Dog Stairs On Wheels

When I brought my new puppy home last year, I discovered a big problem. Due to my paralysis, when I'm at home and I'm not in a wheelchair, I'm in a hospital bed. How was I going to play with my puppy (hereafter known as "Annie")? I couldn't reach down to pick her up because of the paralysis. I have personal care assistants who stay with me but I really didn't want to have to call for someone to put Annie on the bed every time I wanted to see her or she wanted to see me.

Doggy Freedom
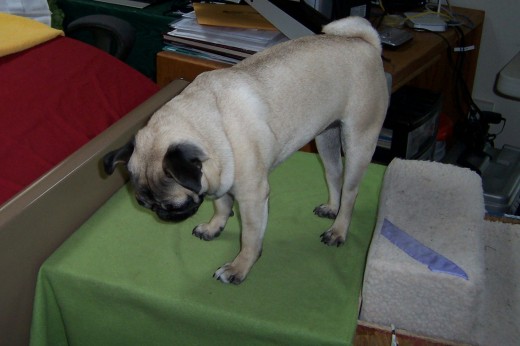
So I designed a set of dog stairs on wheels that could be moved wherever I wanted. My dog stairs are crude and unattractive but work like gangbusters. When they are in place at the foot of my bed, my dog can come and go as she pleases. Annie can take a nap with me and get down to go out the doggy door. All without calling for help.

Simple Design
My design and construction experience is limited to watching home improvement programs on television. However, I do like wandering around an old-fashioned hardware store so I was aware of some bits and pieces (I don't even know what the stuff is called) of hardware that I could use. My budget was limited so whatever I came up with had to be cheap.
I started out ahead of the game as my mother had purchased dog stairs for her poodle several years before. The poodle was never able or willing to use them so they sat in a closet. These things aren't cheap. If I had needed to buy a set then I would've checked Big Lots or a thrift store like Hospice or Goodwill.
Limited Tools
I went to the lumber store and bought a large piece of pressed board about a half-inch thick. I had measured the stairs and knew what length and width I would need. I added a few inches to each side to allow for joining the bottom and sides together. I have limited tools (small electric drill and a hammer) so the nice people at Lowe's cut the much larger board into the size pieces I specified. It turned out I only had to buy one piece of pressed board for the whole project.
I'm not including any measurements here because what you'll need will depend on the size of the stairs that you have.


Putting It Together
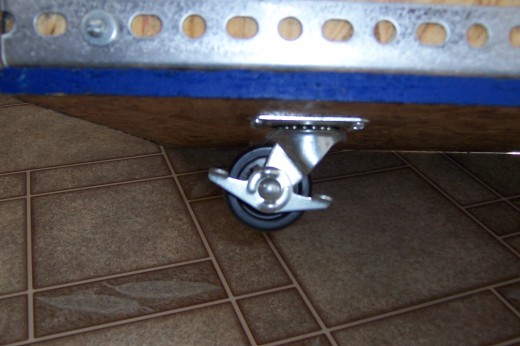
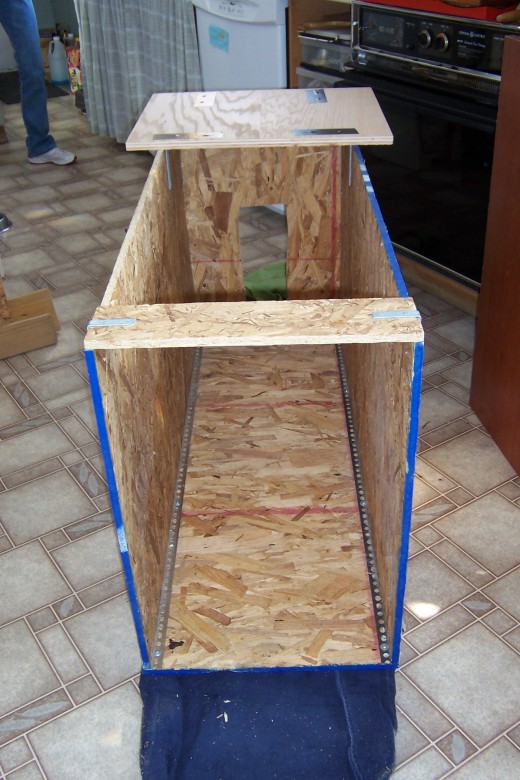
I started by attaching four wheels to the bottom of the platform. I had put wheels on things before so I knew to invest in good rubber wheels with four screws to hold them firmly in place.
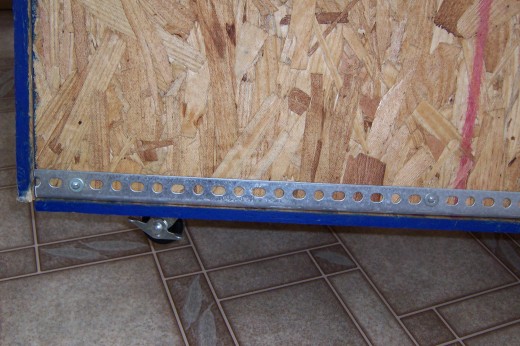
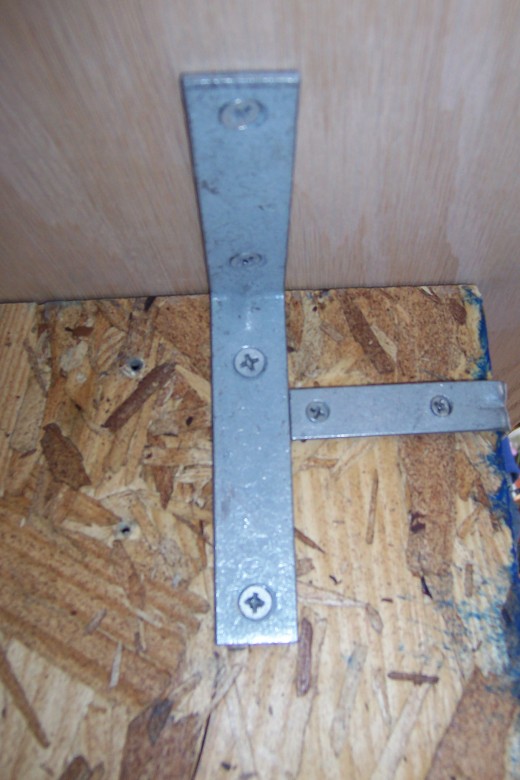
Next, I set the stairs on the platform and drew an outline so we would know where to locate the sides. I attached them to the bottom with a galvanized corner metal bead. I bought that the correct length. I discovered later that we should have put it on the inside wall instead of on the outside. I'll change that if I ever get around to making a pretty version.
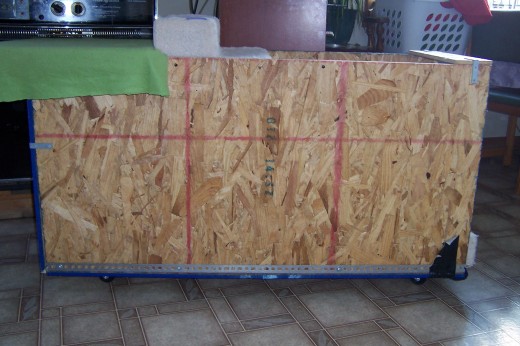
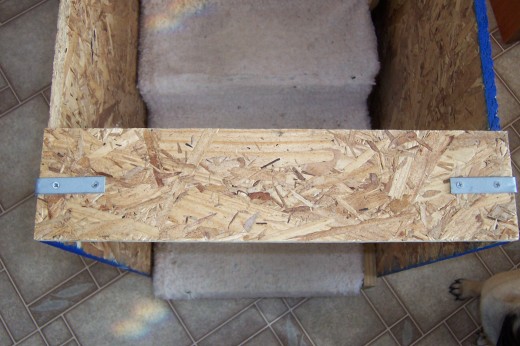
The sidewalls were still pretty unstable so I added a back that I attached to the sides and bottom platform with wood screws. I also put angle brackets any place I could think of for stability.
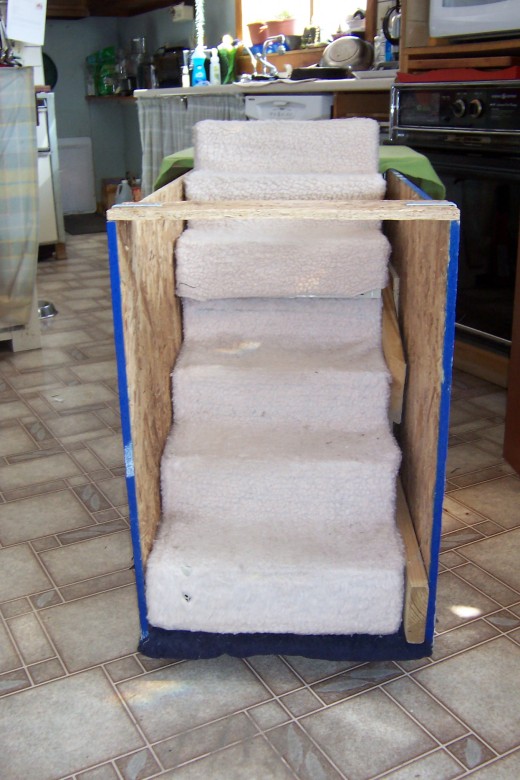
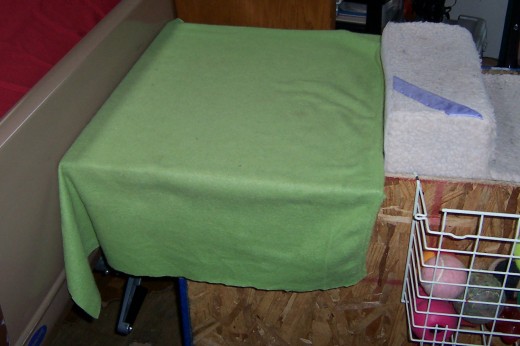
I wanted a platform at the top of the stairs so that she would be at waist level to most people. That way when the steps were not in place I would still be able to see her. I added a piece of blanket over the resting platform for comfort.
I added a cross piece at the bottom of the stairs to stabilize the far end of the sides. It turned out to be a convenient handle for moving the stairs around the room. I ended up using two sets of stairs, stacking one on top of the other with some cardboard boxes for stability and weight in the back.
The Complete Guide to Adult Diapers

Clarity
For neatness and convenience, I added a under-the-shelf basket from the office supply store to the side of her stairs to hold most of her toys. She can sit on the stairs and dig out her favorite ball or moo-cow.
To be clear I should mention that when I write "I", I mean "we". The design and building was a group effort that my personal care assistants participated in completely. I had the vision and they provided the labor as well as talking through the practical aspects of my idea.
If anyone would like some more detail on how we put this together then leave me a message or comment and I'll get back to you.


 or Pariah Dog Names With Meanings")

