Reef Tank: Gravity Driven Automatic Freshwater Top-Off System

Maintaining Salinity Automatically
The importance of stable water chemistry
Keeping a reef tank can be much easier than keeping a freshwater fish tank. Unlike most freshwater aquariums - which are not balanced ecosystems and need to be cleaned of detritus regularly - a proper reef aquarium is an ecosystem of live rock, invertebrates, fish, bacteria, and photosynthetic organisms that is largely self-cleaning. Maintaining balanced chemical conditions is critical to maintaining this ecosystem, and means the difference between nearly effortless upkeep and constant headaches and die-off. Salinity - the amount of dissolved salt in the water - is one of the chemical conditions which should be held constant or changed very slowly. But how? Pouring fresh water into the tank is a hassle, and if not done every day it subjects the system to shocking drops in salinity.
Automatic freshwater top-off
Systems to automatically top off the tank with freshwater as it evaporates come in many designs. Some designs include sensors, switches, and pumps to transport fresh water from a resevoir into the main tank. I don't like these because they can fail, and need to be maintained. My gravity-powered freshwater top-off system has required zero maintenance in the three years I've had it set up, and always worked perfectly.
If you want to build one, take a look at the picture below, and then read the directions under the picture.
My resevoir and sump
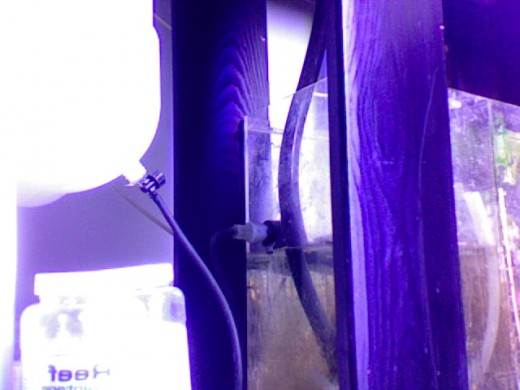
How to build the gravity-powered automatic freshwater top-off system
Pre-requisites:
- An overflow-and-sump style aquarium set up.
- Enough space above the water level in the sump for the freshwater resevoir to be entirely above that level.
- Hole saw, sharp knife, or some other way of cutting a hole in the top of the resevoir jug for filling.
Tools:
- Drill with 5/8" bit that can cut through the side of your sump, and smaller bits
Materials:
- A water-tightfive-gallon jug that can be drilled to receive the small air valve (below).
- A small bucket or something else on which to mount the resevoir jug. It should not have a flat bottom, or split water will get stuck under it.
- Silicone glue
- Masking tape
- A sharpie
- Kent Marine float valve.
- Small valve for air hose.
- Air Hose.
Instructions:
- Establish your chosen "proper water level" in the sump and mark that level in an easy-to-see place by drawing a line on a piece of masking tape.
- Drill a 5/8" hole in the side of your sump, 1-inch above the water level (this can be done with the tank running if necessary).
- Mount the floating valve through the hole, leaving the bulkhead fitting loose.
- Determine the proper orientation of your reservoir jug and mark the points where you will create a larger opening (around 1-2 inches) for filling the reservoir, and where you will drill the 1/4" hole for the air hose small valve.
- Adjust the floating valve to the middle position (it can be adjusted along a 1" range of motion).
- Make the holes in the reservoir.
- Mount the air hose valve to the reservoir: fit one end of the valve into the hole part-way. Then put a ring of silicone around that end, and then push the valve in the rest of the way. Do not disturb for 8 hours.
- Mount the reservoir in the proper orientation on top of the reservoir stand.
- Cut a length of airline tubing long enough to go from the sump to the small valve at the bottom of the resevoir jug.
- Put one end of the tubing into the bulkhead fitting on the outside of the float valve. It should fit snugly.
- Screw tight the bulkhead fittings.
- Fill the space between the bulkhead fitting and the air hose. Let it set for 8 hours.
- Attach the other end of the air hose to the small valve on your reservoir.
- Fill the reservoir with fresh R.O. water
- Open the small valve.
- In a day, the water level will have moved a little bit as the floating valve begins to work. Move the tape to the new water line.
- Check the salinity. it can be raised by shutting the reservoir valve, letting the water evaporate until it's below the line, and replacing it with salt water. Lower the salinity by removing salt water and replacing it with fresh.
Water changes & the top-off system
- Shut the small valve and change the water.
- When adding new salt water, try to get the water level as close to the line in the sump as possible.
- Remember that water takes time to work through the system, so give the system 30 seconds in between additions of water.
- Re-open the small valve.
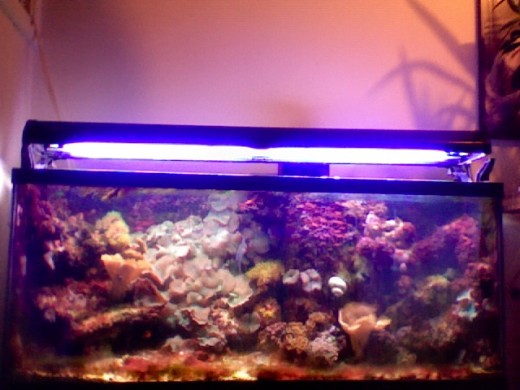
My Tank - Age: 3 years
 DIY Freshwater Up-flow Algae Scrubber #algaescrubber")


