Ceramics 101 - hand-painted treasures
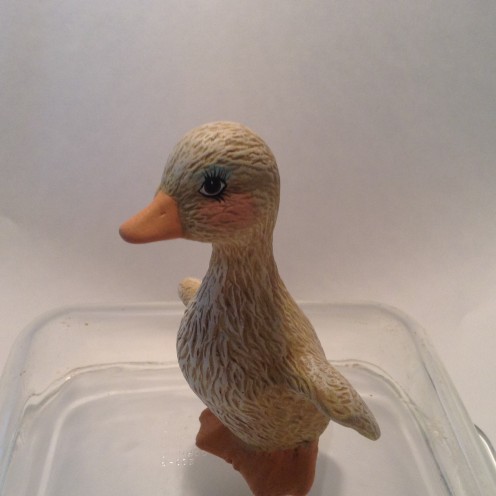
My First Hobby
In the early '90's I was a stay at home mom, which I loved, but I began feeling like I needed some adult time. My mother invited to me to join her ceramic class. It was one night a week, inexpensive and would give me a few hours out of the house interacting with other women. And so it began.
My husband was on board with my new "hobby" although secretly he was concerned about displaying all the gaudy things I was sure to bring home. He kept his thoughts to himself and silently awaited the arrival of my first finished piece.
I consider ceramics my first "craft" even though my mom taught me to knit and crochet when I was a kid. I would knit or crochet occasionally and didn't really get "hooked" until much later in life. Ceramics started as a night out, but turned into much more.
Ladies Night Out
The ceramic studio was small and cramped. It had an odd smell; a combination of clay, dust, and dampness, not offensive, just different. Half of the studio bore shelf after shelf of what they called "greenware" a molded clay like material that was very fragile. I chose my first project piece, something small to get started - an ornament.
That first night I borrowed a few tools and began the process of preparing my greenware ornament. This consisted of scraping the seams and sanding the piece ever so gently. Once this was accomplished I sponged down the piece and it was ready to be put into the kiln. The following week my ornament would be ready to paint. I was excited.
I wish I could remember that first ornament in detail; I know the color red was involved and that my husband was shocked that it looked so cute. With his encouragement I began cleaning more and more greenware so I would have several pieces to work on at once. The ladies were very encouraging and my husband just couldn't believe how well I was doing with this new hobby.
I absolutely loved working with my hands. Betty was the ceramic instructor and she taught me how to apply the paint, how to use a long thin paint brush, and how to paint eyes. Little did I know this new hobby was about to take me on a new adventure.

Let's Get A Kiln
My painted pieces became very popular - with the increased interest in my "hobby" my husband gifted me a training course at a larger, local, ceramic studio. I was in heaven. At the end of the course I was a certified Duncan Ceramic teacher and had made the decision to purchase a kiln in order start my own business. I began teaching a class in my basement, but mostly painted ceramic pieces in my spare time to sell at craft shows and by word of mouth.
Purchasing our own kiln allowed us to pour not only the pieces that were popular, but also allowed us to sell the finished product at a reasonable price and still make money. Being covered in dust was never so much fun - buying a kiln was certainly an adventure!

Getting Started
In addition to the kiln we purchased many plaster molds in a variety of sizes and types; angels, rabbits, ornaments, Christmas trees, etc. Once the kiln was set-up, and the garage cleared out we were in business!
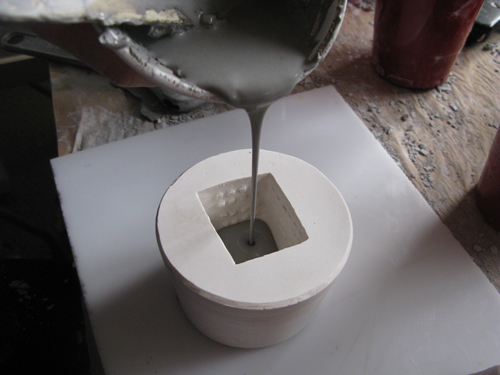
A ceramic piece starts with "slip", by definition slip (noun) is a liquefied suspension of clay particles in water. We purchased the slip in large bags and could pour hundreds of pieces from one bag. Once the plaster mold was band together (most were two pieces, some were three) my husband would fill the mold with the slip and allow it to sit for several minutes up to a half hour depending on how dry the plaster mold might be at the time of the pouring. Once the slip was poured into the mold the plaster would begin to absorb the liquid in the slip creating what we would refer to as greenware. In the case of an ornament we would only allow the mold to sit a few minutes because we wanted the ornament to be light in weight and not too heavy to hang from a tree branch. In the case of a figurine, those molds would sit longer allowing the slip to harden in order to create a thicker wall of greenware so that the piece would be stable and not collapse when unmolded. Once the slip reached the appropriate thickness my husband would pour out the remaining liquid slip, drain the mold over a bucket and then let the mold sit until the piece would begin to pull away from the plaster mold wall. At that time he would unband the mold, open it and gently remove the greenware piece. The greenware would then need to sit and dry out for a few days.
Before placing the piece in the kiln we would clean the greenware by sanding the seams. After firing, the greenware turns pure white in color and is then referred to bisque. Bisque can be painted with glaze paints (which require a second firing) which allows the piece to be immersed in water, like mugs, dishes, etc. Our business was mostly painting the bisque for decorative purposes, using acrylic paints.
Drybrushing Technique
Drybrushing
Like with any craft there are different techniques and/or a process by which to accomplish a certain finished product. In the world of ceramics glazing is a popular technique - my experience is that you really have to be gifted to glaze a piece of bisque and have it look the way it should - so in my business I opted to use acrylic paints on the bisque and I mostly used a technique called drybrushing.
Drybrushing is basically loading paint on a dry brush, taking most of the paint off your brush before you apply it to your piece, laying several coats of paint to achieve a certain look - once you get the hang of it you can create some really nice ceramic pieces to gift, decorate your home or for the holidays. In most cases you will base coat your piece in a solid color (i.e. black, brown) and then you begin layering your colors which allows you to easily create the look of contrast and depth.
In my opinion drybrushing works best on a piece with lots of detail, i.e. an animal with a textured coat, leaves, flowers, etc. anything with a raised surface. Certainly you can drybrush on a smooth surface, but I would suggest you practice on textured surfaces first until you become comfortable with the technique.
To get started chose a piece of textured bisque and base coat it with your desired color. I would suggest black - ideally you want to have a dark color in the crevices of your piece so you have a visible contrast. Of course this depends on your desired outcome. If you're painting a rabbit and you want the finished rabbit to be really, really white you may want to use a lighter base coat, perhaps something in the taupe family. If your finished rabbit is going to be brown, a black base coat would be perfect. Once your base coat is on and your piece is well covered, make sure you give the paint time to dry.
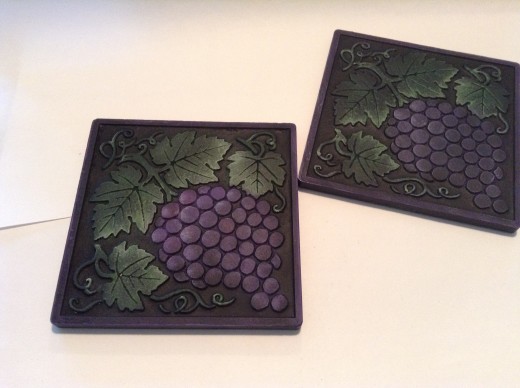
Next you'll put out your darkest color value paint on your palette, have your brown paper bag handy, and load paint onto your bristle brush (do not put your brush in water - load it dry). Work most of the paint out of your brush onto the paper bag. With light sweeping strokes begin applying a thin layer of paint on your piece. This is the process I used on the bunch of grape tiles I have pictured. I worked on one leaf at a time (check out the video). Once you get to the level of color you like, go to your next color value - load your brush (use the same brush) work out the excess paint and begin building more layers of color. Finally, using the same technique, go to your lightest value and start developing some highlights on the edges of piece; notice the tips of the grape leaves.
A few things to remember:
- Layer your colors slowly, there shouldn't be much paint on your brush.
- You can always add color, you can't remove color.
- Make sure the paint is dry before adding additional layers of paint.
- Do not mix different colors on one brush. For example, use one brush for green, a second brush for purple -- do not use your green brush and then dip it into your purple paint - the color will become muddy and off putting:(
Drybrushing is my favorite way to paint a ceramic piece - you can be so creative. Hope you give it a try.


