Create Gorgeous Embedded Text in Photoshop

In this short tutorial which consists of twelve steps only I am going to show you how to create Embedded Golden Text Effect on textured Background which resembles old worn out paper.
You will use lots of Blending Options to achieve the final effect and also you will learn how to use Pillow Emboss to make an object a part of the surface.
The Stone Texture which you'll have to download in the process of work is my own photo and unrestricted stock.
You can create this Text in any Photoshop version, even with Photoshop Elements.
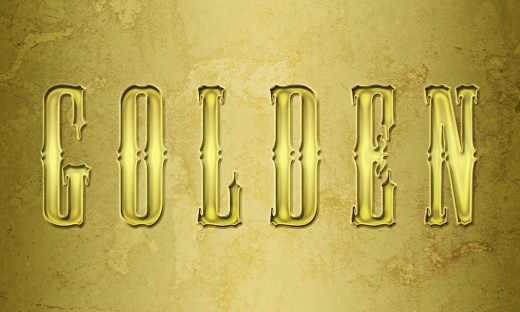
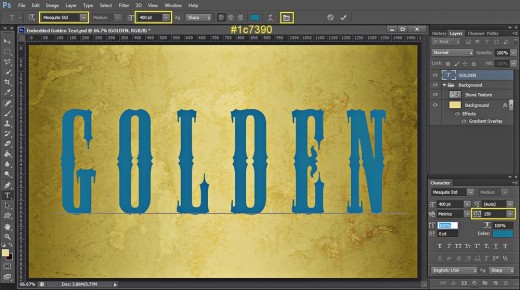
This should be your outcome:

![Adobe Photoshop Elements 2018 [Old Version]](https://m.media-amazon.com/images/I/51AQ4wl7eOL._SL160_.jpg)
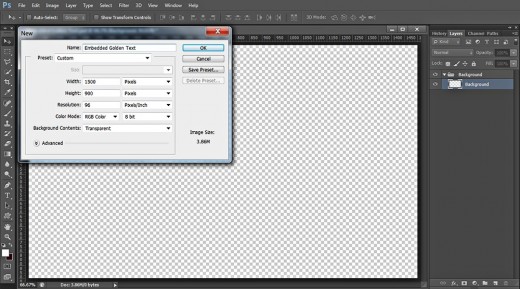
STEP 1
Open Adobe Photoshop then navigate to the Menu bar. Choose File, New to create a new .psd document. Name your new file Embedded GoldenText for example, then set its Width to 1500px and Height to 900px. Set the Resolution to 96 Pixels/Inch, select RGB for Color Mode and Transparent for Background Contents. If you like to print your Text after you have created it, set its Resolution to 300 Pixels/Inch and select CMYK for Color Mode. After you press OK button, you'll see transparent Layer 1 in your Layers panel.
Double click on Layer 1 name and write Background in the white space to rename the layer. Press Ctrl+G to place the Background layer in a Group and call the newly created Group Background too.
Create the Background with Golden Gradient Overlay and Stone Texture
In Steps 2-6 your first task is to colorize the Background layer. For the purpose you are going to use Gradient Overlay Layer Style and choose golden colors for the Color Stops. After that you have to Paste into your .psd file the Stone Texture then resize it and blend it with your Linear Gradient Background. Thus you will make your Background resemble old yellowish worn out paper.
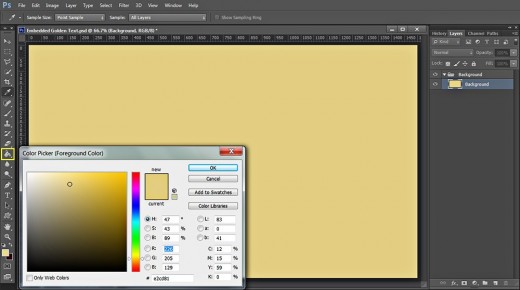
STEP 2
While Background layer is highlighted, click once on Set Foreground Color swatch in the Tools bar and when the Color Picker box appears, change the Foreground color to #a2cd81.
Keep your eye on the Tools bar and grab Paint Bucket tool. Drag once on your canvas with the chosen instrument to colorize it with the Foreground Color. You can do the same using Edit, Fill, Foreground Color.
STEP 3
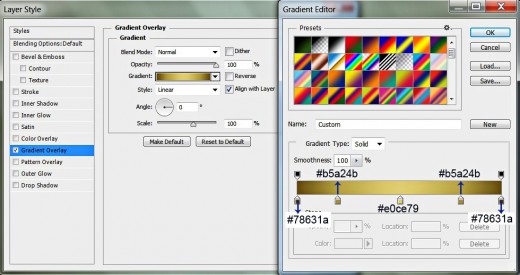
Double click on Background layer's thumbnail to call Layer Style dialog box (Layer, Layer Style, Blending Options). Check Gradient Overlay Layer Style and insert the following settings:
Blend Mode: Normal
Dither: unchecked
Opacity: 100%
Click to Edit the Gradient like this:
First Color Stop (Location 0%): #78631a
Second Color Stop (Location 20%): #b5a24b
Third Color Stop (Location 50%): #e0ce79
Fourth Color Stop (Location 80%): #b5a24b
Fifth Color Stop (Location 100%): #78631a
Reverse: unchecked
Style: Linear type of gradient
Align with Layer: checked
Angle: 0 degrees
Scale: 100%.
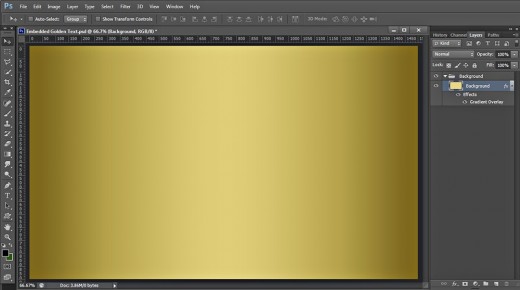
You should get this result after you have added Gradient Overlay to the Background:
STEP 4
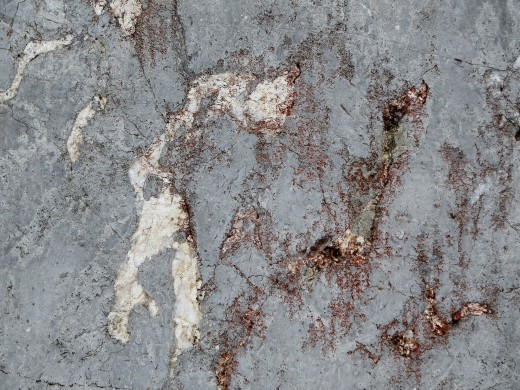
Now you have to download the Stone Texture you see below. Just click on it to open it in high res, then right click on it and choose Save As to save it in your folder.
STEP 5
Create a New Layer above Background layer and name it Stone Texture.
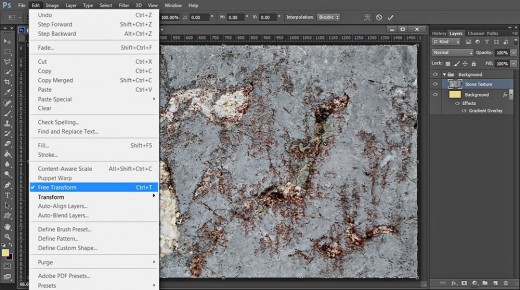
Open the previously downloaded Stone texture in Adobe Photoshop, press Ctrl+A to Load Selection on it then press Ctrl+C to Copy it. Return to your Embedded Golden Text file (check if Stone Texture layer is highlighted) and press Ctrl+V to paste the Texture there. You can see that the texture is a bit bigger than your canvas, so go to Edit, Free Transform and drag the nodes vertically and horizontally in order to resize the texture so that it covers your canvas.
STEP 6
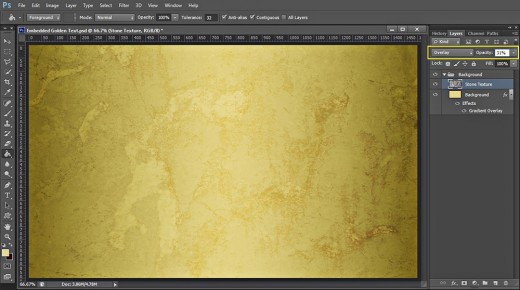
Change the Blend Mode of Stone Texture layer to Overlay and reduce its Opacity to 30-31%.
Type the Text, Fill it with Metallic Gradient and Embed it in the Background
From the next step until the end of this tut you have to create the main part- typing the awesome medieval style Text and applying Blending Options on it. You will use Mesquite Std Font which is default for Photoshop.
After the Text is ready, you need to apply golden shaded Gradient, light yellow glow and a little bit of shadow to add more volume. In Step 11 you are going to add Pillow Emboss which will create the illusion of embedded object.
STEP 7
Now we have to type the Text. Grab Horizontal Type tool from the Tools bar (hot key T). From the Font Family drop down menu choose Mesquite Std default Font and Set its Font Size to 400pt. Set #1c7390 for Text Color then type Golden in Capital Letters.
When your text is ready, select it then click on Toggle the Character and Paragraph Panels icon in your Options bar and Set the Tracking for the Selected Characters to 150.
Move Golden Text layer on top of Layers pane (out of Background group).
STEP 8
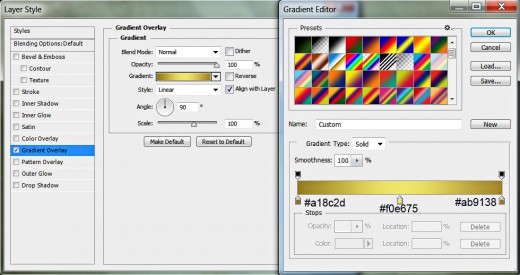
Right click on Golden Text layer and select Blending Options. Firstly check Gradient Overlay and change the following settings:
First Color Stop (Location 0%): #a18c2d
Second Color Stop (Location 50%): #f0e675
Third Color Stop (Location 100%): #ab9138
Change also the Gradient Angle to 90 degrees.
Keep Layer Style box opened as we have to add three more Blending Options.
STEP 9
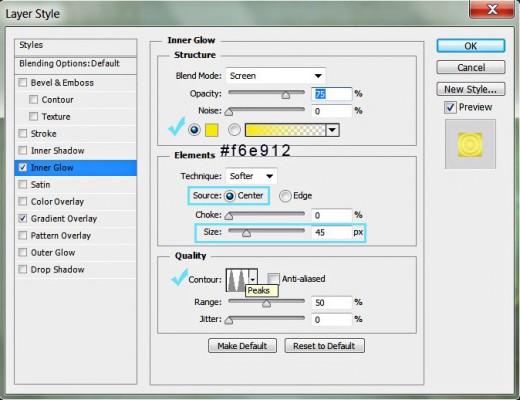
The second Layer Style to be added to Golden Text layer is Inner Glow. Modify these settings:
Color of Glow: #f6e912
Source: Center
Size: 45px
Contour: Peaks.
STEP 10
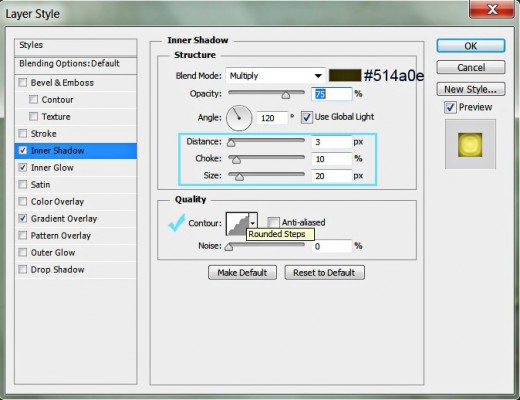
Now apply Inner Shadow and change the following five settings:
Color of Shadow: #514a0e
Distance: 3px
Choke: 10%
Size: 20px
Contour: Rounded Steps.
STEP 11
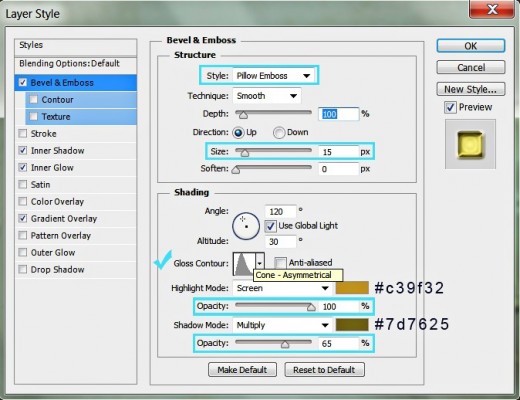
We are going to create the embedded effect in this step. Check Bevel and Emboss Layer Style. Choose Pillow Emboss from Style drop down menu and increase the Size to 15px then select Cone-Asymmetrical for Gloss Contour. Set Color for Highlight to #c39f32 and increase its Opacity to 100%. Change also Color of Shadow to #7d7625 and lower its Opacity to 65%.
STEP 12
This is my result saved in .jpg format. To sharpen the image and imrove its quality, you can apply Filter, Other, High Pass or Filter, Sharpen, Unsharp Mask.
Hope you find this tutorial easy and useful. Thanks a lot for reading and God Bless! :)