Creating Butterfly Pictures in Illustrator Tutorial


Although birds are my greatest passion, butterflies approach a close second. The color and design of these tiny insects is astounding. With over 4,000 of these fascinating creatures inhabiting the country of Ecuador it is impossible to see them all. In an effort to capture that beauty in an image that could cover a wall I turned to Adobe Illustrator to create vector illustrations.
The advantage of creating a vector drawing is that it can be reproduced to any dimension without losing detail. Whether the image is the size of a postage stamp for use as an avatar, or is needed to cover a billboard for an advertisement, the finished art will be just as crisp and sharp as the original.

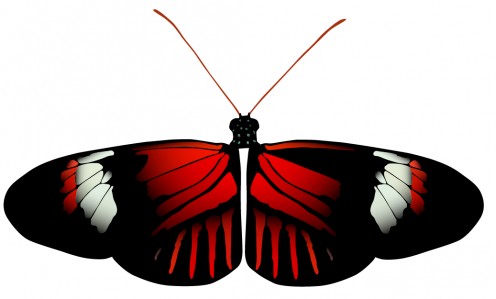
In this tutorial I have chosen a Heliconius Postman butterfly for its simplicity and contrast. The original photo was taken at a butterfly farm in the town of Mindo, a short drive from Quito Ecuador. For a couple of dollars you can walk amongst these gorgeous insects and take photos to your heart’s content.
After choosing my image I imported it to Adobe Illustrator CS4. Since I am using only one tool for the entire process this procedure can be used in all other versions of Illustrator and possibly many other similar and less expensive programs. This photo will now become my template to create the vector drawing.
The Process
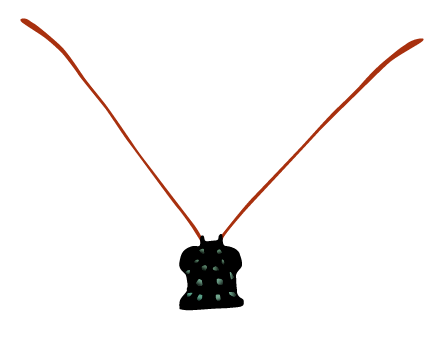
Once the image is in place I will start by drawing the antennae. As I mentioned, there is only one tool required to complete the entire vector: the pen tool. This instrument scares many people but is fairly easy to use after a little practice. Each object that is drawn should be placed on a separate layer. This allows for individual adjustment of color and shadow as well as positioning. Once the layer has been created I will trace the outline of the antennae. I usually start somewhere inside the head of the insect as this will eventually be covered by other parts of the drawing and the start/stop point will not be seen. I will use the color pallet to choose a proper color for the antennae.
The Head
Next I will draw the head on a separate layer, again using the pen tool. I begin my image at the base since the body will eventually cover the neck on a separate layer. Once the head has been completed and the color added, I will turn this layer off so that I can view the head spots underneath. Each spot is placed on an individual layer and a gradient is added to the color so that I can control the shadow and color blending. Although it is not noticeable in this illustration it can become very obvious when increased to poster size.
The Wings
Now that the head is complete I can move on to the wings. I concentrate on one side only. After drawing the outline and adding the proper color, I will again turn this layer off so that I can view the color and shading of the wing bars. Each section is again placed on a separate layer so that the tint and blending can be adjusted accordingly. As can be seen, the merging of tone varies depending on what part of the wing the bar occurs. I will generally do all of the items exhibiting similar colors first so that I can adjust them for proper blending.
After the first wing is completed, I will do a copy and mirror image of this object to produce the second and opposite wing. This insures symmetry from one side to the next and also allows for proper positioning.

The Body
After finishing the wings the body is created on a separate layer and positions so that it blends evenly with the rest of the butterfly. This part is generally placed under wings to look natural.

Summary
The process of making this butterfly as a vector image is quite simple but creates beautiful results. After the first couple of drawings I was able to produce a butterfly, some with more detail, in less than twenty minutes. With access to Illustrator or some other vector software, images such as these can be hung on the wall, or become the wall, in a short period of time.
Other Articles by this Author
- Photographic Composition
Composition is the most important factor in producing an image that will attract the viewers attention. However, although it is the easiest to learn of all photographic techniques, it... - Creating Bird Illustrations in Photoshop
Regardless of how many years photographers may practice their trade; a true artist will always look for avenues of expanding their photographic vision. This experimentation may transport...
Other Links
- The Birds of Ecuador
Photos and articles on the birds of Ecuador - Discovering the Birds of Ecuador
Birding locations in Ecuador


