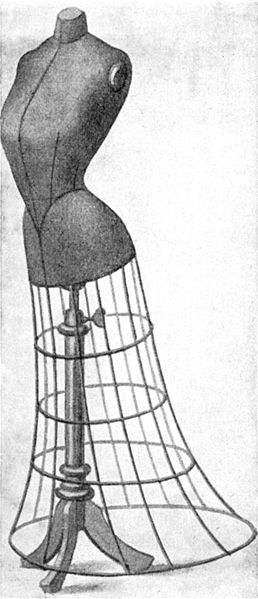
Dressmaker Dummy for Dressmaking and Sewing


The advantage of a dressmaker dummy
If you are new to sewing or are an old pro, a dressmaker dummy can really help you in creating that special item. When altering a design, to make it unique, or creating a totally new design the shape and curve of the human body are hard to account for.
The advantage of the dressmaker dummy is that you can do all the pinning of the material without sticking a human model trying to help you out. Any adjustments that you need to make can be made in precise increments. The dressmaker dummy can act as a bit of a pincushion these days as well, don't try that on a human volunteer!
If you own or plan to own a shop and are a professional dressmaker you will need to buy a dressmaker dummy and maybe even a few. If sewing is just a fun hobby and the price tags on these things is making your stomach turn never fear! You can make your own! It's not quite as adjustable or heavy duty but it will be made to your body shape perfectly! If making your own is to much by all means buy a shop bought one, then again maybe you like sewing because you like craft hobbies. Making your own dressmaker dummy or dress form (as I have seen them called) could in and of itself be a great project.

Dressmaker Dummy, Make your own
Making your own body form dressmaker is not free but it should cost a heck of a lot less. The one bit you cannot buy is a friend, for the rest I shall try to provide an amazon link for your convenience so that you can get any bits you are missing and get started asap!
The list of things you need
- Duct tape, a fair old amount of it really
- Decent scissors, they may get gummy with tape but you don't want to mess about with them either
- A small amount of plastic wrap to protect the neck and arms (you will see what I mean)
- A filler like Poly Batting
- A stand for the finished project to stand on, there are a number of options that I will describe as we go through the process.
- Last and most important, an assistant to help you out! (they want to be wearing tight fitting undergarments and a loose long t-shirt that can be taped and cut)
When you have all the bits that you need you are ready to begin (warning: you may be on your feet for an hour or more now). You, as the maker of the dress form (the model will be the body shape being captured) will want to start wrapping the body starting from the bottom of the long t-shirt. To begin with you want to wrap in horizontal strips. You want to wrap snugly while being aware that by wrapping to tight you may rearrange or compress the body.
At the waist you will want to wrap a little more loosely to allow folds to form as you follow the contour of the body, the second and third layer can then create a tight fitting shape without the problems of folds at that point.
At the bust and underarms you may need to cut the t-shirt sleeves to allow for the tape to follow the figure. You will also want to use shorter pieces to be arranged radially over the bust. Short pieces can capture the contours of the bust better to create a great replica of the body your are reproducing.
At both the neck and sleeve you may want to use some plastic wrap to protect the skin at these points. At these edges you want to wrap so as to form a neckline and or armhole edges similar to what ou would find on a fitted bodice.
When you have finished the first with the first layer of tape you will want to wrap again twice more. On this the second wrap you want to go vertically, then the third wrap will be a horizontal wrap again. Each layer should compress the waistline to fit more closely and allows you to further smooth out any wrinkles and folds.
When finished have your wrapping have your model bend slightly so as to mark the waist and any other points you want to identify. You may want to use colored tape or a permanent marker. Now you are ready to cut the body form from your model.
You will want to cut the from and t-shirt layer at the center of the back with your other hand between the scissors and the body to avoid cutting the model or their undergarments. Once off you can close the form back up with additional tape and its ready to be stuffed and placed on a stand. Your almost there!

Your dressmaker dummy, the final details
Now that you have cut the body from from your model and taped to back together you are ready to stuff it and mount it. To make this a hanging dressmaker dummy all you need is a solid wooden hanger.
My suggestion would be to use a poly batting to stuff your body form with, other options include expanding foam. If you try the expanding foam be aware that the stuff expands and could alter the shape of your dressmaker body form, to avoid this you can try using bunched up newspaper that gives the foam something to compress and the room it needs to expand. I have even read of people using old saved up pillows to reduce the amount of poly batting used (polly batting can be used when sewing quilts).
Now that you have filled your body form its time to mount it to a stand, unless you happy for it to hand from a hanger alone. I should mention that while I do not like that expanding foam (personal reasons) if you choose to use it instead you might want to have your stand in place so that the foam can help hold the piping you use in place. A tip might be to try to cut the pipe in such a way that it is attached to your hanger before using the foam, creating a pretty solid body form ready for a stand.
PVC piping is a great option as you can measure it out to your body hight, meaning your self made dressmaker dummy is both accurate to your body shape as well as your height. A stand that your new dressmaker dummy can stand on can vary from old christmas tree stands to an umbrella stand. I have even read of people using a microphone stand inserted inside the PVC piping.

Your Personal Dressmaker Dummy
Now that you have the basic idea on how to make a dressmaker dummy that fits your body you can think about some of the finer details that could aid you in creating your own clothing. If you would like a little bit of the shape of your bottom half, feel free to experiment. You may want to try using a disposable pair of shorts to provide legs for your dressmaker dummy. A disposable skirt could help with dress and skit making, to create something that has a lovely tight fit around your hips.
Other tips would include, have a camera at hand. When your all wrapped up chances are you are going to feel very silly and want to have a bit of fun. You may not want to be drunk tho! It is a bit constrictive on movement and breathing when you want to goof off while feeling like a silver mummy and you wont need alcohol to feel goofy drunk anyway.
I would love to hear about your experiences if you give this a go so please feel free to let us know in the comments section here. I would even be happy to include a prized picture here if you like the idea of sharing here. In any case all the best and have a great time!

Some Great Articles on Sewing
- How to make your own sewing pattern
There are lots of web sites to learn crafts & cooking. But, I didn't find any web site where you can learn how to make your own basic sewing pattern. So I thought I should share my knowledge with you ladies,... - Learn to Sew
I frequently bump into people that tell me they sure wish they knew how to sew. Gone are the days where school's required women to take sewing classes. And a lot of men never got a chance at all. So what do...


