- HubPages»
- Arts and Design»
- Crafts & Handiwork»
- Jewelry Making
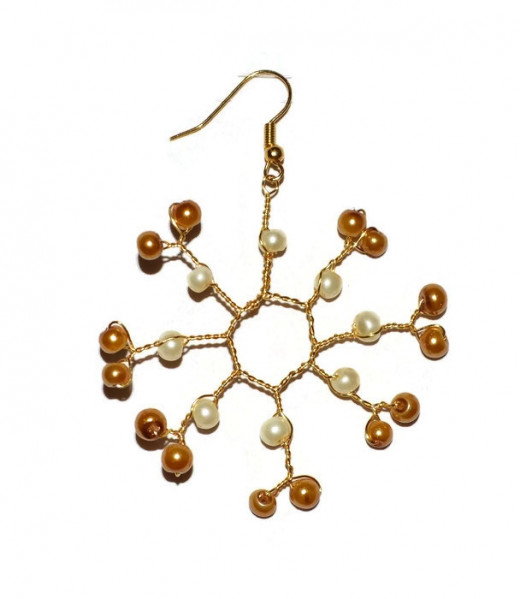
Free Jewellery Making Tutorial: How to Create Wire Work Snowflakes or Starbursts


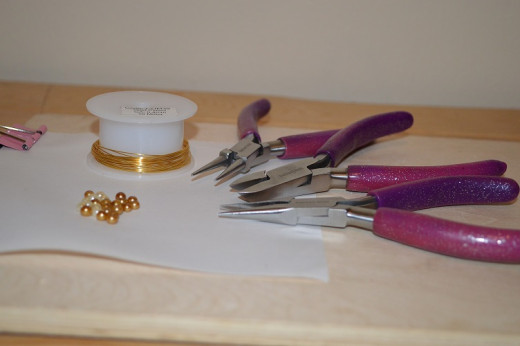
What you will need to make the earrings:
0.45mm gauge wire in the colour of your choice
22 small beads per earring (I have used 4mm round glass pearls 14 in gold and 8 in cream)
Round nose pliers, flat nose pliers, wire snippers
Earring hooks
A note before you start
This tutorial is adapted from the very simple bridal/basic twist technique used to make tiaras. If you are unfamiliar with this technique you may wish to watch this video first.
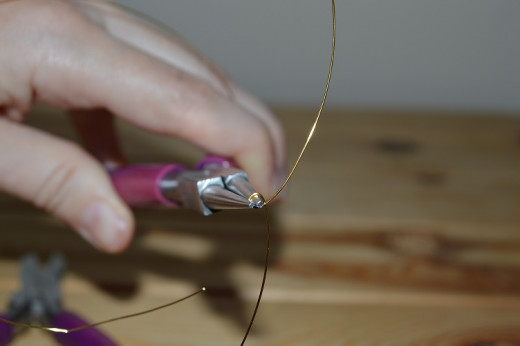
1. Begin by cutting a 1/2 meter length of wire. I have used 0.45mm gauge - this is because the thinner size (0.25mm) is prone to snap with a lot of twisting, and the thicker size (0.6mm) can be difficult to twist.
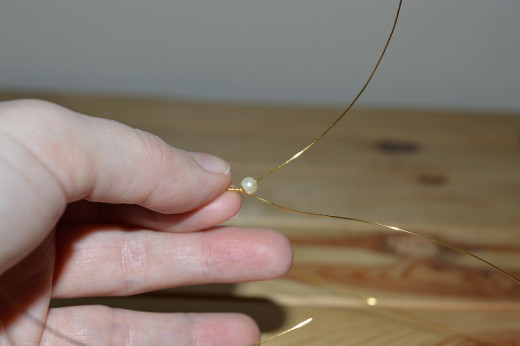
Find the middle of the length of wire, and wrap it around one prong of your round nose pliers, overlapping to create a small loop.
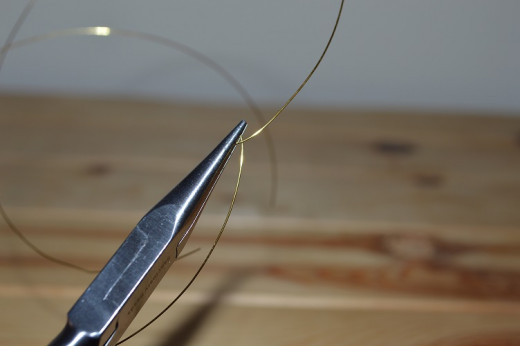
2. Hold the loop with your flat nose pliers, and then twist the two ends of wire together to create a twist approx 0.5cm long
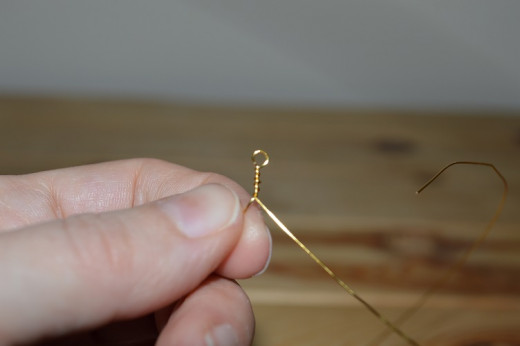
3. Thread a bead onto one end of wire. If you are using more than one colour as I am doing use the colour that will make up the inner ring of beads.
Now twist the two wire ends together again, enclosing the bead.
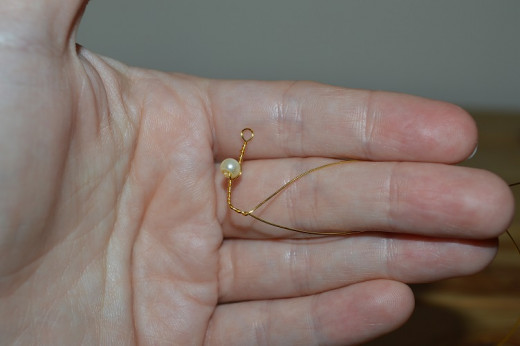
4. The twist should be the same length as the first twist, so the bead is centrally positioned.
Then bend the wires to the side slightly, and continue to twist for another 0.5cm. This will begin to make the central wire circle of the snowflake.
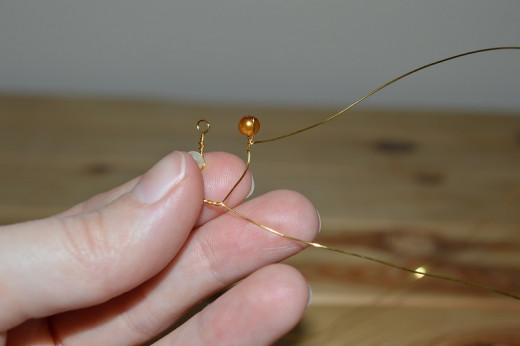
5. Now bend one end of wire upwards to make another prong.
Thread on one of the outer colour beads, hold it in position about 2cm away from what will be the base of the prong and twist just 1 or 2 times below the bead to hold it in place.

6. Bend the wire up again, put on another out bead and secure that into place with one or two twists.
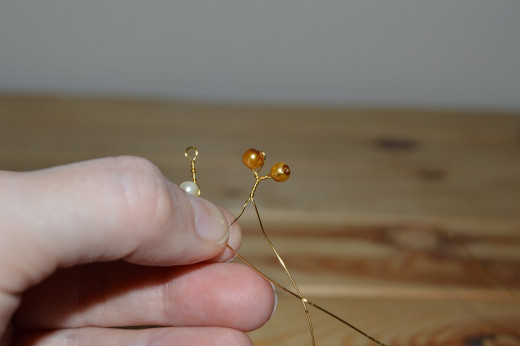
7. Twist the two ends together for 0.5cm
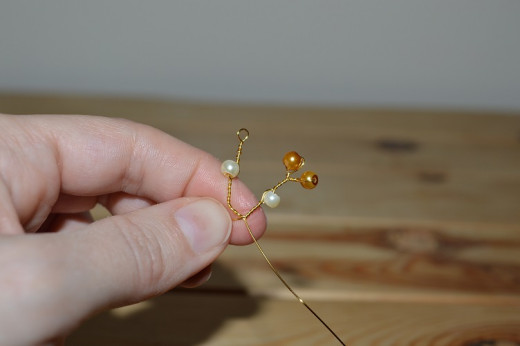
8. Thread on an inner bead, twist the wire another 0.5cm
9. Repeat steps 4 - 8 to make a little bit more of the central ring, and create another prong.
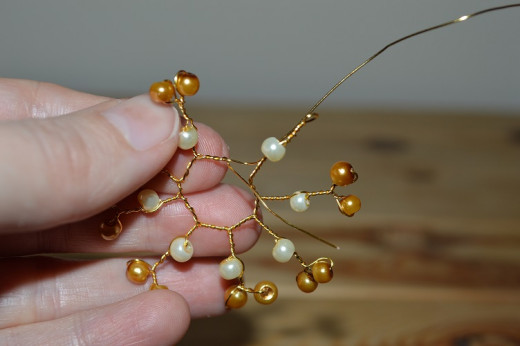
Make a total of 8 prongs
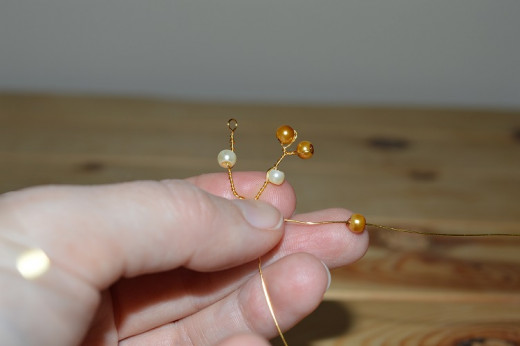
Tip - a length of wire will shrink when twisted. So when you make subsequent prongs, make sure you always measure out the same length of wire and try to twist it the same amount of times, keep a note if it helps. However, if one prong seems a bit longer than the others you can always twist it a couple more times to shrink it down a bit. Just remember not to twist too many times or the wire will snap, you feel a change in the tensity of the wire before it snaps.
Halfway
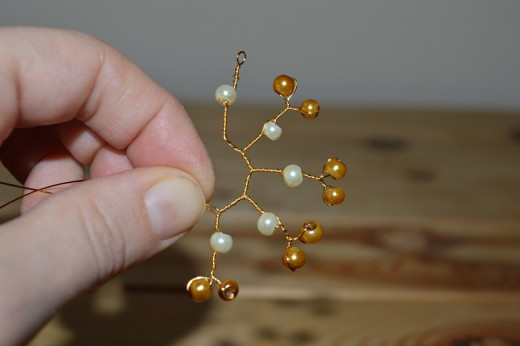
Three quarters around.
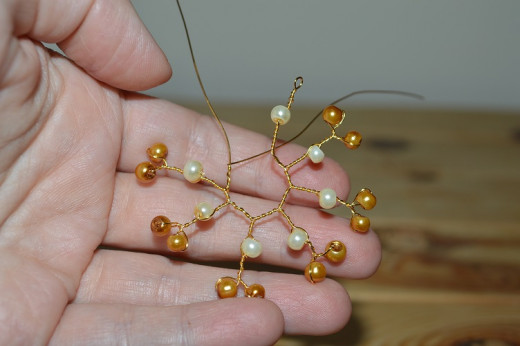
10. After making the eighth and final prong, don't forget to bend the wire and make a little bit more of the central ring/frame to go between prong 8 and 1
Once you have done that, split the wires and put one on either side (front and back) of prong number 1
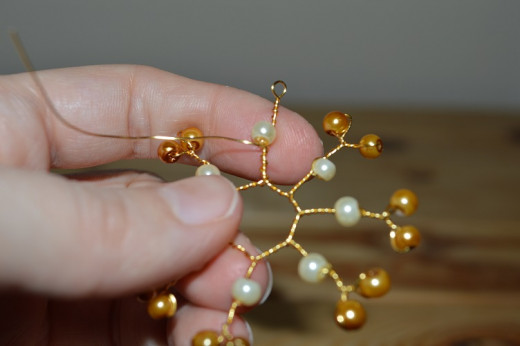
11. Twist the two ends of wire together, just once or twice, to enclose prong number 1, and close the circle.
Now take one end up prong 1, wrapping it around the base of the prong, up to the inner bead.
Take the other end along the central frame/ring, wrapping it around the section between prongs 1 and 2
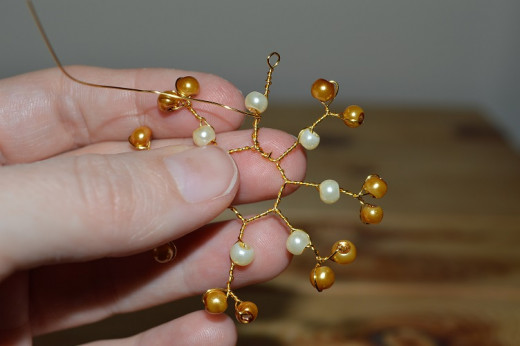
12. Snip the ends of wire
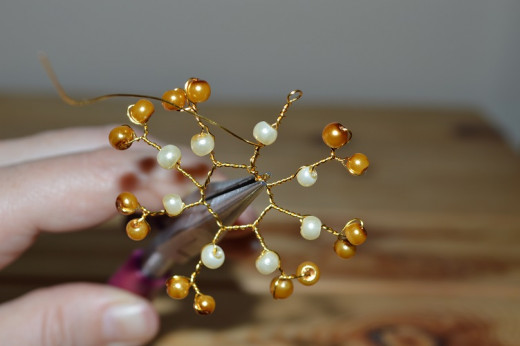
13. Using the flat nose pliers, pinch the ends down in a smoothing/rotating motion to tuck the sharp edges out of the way.
14. Attach an earring wire to the small loop on prong number 1, and repeat all steps to make the second earring
This pattern is very adaptable. Try different colours or different shapes and size beads.
Try these ideas:
Make the beginning loop larger, and add a bail to turn the snowflake into a pendant
Add a loop of ribbon to make a Christmas tree ornament
Use Swarovski beads for added sparkle and glamour
Or you can attempt this technique on a larger scale to create your own Star-burst Flower fascinator

To make this fascinator you will need approx 1.5m of wire depending on how large you want it.
- Make your starting loop, and twist all the way down to the central ring. Make this prong about 6-7cm long
- Start making the prongs adding beads just to the ends. I added a large teardrop and a small glass pearl alternately, making the prongs for the tear drops longer than the prongs for the pearls.
- Halfway around, make another prong that only has a loop, make it the same length as the first one.
- Continue all the way around. Finish in the same way as the snowflake.
- Now bend the prongs with beads up into the shape of a flower bloom
- Attach the fascinator to an updo by slipping hair grips through the loops
If you have enjoyed this tutorial you may also enjoy
- How to Organize Your Own Jewellery Making Party
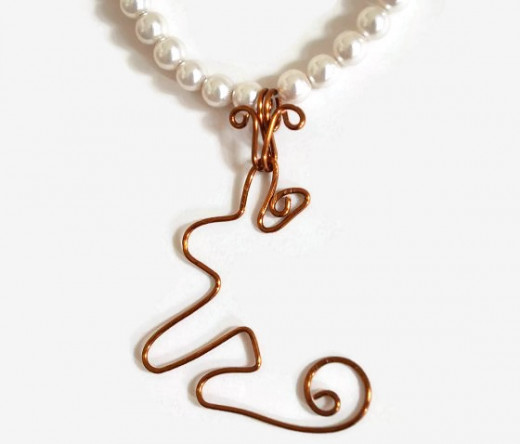
- Free Jewellery Making Tutorial. Cute Wire Work Rabbit Pendant
An illustrated tutorial showing how to make this rabbit pendant, suitable for beginners to wire work, plus three additional pendant tutorials continuing the woodland animal theme. - How to Make a Holly Ring Out of Wire and Beads. Free Wire Work Tutorial
A free illustrated tutorial showing you how to make a contemporary seasonal piece of jewellery: A ring featuring a sprig of holly made from wire and beads - How to Make a Simple Beaded Wire Bangle. Free Wire Work Tutorial for Beginners
A step by step illustrated guide to creating your own beaded bangle with a shepherd hook clasp