- HubPages»
- Arts and Design»
- Drawing»
- Drawing Tutorials
How To Color With Colored Pencils: A Beginner's Guide

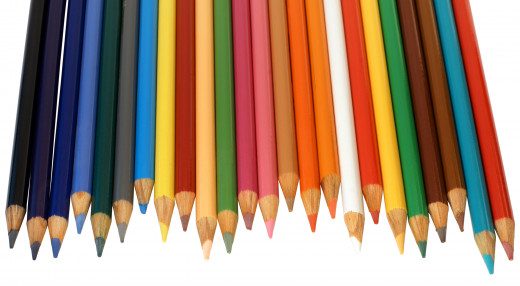
Colored Pencils: Our tools for today
Why Colored Pencils?
Coloring with colored pencils is fun and relaxing. Art therapists use coloring to reduce anxiety in their patients. Have you seen all those commercials for grown-up coloring books? They exist because it's still fun to color! Colored pencils are one of my favorites because markers leave streaks and crayons aren't sharp enough for me. Plus, it's easy to blend colored pencils to create interesting effects! I'll teach you how with one of my illustrations, so let's get right to it.
Time to Gather Your Tools
Colored pencils are required of course. It doesn't matter if they're crayolas from the kids aisle or expensive prismacolors. As long as they can blend and cover smoothly. Hot tip: try to stay away from roseart, their pencils are very waxy and difficult to work with. This is based on my observations, it's just a personal recommendation. Now, there are a couple of tools that are optional but can come in handy later, depending on what you want to do:
The Blender Stick (optional)

White Paint Pen (optional)

Your Optional Tools in Depth
The Blender Stick will blend your colored pencils and remove some of the tool marks. You can freshen the blender stick by scraping it against sandpaper. The white paint pen can be used to add stark highlights to certain areas. I'll show you how to use these tools further down the line.
Time To Color!!!
Now get an image to color. You can use a coloring book, one of those posters from the craft store, or draw your own image! If you're just beginning, start with something cartoonish, so you can use these new techniques on something that's usually simple. I use my own illustration for the purposes of this tutorial.
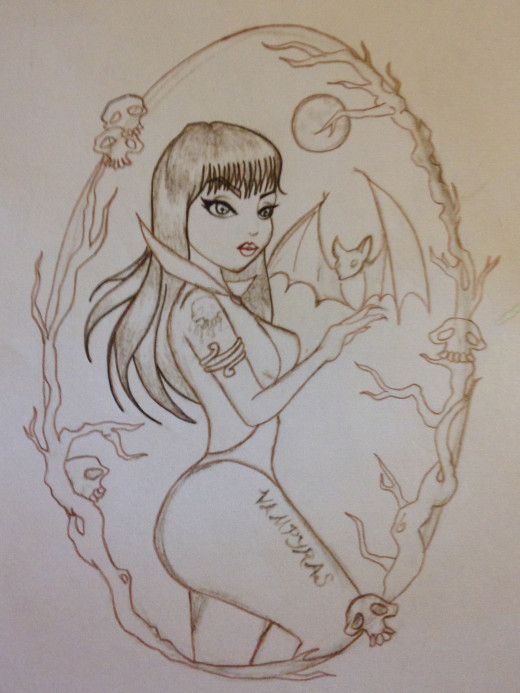
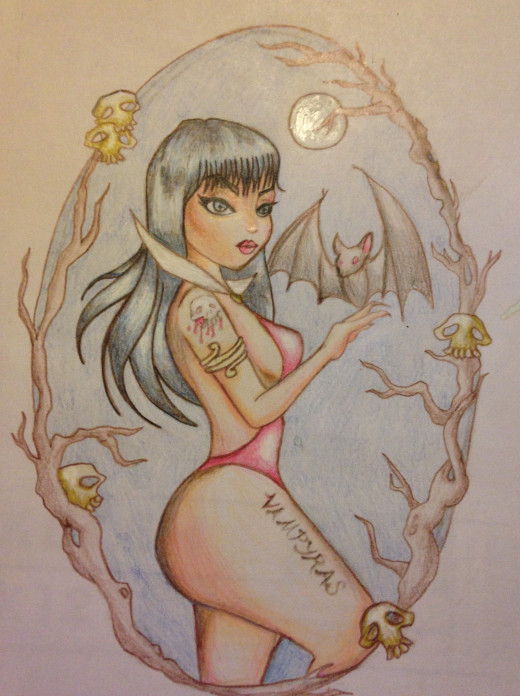
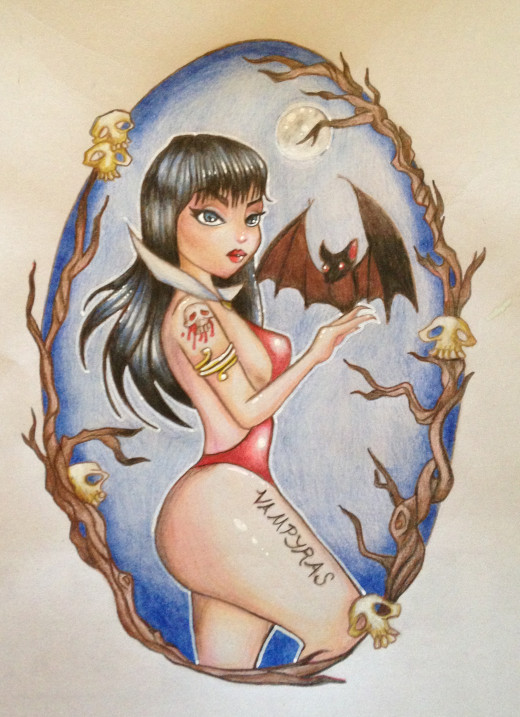
My Starting Illustration: Vampirella

If You Used Your Own Drawing, Start An Outline
Here's A Tip On Outlining
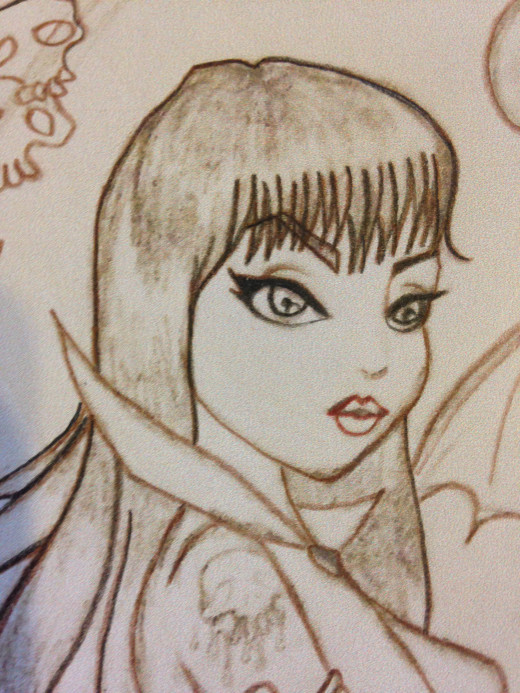
If you're using your own drawing, sharpen your outlining pencil to a very sharp point. Try using dark brown instead of black, it will make the picture softer. However, you can use black on certain areas. On this drawing, I used brown on all areas except vampirella's hair. because I know her hair is going to be black, I used a black pencil to outline. And I used black for the eyelashes. Notice in the next picture I used red to outline the lips so the effect will be soft.
Try to make your outlines as clean as possible but if you make mistakes, it's okay! Coloring in will cover up most mistakes.

Put in a very light layer of the colors you want on your drawing. Layering is important for a drawing with dimension. Think ahead a little bit and decide where you want some highlights. It'll help to choose a light source, like I have done by drawing the moon here.
Put in another, darker layer of coloring, Make the color darker around the edges, to give the appearance that they are receding into the background. Also, start adding some natural shadows opposite of your highlighted spots. I've shaded the skulls a bit to show you how. Also, check out Vampirella's leg, I've started to add shadows there.
Start playing with colors a bit. Don't be afraid of trying crazy stuff! Colors that don't seem to work together sometimes create the best effects! For instance, I've added blue to Vampirella's hair to make the highlights more interesting. And I've added red to the shadowed areas of her skin to make it appear like she has some blushing. This is also where I use the blender stick to make the colors mix together. Use a light hand when coloring, because it's easier to make things darker than to make them lighter.

Keep layering your colors darker and darker, but leave some spots open for your highlights. Make a gradual transition from dark to light. I am working on the main subject before the background, which is okay. You can choose to jump around your coloring, it's your show! It's also time to start making some style choices. I decided to put more lines in Vampirella's hair here, to play around with the highlights.
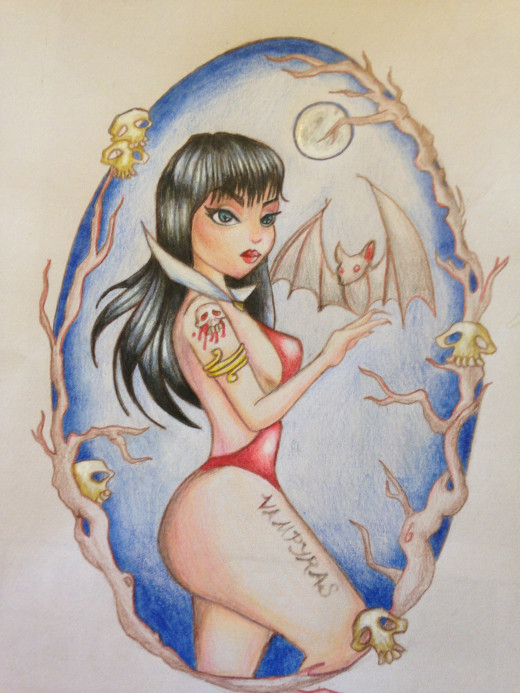
Now I've started to work on the background, I've got a darker color around the edges to create a receding effect. It really puts the subject on display. Remember to use a very gentle touch when making transitions between light and dark color. It's easier to make the color darker than it is to make it lighter.
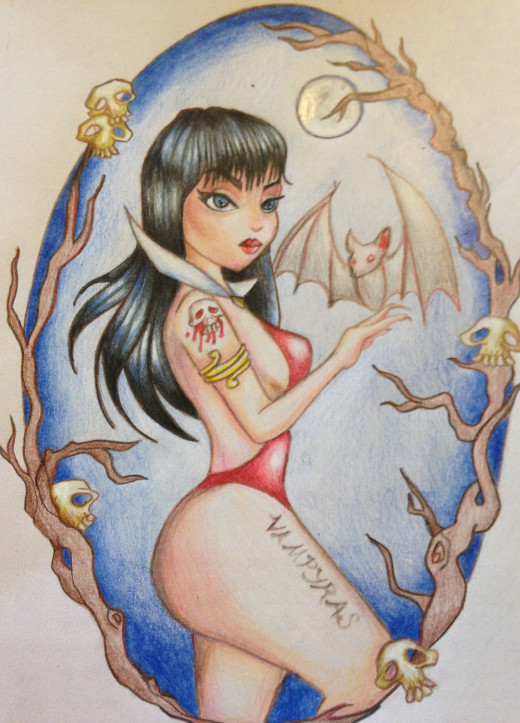
Now that you're done with the main part of the picture, time to bring the rest of the image up to speed. All the background and minor pieces we didn't do earlier need our attention now. Notice I'm outlining the branches, trying to match them with the rest of the picture.
Even though you completed the outline at the beginning or maybe you're using a coloring book, you can still add all the lines you want to make a picture more interesting! I'm adding lines to my branches to make a more gnarled and spooky effect.
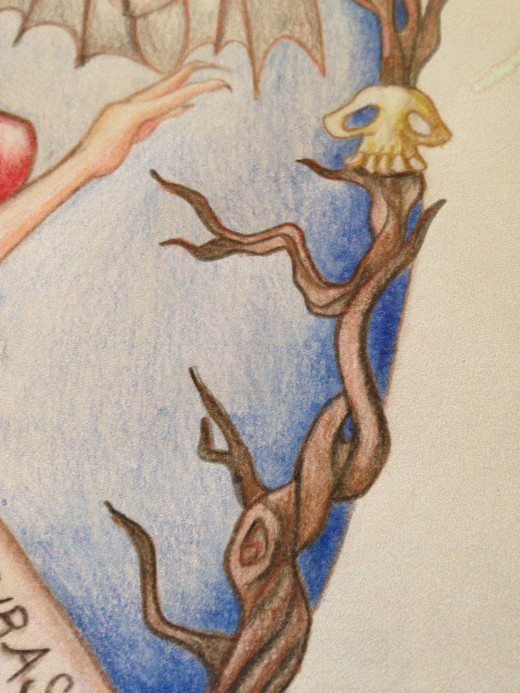
Now you can add some shading to these extra parts of the background. This is really going to be the icing on the cake of your drawing!
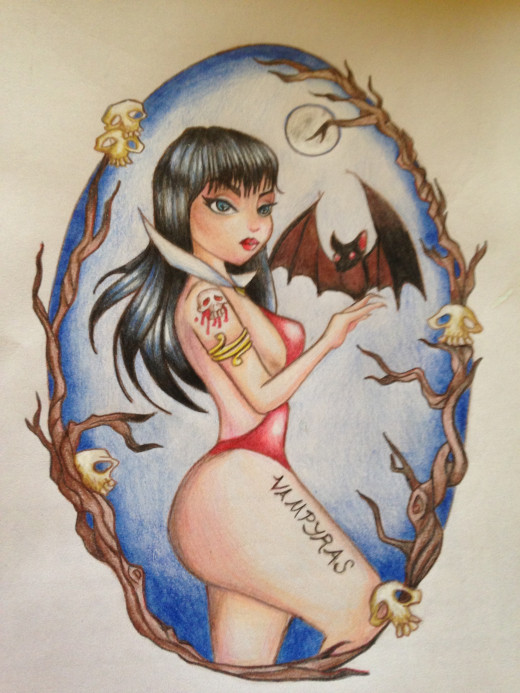
Put the finishing touches on all the parts that are still left. For instance, I finished the bat in this frame. It's starting to look pretty good!
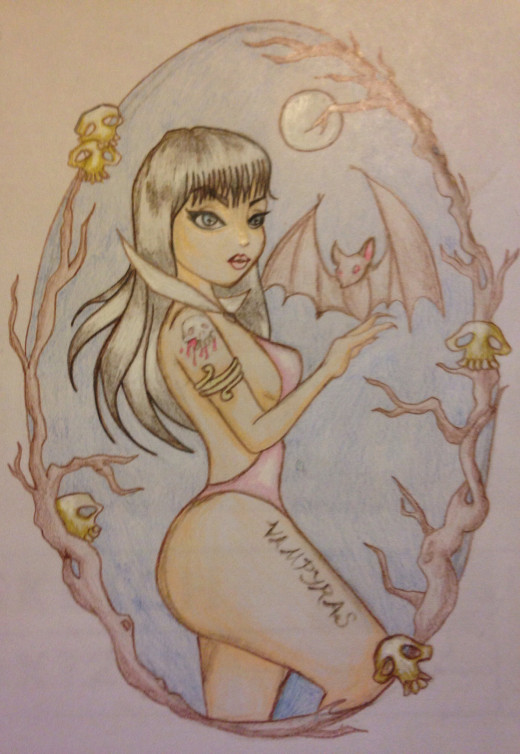
This is where I used the white paint pen. I put highlights on eyes, lips, nose, skin, and other parts of her skin. I also outlined Vampirella in white, because it's the style I wanted to go for. This is not a necessary step, but it creates a nice effect. Highlights are great on facial features, it brings a sparkly quality.
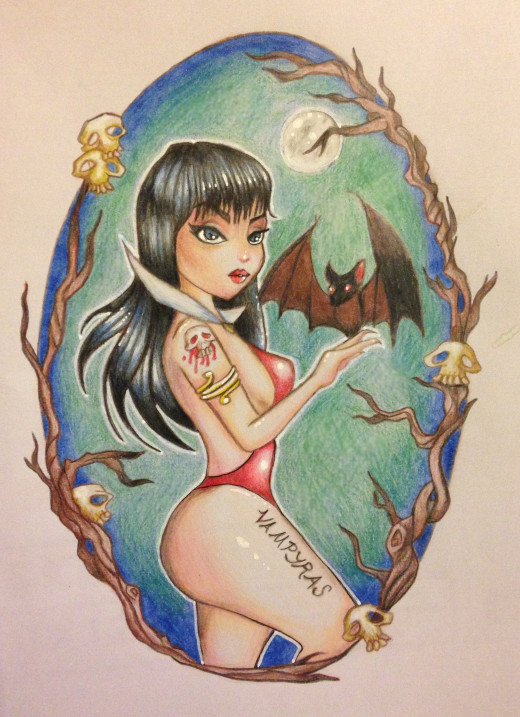
Here I added green to the background to make it more interesting. Remember, sometimes colors that don't make sense together are really pretty. Don't be afraid of your colors! We're done! Now you have amazing art you can use as a gift or hang anywhere! Leave a comment if you found this tutorial helpful or if you have any other questions for me. Happy coloring!


