How To Make Your Own ChalkBoard Picture Frame To Hang

We've been doing a lot of junking, I guess is the term. There seems to be some cool creative ideas for making your own little chalkboard for your home. We've seen small picture framed chalkboards to hang up any where in the house. Some themed chalkboards for different areas of your house. After seeing more and more of these, I thought it would be neat to attempt this project.
Decided on putting one up in the kitchen. It can be used as a grocery list chalkboard, leave notes for my darling wife, my son, who's in a wheelchair could use it to doodle on. It could be used for a lot of neat purposes for the home, fill some space on the wall, and just be a nice functionaly conversational piece.

STEPS
1. First try to determine where you might want to place a chalkboard.
2. Determine the size and take measurements.
3. Decide on how you want it to look. (type of frame, type of material used for actual chalkboard, the look and feel)
Pretty basic stuff when starting a project like this.
I decided in the kitchen and on the wall that has nothing on it. Pretty simple decision for me. It could be utilized by the family. It can be a multi-use chalkboard.
Off to the hardware store:
1. I located the type of plywood or material that i would apply the chalkboard paint on. I found some pre-cut pieces (2x4) that would work perfectly for me, and the location of where the chalkboard would hang. I tried to find the smoothiest piece of wood possible. Some sanding maybe needed.
2. Pick out the frame trim. I selected mine based on the size of the overall chalkboard and the design of the frame to match as close as possible the decor of the home. I did not want the frame to overwhelm the chalkboard, and I did not want the frame to not match the interior wood work of the home.
3. Next, I selected brush on chalkboard paint and I picked up a couple of spray cans of chalkboard paint for the final layers.
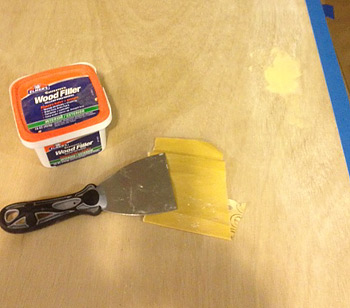
4. Pick up some wood putty, wood glue and sandpaper. I used 320,800 and 1500 grit paper.
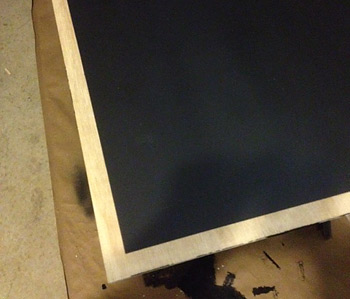
5. Have some painters tape also. I used 1" wide painters tape to allow a border around the plywood to not have chalkboard paint, so that I could apply some wood glue for the frame.
6. Set up an area so that you can work on this project. Somewhere out of the way from daily traffic.
7. First, I went over the plywood with a sander and sandpaper to get it as smooth as possible.
8. Use the painters tape to layout a border around the plywood for woodglue.
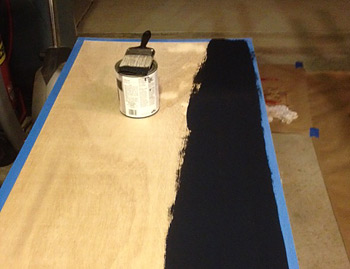
9. Have new brushes for painting on the chalkboard paint. I painted the first layer and waited about an hour to make sure it was good and dry, and I sanding it with the 800grit sandpaper.
10. I applied apx 6 coats of brushed on chalkboard paint. i know they say 3 coats. I just didn't feel like that was enough. I would sand between every other coat with the 800grit paper, and sometimes the 1500 grit paper. When painting, make sure you overlap the strokes and your keep the layer nice and even. I would gently run my brush over the wet paint from one end to the order, making sure it was nice and even.
11. I waited until the next day, until I used the final spray on chalkboard paint to add a nice smooth layer with no paint strokes. They say the paint needs to cure for 3 days before writing on it with chalk, and also, cover the new chalkboard with chalk and wipe off before using.
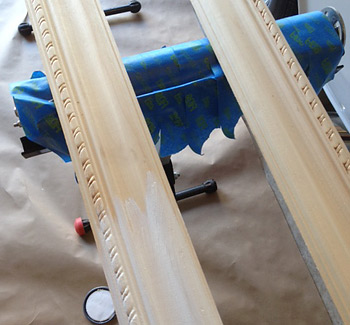
12. While all this was curing or drying, I went ahead and cut my frame for the border.
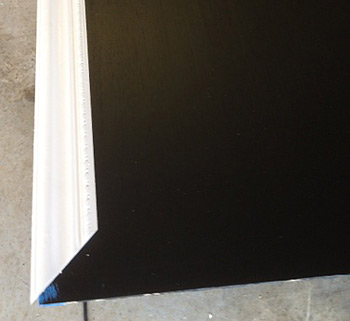
13. Once all cut, I layed it out on the chalkboard and pre-fitted everything.
14. Once I felt the cuts were all good and the paint was all cured and dried, I ran bead of wood glue along the edge where the painters tape (after I pulled off the painters tape). I also used a pin nail gun to make sure the frame was secure to the plywood. With the wood glue and pin nails, the frame is not going any where.
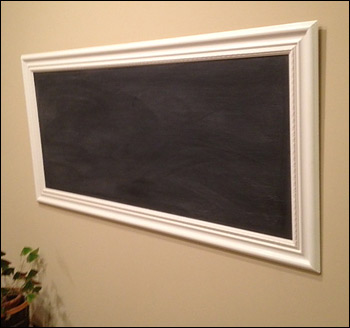
15. All done, placed some picture frame hooks on the back, and hung it up.
This project was not that bad. Just some patients between coats, and make sure you get the plywood as smooth as possible before starting. Even than, it's not as smooth as you would think. The chalkboard serves it's purpose, and is a nice touch to the house.


