- HubPages»
- Arts and Design»
- Crafts & Handiwork»
- Jewelry Making
How to Make a Holly Ring Out of Wire and Beads. Free Wire Work Tutorial


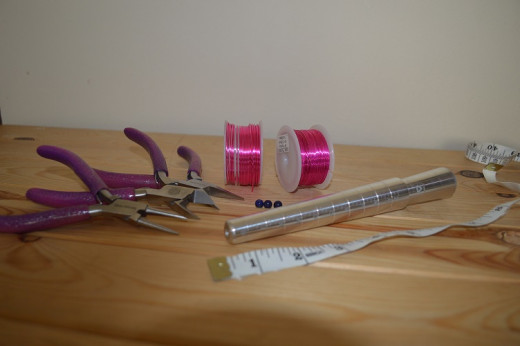
You will need:
1mm gauge wire
0.25 (or 0.45) gauge wire
3 round center-drilled beads or gemstones
Wire snippers, flat nose pliers and round nose pliers
Tape measure
Optional: ring mandrel (an alternative would be to use a marker pen - but a mandrel is the best tool to use as it allows you to make different size rings)
UK to US Craft Wire Gauge Conversion Chart
UK
| US
| |
|---|---|---|
1mm
| 18G
| |
0.6mm
| 22G
| |
0.45mm
| 25G
| |
0.25mm
| 30G
|
How to make the ring
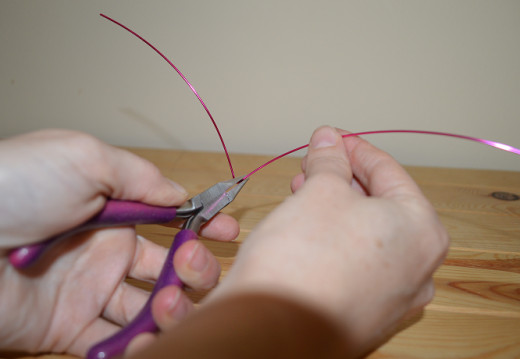
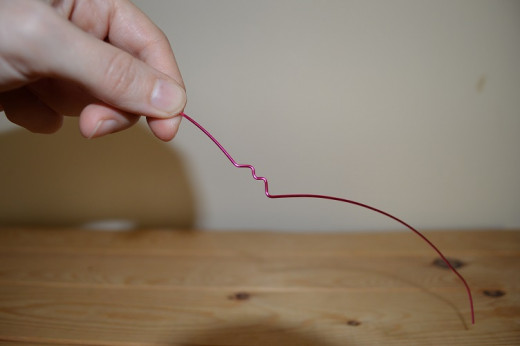
1. Begin by cutting a 15" length of the 1mm gauge wire.
Using the flat nose pliers make a right angle bend about 2" away from the center of the wire
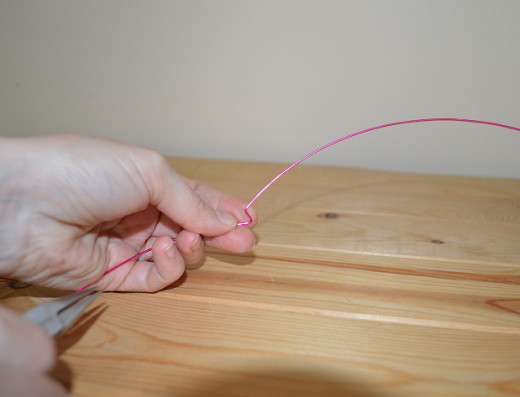
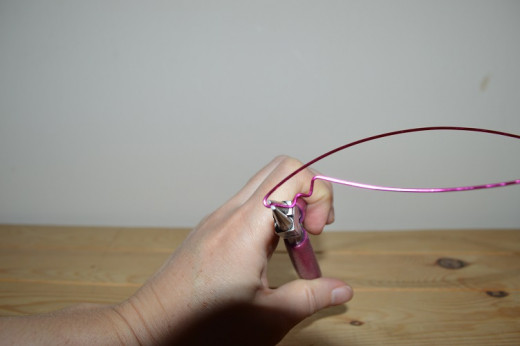
2. Grip the longer side of the wire with the narrow end of your flat nose pliers, near the bend you have just made. Gently press the longer side down, so that it forms a bend against the pliers
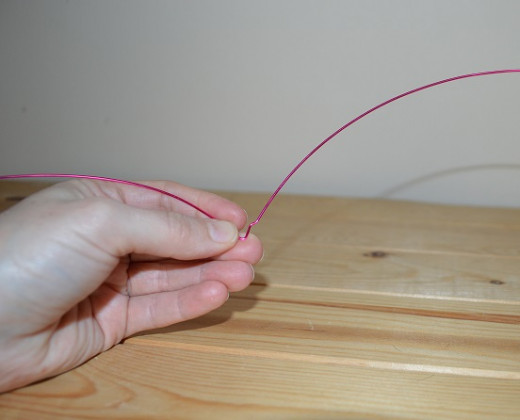
3. Now move the pliers along, so that they grip the wire just after the bend you just made. Push the wire up against the pliers so that you now have a small V shape
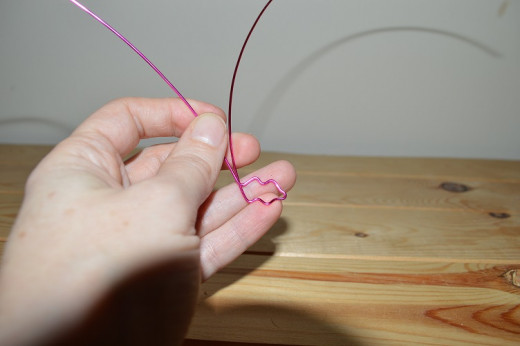
4. Repeat so that you have a W (or M) shape
5. Grip the wire with the round nose pliers just past the W shape you have just made, and bend the wire back toward the starting point
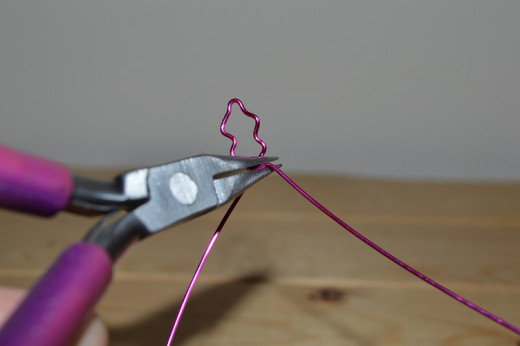
6. Now using the flat nose pliers, make another W shape which is symmetrical to the first one
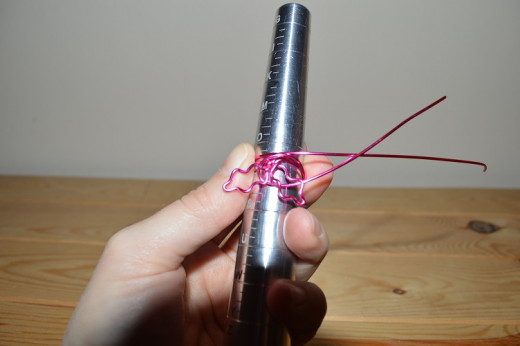
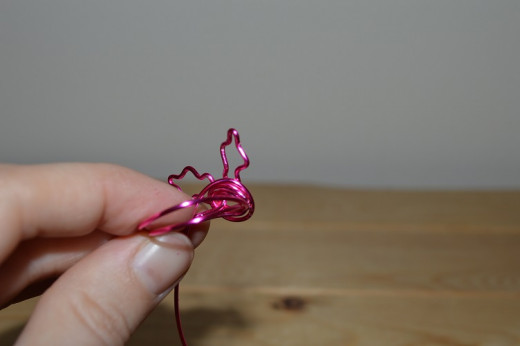
7. Hold the leaf shape with one hand, and with the other hold the wire ends. Rotate the hand holding the leaf once or twice to create a small twist at the base of the leaf. This will secure it in place.

8. Now repeat and make a second leaf at a slight angle from the first one. If one end is significantly longer than the other, make the second leaf on that end of the wire
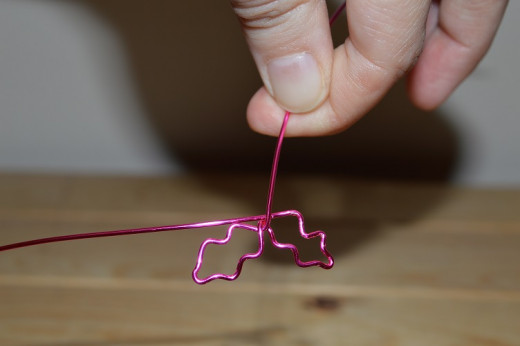
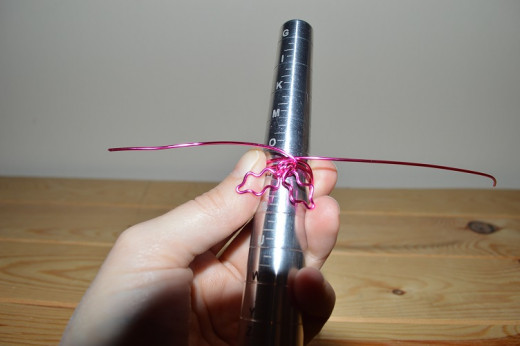
9. When you have completed the second holly leaf, give it a twist at the base to secure it in place. Now is the time to gently adjust the positioning of the leafs if you think they need it.
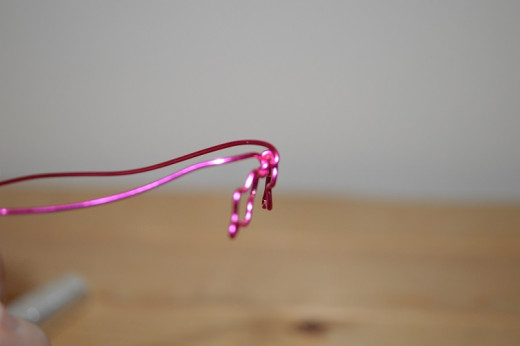
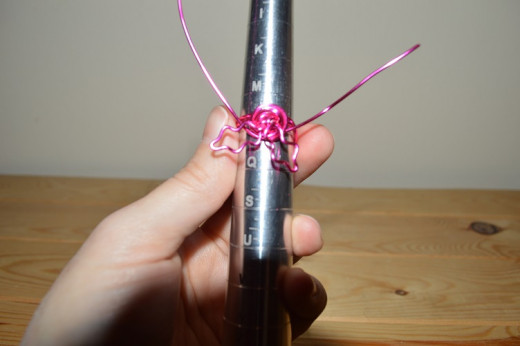
10. Now bend both of the leaves down, so that they are approximately at a right angle (90 degrees) from the excess wire, as shown in this side on view
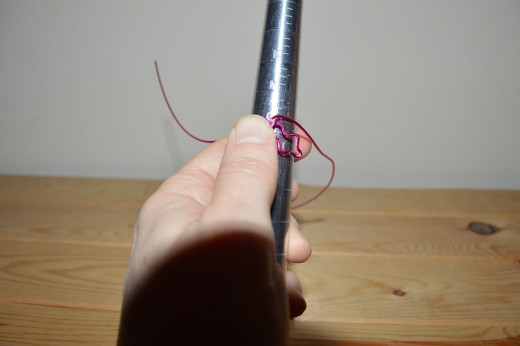
11. Place the holly leaves (right side up) onto the ring mandrel (or marker pen) at the correct ring size for the person you are making the ring for. Spread the two ends so they lie either side of the mandrel
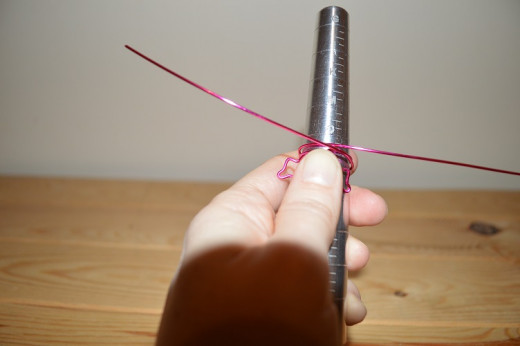
12. Wrap the two ends around the mandrel and bring them back to the front of the ring
13. Take the end on the left and wrap it anti-clockwise under the holly leaves, pull it tight, and wrap it around again
14. Complete wrapping that end by taking the wire back to it's beginning position. Note how a small knot is beginning to form beneath the leaves
15. Wrap the right hand end in a clockwise direction under the leaves.
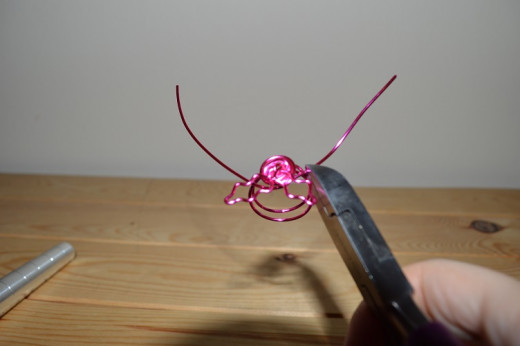
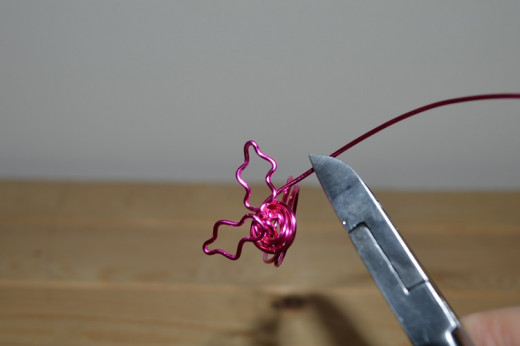
16. Remove the ring from the mandrel, and trim one end close to the knotted base you have just made under the leaves
17. Use the flat nose pliers to tuck the jagged end of the wire into the knot. Run your thumb over it to make sure it is safely out of the way
18. Trim the other end, not as close to the knot as last time
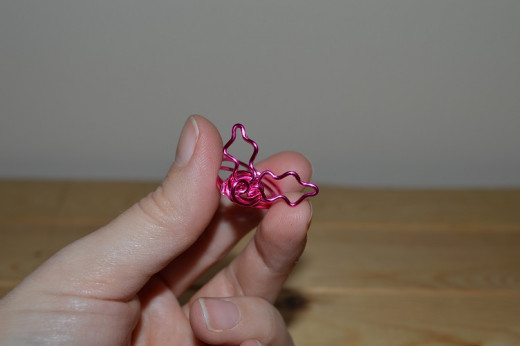
19. Curl this end around the narrow end of your round nose pliers making a small coil, which lies on top of the knot. Make sure the inner part of the coil isn't jagged, use your flat nose pliers to squeeze the tip of the wire down if it is sticking up or scratchy
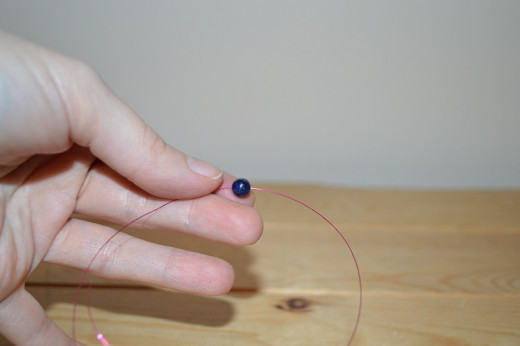
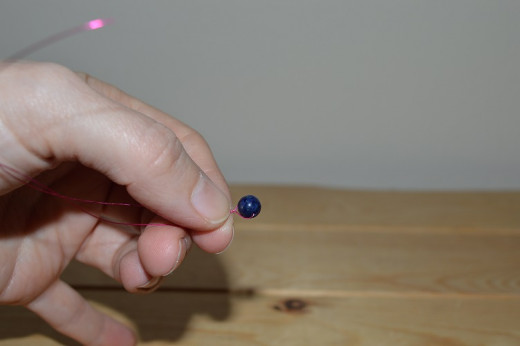
20. Put the ring to one side for now, and cut a 20cm length of 0.25mm gauge wire.
Thread a bead midway onto the wire
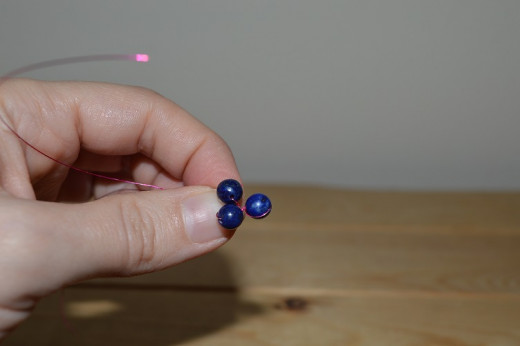
21. Bend one end of the wire back to meet the other end, hold the wires together at the base of the bead and give the bead a little twist to secure it in place
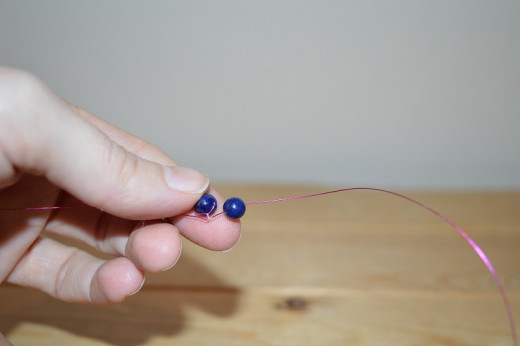
22. Thread on a second bead close to the first one, and repeat bending the wire back and twisting the bead to secure
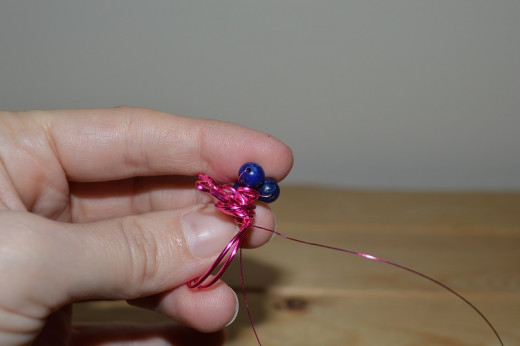
23. Add a third bead in the same way
24. Place the beaded berries onto the front of the ring, bring the ends of wire down either side of the leaves, wrap the wire ends around the knotted base to secure the berries in place

25. Trim the ends close to the knotted base, and tuck them into the knot using the flat nose pliers


You can adapt this ring using different colour wire, or different beads. Imagine this ring made with traditional green wire and red gemstones... or go really glam by using sparkly 'stardust' beads
![Mixed Stardust Spacer Beads 8mm, Sold per Pack of 300 [Office Product]](https://m.media-amazon.com/images/I/51S8oG0d5XL._SL160_.jpg)
Note to any experienced jewellery makers
Anybody who has been making jewellery for a while may be used to making rings by wrapping wire around a mandrel and then creating the decorative part using the ends. You might then be wondering why I have made this ring the opposite way around - creating the decorative part first. When I first came up with the idea for this ring, I tried making it by wrapping the wire around the mandrel first, and it was so difficult to create the leaf shapes that way I had to rethink the whole thing. This way was much easier, giving me greater control on the shape and size of the leaves. Happy jewellery making!
If you liked this tutorial you might also like:
- How to Organize Your Own Jewellery Making Party
- How to Make a Wire and Gemstone Wishbone Ring
A free jewellery making tutorial with a step by step illustrated guide to making your own wire and gemstone ring, suitable for beginner jewellery makers with minimal tools. - How to Make a Simple Beaded Wire Bangle. Free Tutorial for Beginners
A step by step illustrated guide to creating your own beaded bangle with a shepherd hook clasp

 for Jewelry or Armor: A How-To")


