Stenciled Paper Craft Projects

Stenciled Paper Craft Bags
Stenciled Gift Bags
So why make your own gift bags? It’s thoughtful and practical. It shows that you took time and added a touch of personality that doesn’t really come in store-bought bags. Bags are easy to construct with a few folds and a little glue, so why not? Not just for girls, boys can get a lot of use out of them too.
Bags aren’t the only things you can use this lovely decorated paper for. You could save it for gift wrapping, or covering a textbook to protect it and give it flair. You could save the paper to make your own books but cutting accordion papers for the interior pages and use the decorated paper for the cover. The possibilities are endless. Time to start.
Cut Some Shapes
Materials List
The materials you will need are:
- White construction paper (12x18 or larger) plus small pieces for stencils
- Watercolors
- Sponge
- White glue, scissors and a hole punch
- 2 twelve inch pieces of yarn
- Decorative tissue paper
Use a Natural Sponge to Paint Shapes

Step 1. Painting the Paper
Open your watercolors and drip one drop of water into each of the paint wells. Leave them for a few minutes to absorb the water and get soft and rich.
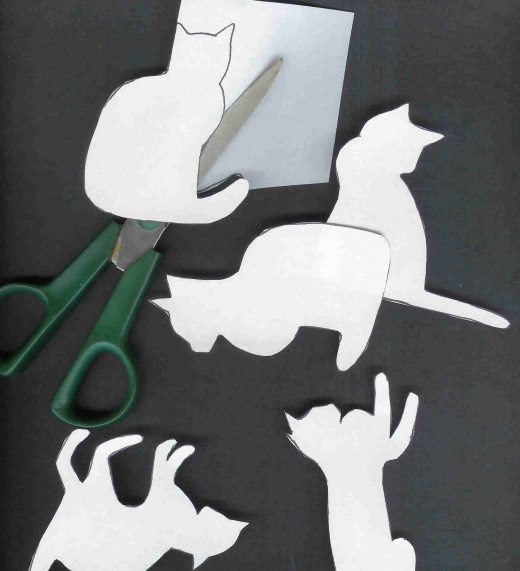
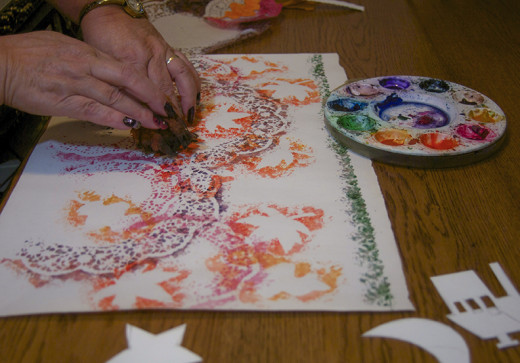
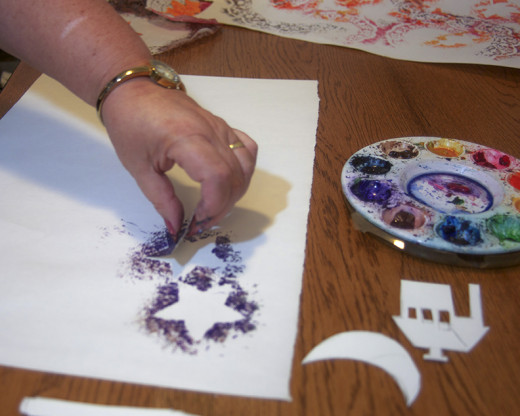
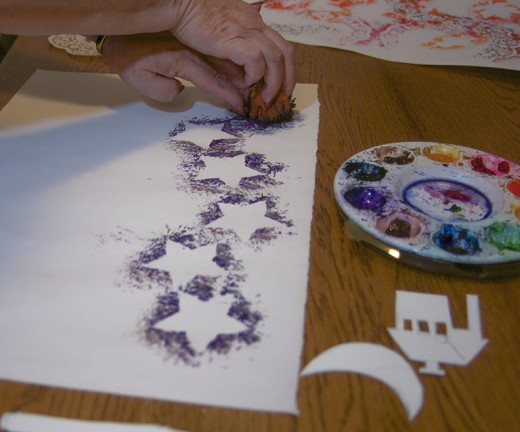
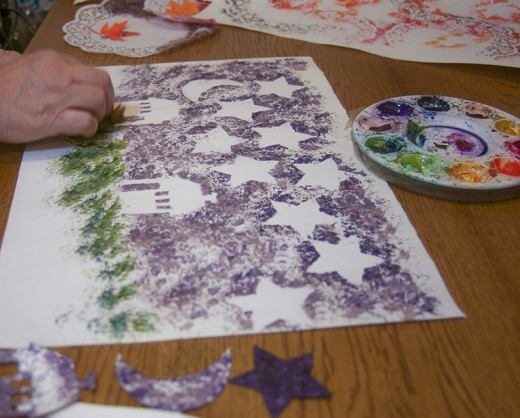
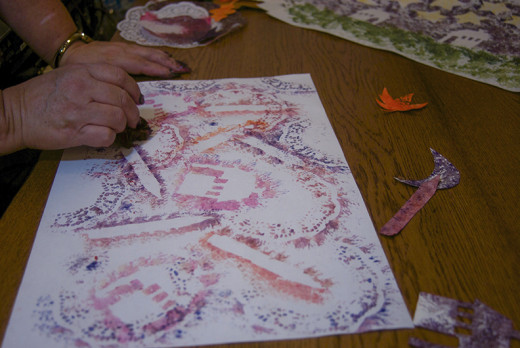
While you are waiting, cut some cat shapes with the scissors and another piece of paper. Leaves, birds, insects, hearts, sun, moon and stars are all good shapes to try. Also, get a paper doily or two ready.
Place one shape onto your large paper and hold it there with one hand. Take the sponge on the other hand and moisten it but wring it until all excess water is out. Stick one corner into a desired color and twist until there is plenty of color on the sponge. Then pat the sponge on the edge of your cut design. Lift the cut stencil to reveal your design on the paper. Now move around several of the designs and fill the paper with designs and color. Remember to pat the sponge and not rub. Rubbing will tear the stencils and not leave as nice decoration on your paper.
More Shapes
Click thumbnail to view full-size


Stenciling
Have you ever tried stenciling?
Folding steps
Click thumbnail to view full-size


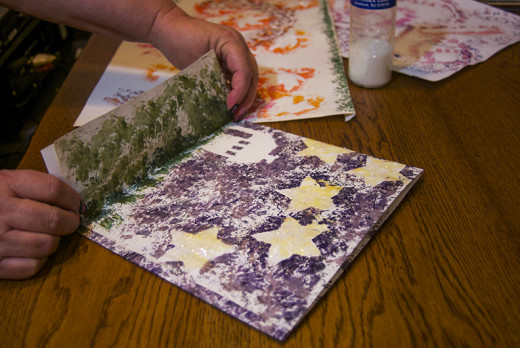
Step 2. Folding the Bag
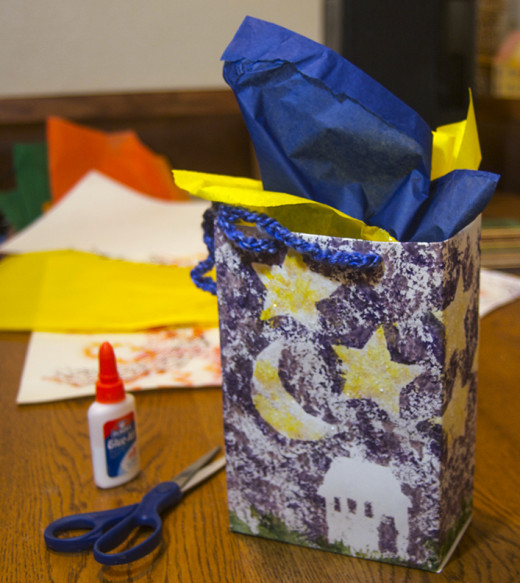
You are now ready to fold the decorated paper into a gift bag. Put away the paints and the sponges. You will not need them anymore. With a clean dry space in front of you, turn the paper over, facedown. Next, fold the top edge of the bag down about half an inch and glue it. This is to give the bag strength so it won’t tear when you carry something inside the bag.
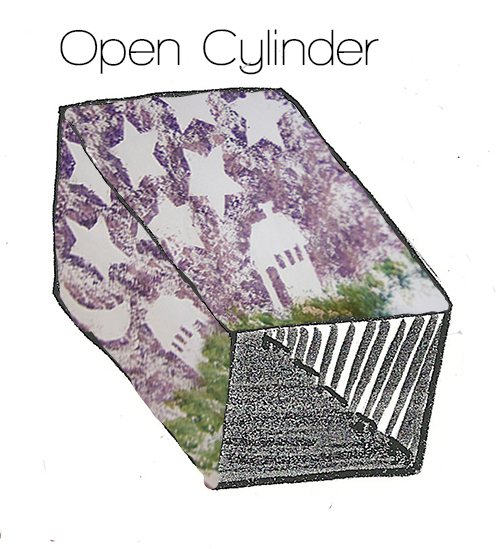
Now fold the paper in half like a book and open it back up again. Fold each side into the center but fold one side slightly over the center (about half an inch) to give room for gluing. Glue these two sides together. Hold them until the glue has bonded well. You should have a square cylinder.
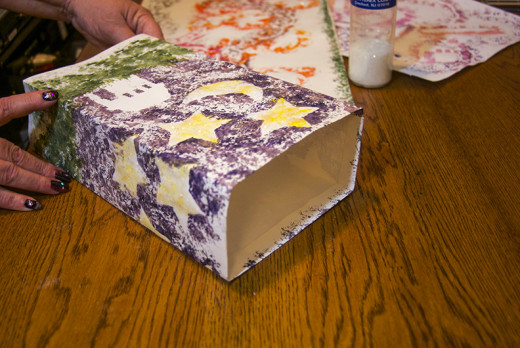
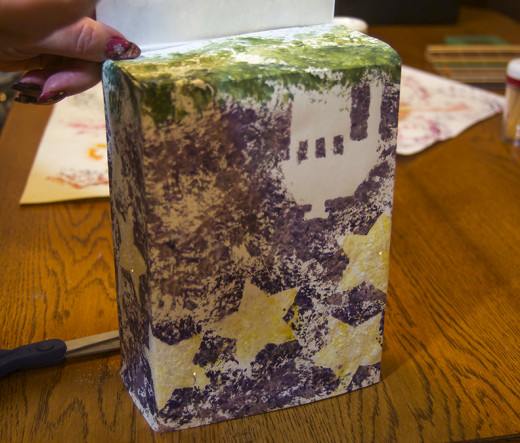
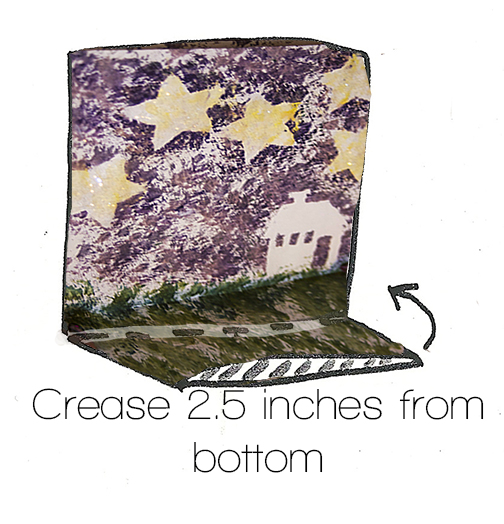
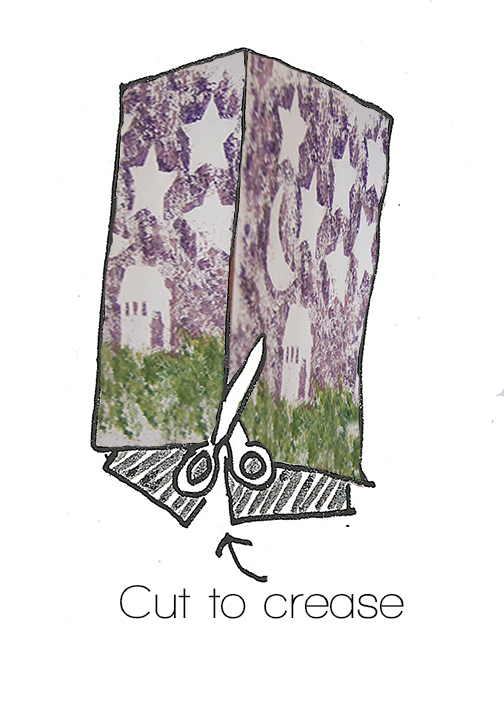
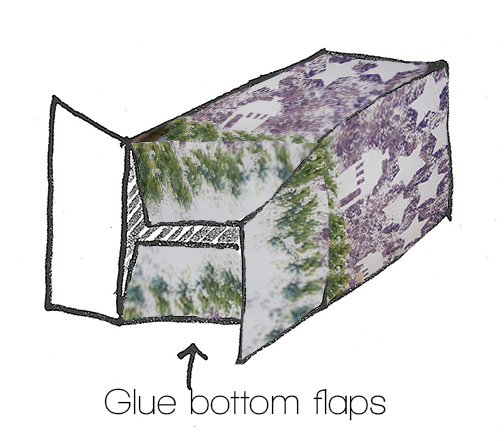
Take the bottom of the bag and fold it up about 2.5 inches. Don’t confuse the bottom of the bag with the top where you already folded and glued about half an inch down. Now that you have a crease at 2.5 inches from the bottom, open it back up and cut each of the four corners up to the 2.5-inch crease. Now you can fold these four flaps over each other and glue.
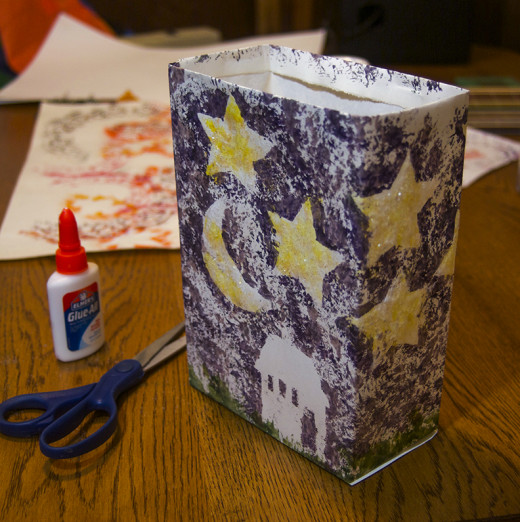
Next punch two holes on one side of the top and two holes on the opposite side. Take the yarn and string it through the holes and tie them on the inside, as in the diagram.
Cat Bag
Step 3. Ready For A Gift
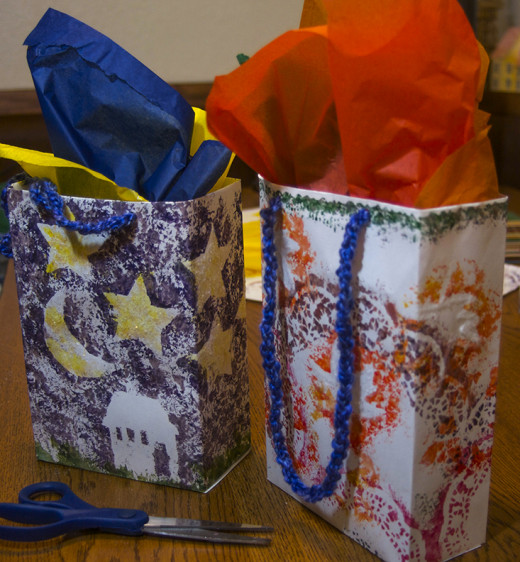
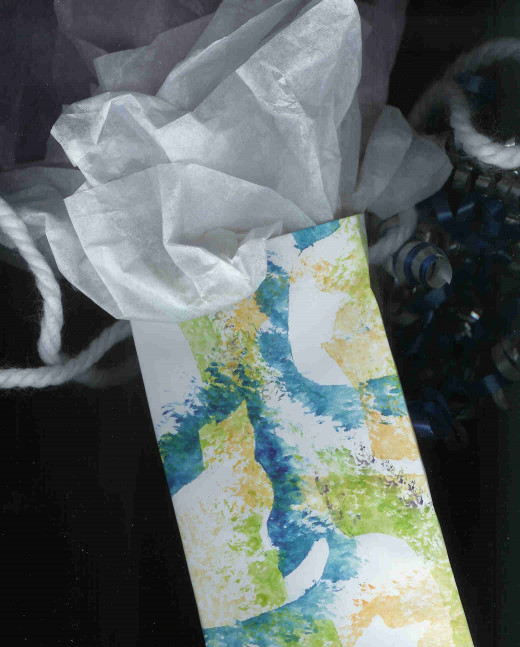
Now take a couple of sheets of the decorative tissue paper and insert them into the bag so that the corners stick out slightly. You are ready to add a gift and impress your friends. The bag is so special they may like it better than the gift! Create a whole bunch of them for special occasions.
Cat Bag

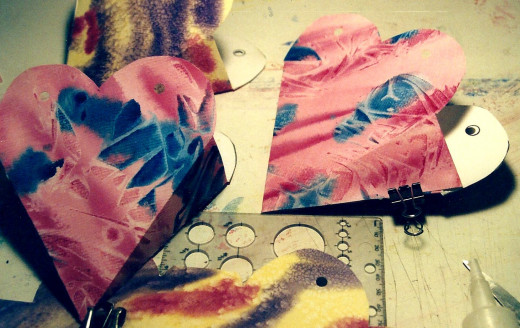
Heart Bags
Open your watercolors and drip one drop of water into each of the paint wells. Leave them for a few minutes to absorb the water and get soft and rich, just like before.
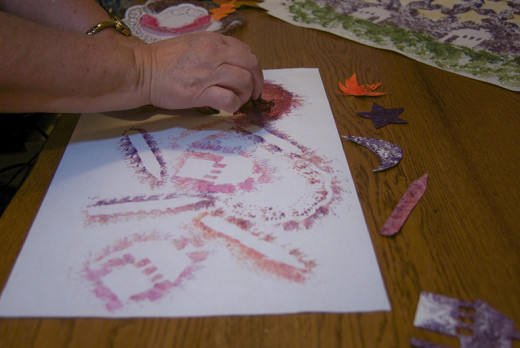
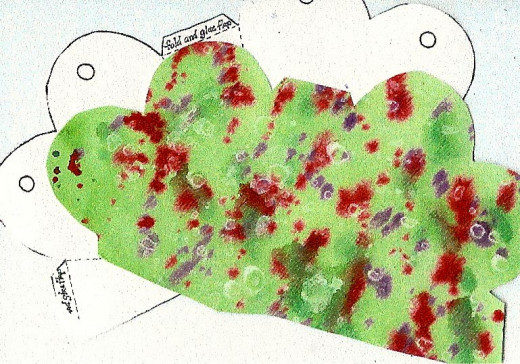
While you are waiting, cut a six-inch tall heart with the scissors and a piece of construction paper by folding the paper in half and cutting half the heart. Place it onto your watercolor paper and trace it. Move the heart and draw another one with the point touching the first one. Leave a triangle between the two hearts and draw another triangle to match it on the other side of one heart as in the diagram. Add a long half-inch flap on the side of the outside triangle, as you see in the diagram.
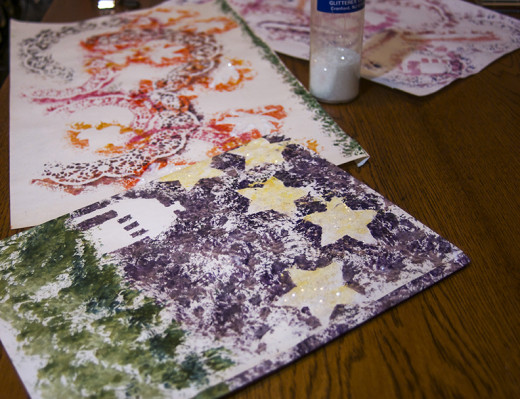
Paint or stencil the paper on the opposite side from the pattern drawing. Make sure you use almost no water on the sponge. Sponges absorb water quickly and before you know it, the sponge will be too wet. Sponge over the stencils by bouncing the sponge and not rubbing. Change the colors and the stencil as often as you like. Allow the paper time to dry.
Heart-shaped Bag
Click thumbnail to view full-size


Cut and Fold Heart Bag
Cut the heart pattern out as soon as the paper is dry. While waiting you can paint several papers for making into bags later. Be sure to cut the two hearts and two triangles together; don’t separate them.
You are now ready to fold the decorated paper into a gift bag. With a clean dry space in front of you, turn the paper over, facedown. Next, fold the top edge of the triangles down about half an inch and glue them. This is to give the bag strength so it won’t tear when you carry something inside it.
Now fold the paper along the sides of the hearts and triangles and flap. Glue the flap to the far heart as in the diagram. Hold it until the glue has bonded well. You should have a pair of hearts separated by two triangles.
Next punch two holes on one side of the heart and two holes on the opposite side. Take the yarn and string it through the holes and tie them on the inside, as in the diagram.
How to Create a Stencil
Tissue Paper
Now take a sheet of decorative tissue paper and insert it into the bag so that the corners stick out slightly. You are ready to add a gift and impress your friends. The bag is so special they may like it better than the gift! Create a whole bunch of them for special occasions.
Folding Bags
Click thumbnail to view full-size