Digital Painting Tutorial

Learning Digital Painting
This digital painting tutorial is designed to help you keep up with expanding technology in producing digital media art. The resulting digital art is comparable to traditional art media when you are interested in prints rather than original traditional paintings.
I will help you explore methods of producing digital art which you can be proud of.
The Advantages of Digital Painting
- No inventory of tubes of paints, brushes and canvases or other painting surfaces.
- No fumes from paints which create problems for people with allergies
- No cleanup polluting our water supply and sewer systems
- No problem correcting a stroke of the paint brush that you are not satisfied with
- The ability to paint in layers which can be changed, deleted or experimented with for the best effect.
- The freedom to save the work and turn off the computer at anytime knowing that the next time you turn it on, you can start working right away...no drying time to worry about.
- Freedom to explore new techniques, colors, and different media.
Before we start, I want you to understand that all of these paintings are mine and are copyrighted under my name. I am presenting them here strictly for demonstration and they are not to be duplicated or sold without my specific approval.

Mixed Media - Chalk and Liquid Ink
This is an example of how I mixed chalk and liquid ink using the brushes in Corel Painter 12.
There are many steps I go through to get to the finished painting.
To start with, I take a lot of photos for reference so that is where I begin. In this case I started with a closeup of the bougainvillea blooms in my backyard.

Auto Paint with Chalk
The second step was to eliminate detail so it was not so "photographic." In this case. I used the "Auto paint" feature in Painter to accomplish it.
I applied a chalk medium over the photo in a "clone mode" so it would pick up the underlying colors but not the detail.

Liquid Inks
Next I started experimenting with several different "liquid ink" brushes to start giving structure to the flowers.
I also dabbed in a few splashes of blue just to add interest.
I created several new layers to work on additional ink dabs until I was satisfied.
If I wasn't happy with a brush stroke, I could delete it easily without disturbing any other stroke on that layer or anything in the layers below.


The Selection Tool
Once I was satisfied, I isolated the background from the flowers using several "select" tools, including masking, which is too involved to explain here, but is a very useful tool.
Masking and Gradient Tools
I then filled in the background with a gradient tool choosing two colors that would complement the flowers without detracting from them,

and that finalized the painting.
I was really excited with how this came out, because I have been trying to free up my style more to produce a painting that is considered a realistic abstract. I think I accomplished it here.
Having the freedom of working on layers so that you don't mess up what you have painting below and are satisfied with makes all the difference in feeling the freedom of experimentation. It still requires your skill as an artist, but it is a lot less threatening. Bougainvillae Painting
Corel Painter 2015

Corel Painter 2015
Corel has just upgraded Painter X3 to this new version. It is an easy transition from Painter 12 and X3 if you have those versions.
They have made it even more user friendly and have added a new variety of exciting brushes called particle brushes.
All three of these versions are so flexible that they suits people with extensive skill at traditional painting as well as those who have only just begun to test their creativity.
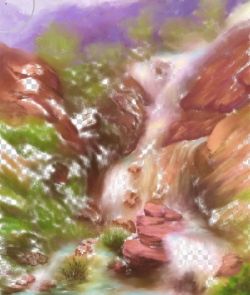
Waterfall Wonderland
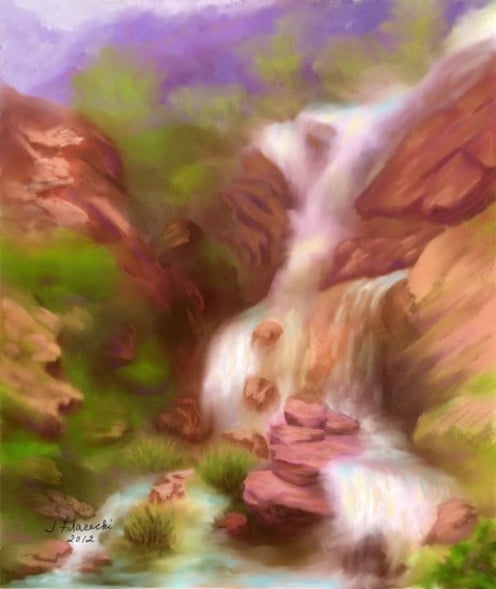
Mixed Media
Chalks and Acrylics
This is an example of a painting I did using digital chalks as the base for establishing shapes and colors and then used acrylic brushes from Painter 12 to complete the painting.
This began from a photograph by Johannes Vloothuis which we used during one of his many, very informative, free painting classes.
Adding Color
The photo had very little color with the rocks the usual colors of black and multiple levels of gray. The greens were very dark and lifeless. I decided to add color and vibrancy to a wonderful, majestic waterfalls.
Chalk Auto Painting
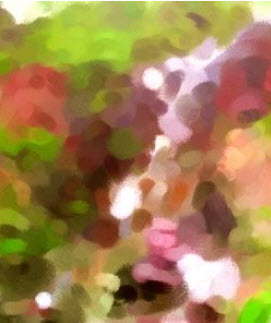
Digital Acrylic Brushes
I took the photo and made a clone painting using digital chalk and "Auto-painting." I then experimented with different underpainting effects and decided to apply the "chalk drawing scheme." This brought up all the beautiful colors.Then I further enhanced the colors with "chalk saturation" and increased contrast.
What this did was give me a sketchy outline of the composition and placement of objects. It also gave me the starting point for colors I would be using in the painting.
You can select a color with an eye dropper and use it, and also place it on a mixer palette to create the variations of color you want just as if you were mixing on a real palette.
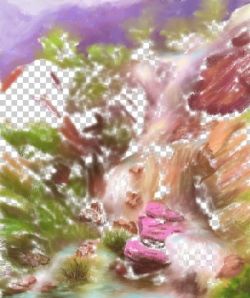
Now it was time to start working with the digital acrylic brushes. This picture is a summary of five different layers I produced as I added detail into the painting.
More Layers
I did 4 more layers as detailing continued.
When all the layers were to my liking, they were dropped to the canvas to produce the finished painting.

Water-Soluble Oils Version
When I finished it, I liked it so much, I decided to paint it using water-soluble oils on a 24 x 30 inch stretched canvas. I made a few changes and also lost some of the softness of the digital painting but I was happy with it.
It have it hanging in a special place in my home.

Digital Oil Painting
This third example was produced mainly with the oil brushes from Painter 12. I combined three different photos to come up with the composition of the finished painting.
I photographed my newly planted pomegranate tree that survived the winter, flowered and even started bearing fruit.
This is the same process I use when doing traditional paintings, but it is much easier because, using the digital program, you can cut out unnecessary clutter and position components much more readily.
It started out with a photo of two pomegranate flowers hanging down from some branches.

Composite Photo
I added another flower above them to improve the composition. I placed it on a layer above the first one so it would appear to be in front of the other two.

Next I took the photograph of the fruit and added it to the composition in the top right.
I made a copy of the first fruit, flipped it horizontally and then rotated it before placing to the left.
Again, each of these things were done on separate layers so I could move them around and angle them as needed for best effect.
Once I was happy with the composition, I combined all the layers and used it as a reference for the painting.
I used mostly the Painter 12 Oil brushes for painting. I did the flowers and buds on one layer. I put a second layer under the flowers and painted the leaves. I started painting the background on a third layer behind the leaf layer. I make adjustments to color and value until I felt the background was dark enough to enhance the flowers and leaves to bring them forward.
Once completed, I signed it and dropped all the layers to the canvas.

Abstract Windmill Demonstration - Flow Maps and Selections
I put together this short video to show you some of the steps I used to produce an abstract windmill painting. There are two corrections in it that need to be pointed out.
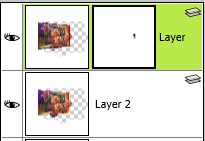
Early in the video when I was trying to change the composite method of the first layer to demonstrate it, it didn't work. This is because I was on the wrong layer.(note the green highlighted layer higher up on the layers chart.)
I made the same mistake when I wanted to demonstrate effects on the canvas layer. Effects do work on the canvas layer. I was on the signature layer by mistake.(see the green highlight)
This mistake is easy to make and something you want to be sure to keep track of. You can always apply a lock to any layer so you don't mistakenly change one that you don't want changed.
Please excuse all the sniffing. It was allergy time here in the desert.
Abstract Windmill Painting
First Version
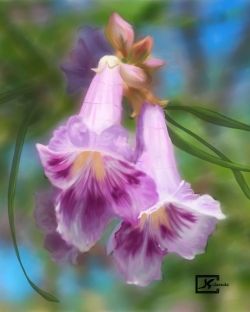
Floral Art Oil Painting
I just recently finished an oil painting of desert willow flowers using Painter 12. When I was finished, however, I felt that the background was too photographic and I decided to make some changes.
The one to the right is the first version.
The one below is the revised version.
Revised Version
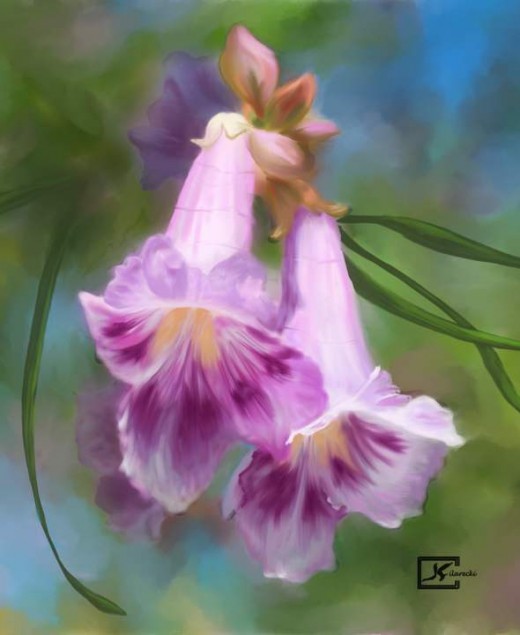
To make the changes, I loaded the background selection I had saved earlier and repainted the background using the Painter 12 feathered oil brush and used an oil blending brush to come up with the new version.
Which Desert Willow Painting Do You Prefer
I would like to know which painting you like the best and why. It always helps to get feedback from other people and with digital painting, it is so easy to make changes if needed. Help me to finalize the choice.
Why?
Field of Flowers

Landscape Painting
Video Tutorial
This is a 25 minute video in two parts, showing you how I made some modifications to a digital landscape I had painted.
I was not satisfied with:
- the flowers in the foreground,
- the green shrubs in the center left,
- and I also added some pinks to the sky and blues in the foreground to help harmonize the completed painting.
You will see the original painting before the modifications in the video.
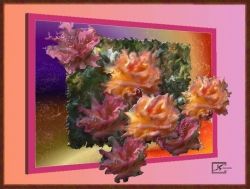
Just for Fun
Out of the Box
Here is a fun project to try to combine the information you are learning to come up with a completed project.
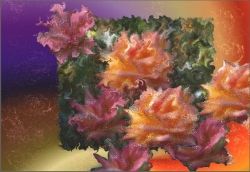
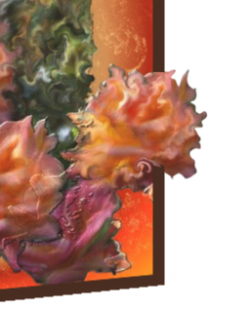
It started with a picture I had composed form a photograph of three roses.
I duplicate the roses and then pasted them on several layers. I moved them around and stacked them so some were in front of the others.
Free Transfer Tool
Using the "Free Transform" tool, I rotated the picture using the perspective choice. Then I duplicated the layer.
Rectangular Select Tool
On the duplicate layer, I made the frame using the rectangular select tool to fit over just outside the picture and make a second smaller rectangle with (-) rectangle tool.
Matching Perspective
I painted in the selected area with my choice of color and then transformed the rectangle to match the perspective of the picture.
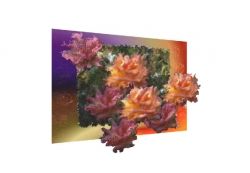
Creating a Mask Layer
To get the roses to appear outside the frame, I created a mask frame on the same layer, chose the Opaque Acrylic Brush and the color black (0,0,0,).
I clicked on the mask layer and painted the black just over the frame covering the rose.
Because there was a duplicate rose in the layer below, it appeared anyplace I applied the black.
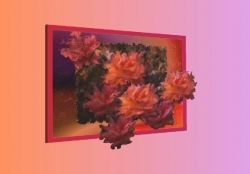
Gradient Background
I added a background using the gradient fill tool after choosing two colors that would complement the rest of the composition.

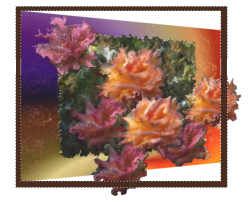
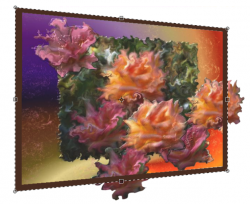
Cropping and Stroke Selection
Next, I cropped the image to the size I wanted and chose a brush variant and color that I would like the border to be.
Then, I selected the whole image and then clicked on the "Select" menu and chose "Stroke Selection". The border automatically drew around the finished picture.
Finally, I added my digital signature in the right-hand corner.

Digital Calligrapy
When you want to add text to a painting, it is so easy to just click the "Text" button and select a font you would like to use. I've been learning how to write my own text using a calligraphy pen on my Wacom Tablet.
It is a lot of fun and makes you feel like you have accomplished a major feat. It also makes you proud that you have actually done it.
The advantage of doing digital calligraphy over traditional calligraphy is that if you make a mistake, you just click the "undo" button and try again until you get it right.
Doing it on paper in the traditional way, you throw the paper away and start all over. It is really depressing if the mistake is the last letter on the page and you have to throw it all away.
This holiday card is my first attempt.
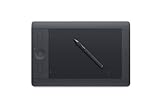
The Wacom Tablet
A pressure sensitive tablet is a must for digital painting. My choice is the Wacom Tablet.
I have my original medium-sized Intuos 4 which I use on my older laptop. You use the stylus as your brush on the pressure-sensitive tablet and see the painting on your computer scene.
This past year I got the Cinteq 13HD which I really love. Here you are using your stylus on the tablet which is also the visual of the painting as you work on it. It is just like actually painting on the canvas directly.


