Cute Artwork Ideas For Paper Plates, Part 1

Our Little Tech Savy Children Love to Create
Kids are enchanted by the many games they can find on line but they still like to create. This was always a highlight of our week.
One plus for these paper plate ideas is that they are inexpensive and mostly made from things you already have at home.
On a rainy day when everyone seems antsy, this is a fun activity. Older siblings can help little ones with it too.
Momma or Daddy Piggy (full-size plates)
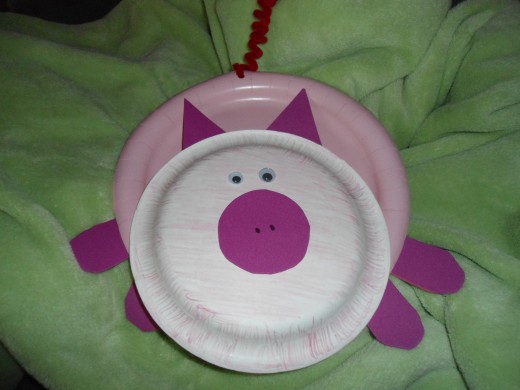
Paper plates are an inexpensive way for children to make adorable crafts. Add some pipe cleaners, googley eyes, and maybe a pom-pom nose if desired. Otherwise, eyes and other parts can be made from cut paper or drawn on the critters.
There are many sources for craft ideas on line.The crafts I am sharing in this article are from the site listed below with revisions and modifications. Busybee crafts is one you will find filled with ideas your children will enjoy.
There are many more sites available and the specific animal you are looking for is probably out there.
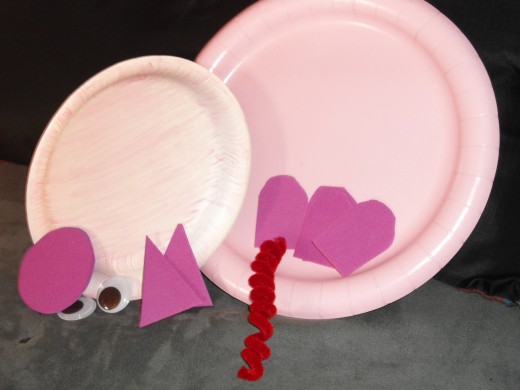
What you need:
For the Momma or Daddy:
- a dinner size pink plate
- a dessert size pink plate
- googly eyes
- four foam feet
- two foam ears
- pipe cleaner for tail
- a foam nose
To make the ears, feet, and nose, I made a small pattern to use to trace and cut out these parts. You can shape the feet as you wish.
More Paper Plate Crafting
Materials for the project...
Instructions for Momma or Daddy Piggy
If you do not have pink paper plates, children can color white ones the color they wish their piggy to be. Some children have pigs at home and theirs may be one of the diverse colors of the pigs out in the barnyard.
- Make simple little patterns to use to cut out feet, ears, and nose. (Some of you can do this step with no patterns!!)
- Glue eyes and nose onto the small paper plate.
- Draw nostrils on nose.
- Glue small paper plate to large one. If it will not hold, you can staple it. Another option is to roll tape with the sticky side up and tape it to the back of the small plate and press to make it stick.
- Glue feet on as shown.
- Using a paper punch, make a hole at the top for a tail.
- To make a tail, roll your pipe cleaner around a pencil to make it curly.
- Push one end of pipe cleaner through the hole just about one half inch and fold so that it is secure.
That is it...you now have Momma or Daddy. Your children may wish to make a whole family of piggies.
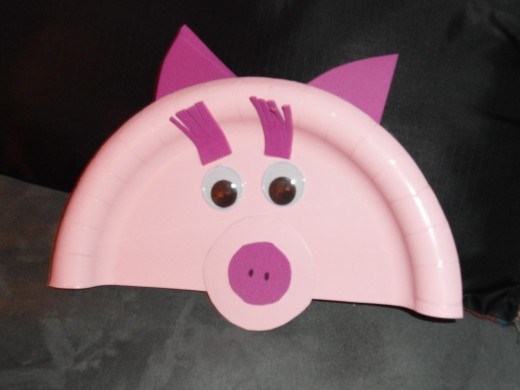
Baby Girl Piggy
What you need for baby girl piggy
- pink paper plates (dinner size and dessert size)
- white can be substituted and colored (which I did to demonstrate)
- dark pink foam
- pink or red pipe cleaner
- googly eyes (choose the size you prefer)
- glue
How to make the baby girl piggie
For Baby Girl:
- Cut a pink paper plate in half
- Cut a nose and ears from foam. (Make small patterns to use to trace and cut as suggested above if necessary. It was necessary for me.)
- Make eyelashes from foam by cutting strips in a small piece of foam that remain connected to the piece you are using. (See the picture of Baby Girl Piggy)Glue on all items
- Make a pipe cleaner tail if desired. To make the tail, roll a pipe cleaner around a pencil to make it curly. Using a paper punch, make a hole in the plate and insert pipe cleaner and bend the end so it will be secure like you did with Momma or Daddy.
That's it...you have Baby Girl Piggy.
Now, you can leave off the eyelashes for 'Baby Boy'.
Variation: Use other color plates to make different colored pigs. Or, use white and have children color the Piggy the color of a piggy they have seen or might have.
Variations
For those of you who craft often with children, you can skip this paragraph
- Materials suggested can be adjusted to your needs or desires.
- White paper plates can be used if you would prefer children color the plate.
- Construction paper can be used in place of the foam.
- Yarn can used for the tail.
- The Momma piggy can be glammed up...add some faux gems or a ribbon made of fabric.
- The Daddy piggy could have a bow tie or a hat.
The fun part is taking the idea and running with it. My mantra for crafting is: make it your own!!
© 2012 Patricia Scott


