Recharging A Car's Air Conditioning Unit

This article will discuss how to easily recharge one's air conditioning unit in your car. It is important when recharging the air conditioning unit in your car that you understand all of the steps you will need to take prior to beginning the process. This is because overcharging one's air conditioning unit can cause damage to the compressor unit in your vehicle. Damage to the compressor unit of your vehicle can result in costly repairs, which could cost upwards of $1,000.
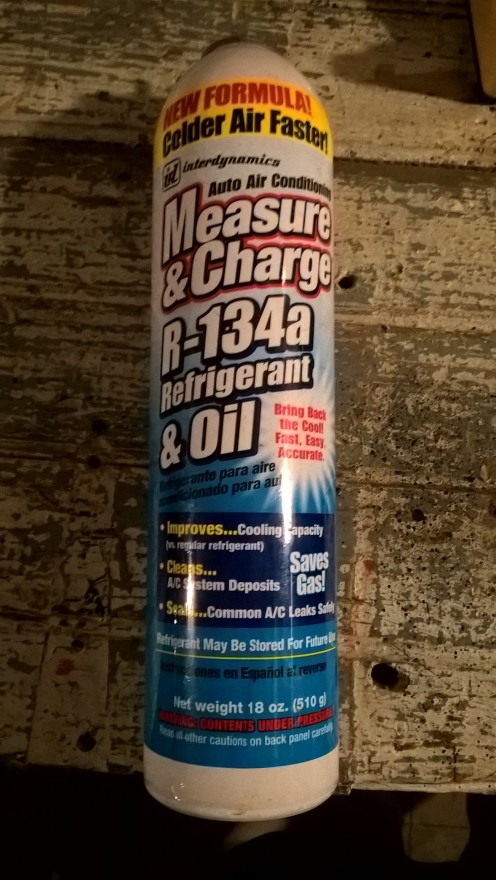
Refrigerant and Charging Hose

Refrigerant and Tools: When you purchase your refrigerant you will have the option to purchase the refrigerant only, or refrigerant with a pressure gauge and charging hose. See the attached picture of a refrigerant can, pressure gauge and charging hose. If you end up using up all of your refrigerant then you should save the pressure gauge and charging hose. This will help you save money in the future if you ever need to recharge your air conditioning unit again. This is because by saving the gauge and hose you will not have to purchase a canister of refrigerant with the charging hose again.
Finding out which refrigerant your car needs: You will first need to find out what type of refrigerant your car uses. The easiest way to find this information is to use your car owner's manual. Once you have located your car owner's manual you should look to the index and search for "air conditioner." This will lead you to the correct page to look up the proper refrigerant type you will need. Most likely the refrigerant that you will need is R-134A, however, you should verify this information. If you have lost your owner's manual then you can do a search online for the refrigerant which matches your car's make and model. This is very important as many hybrid vehicles with electrical driven compressors may require something different.
A/C Refrigerant
Steps to Recharge Your Air-Conditioning Unit:
Step 1: You will need to turn your vehicle on and turn on your A/C to its maximum cool setting.
Step 2: You will need to determine if your compressor unit is on. The instructions on the A/C unit can show you what your compressor unit looks like.
Step 3: You will now need to locate your A/C service port. Your owner's manual may be used to help you locate the service port. If your manual does not list the location of the port, then (1) you can look online for the location of the port; or (2) look to the instructions on your refrigerant can may have a website which lists the port's location depending on the make and model of your car. When you have found the port you will need to unscrew the port cap.
Step 4: Remove any discs or other labels on your can of refrigerant which needs to be removed before you can recharge your a/c unit.
Step 5: Your A/C refrigerant can may already come with a pressure gauge and charging hose. If it does, make sure that it is connected. You will then need to find out the outside temperature. This is important when you are using the gauge as you will need to adjusted the "temperature" reading on the gauge prior to connecting the charging hose to the A/C port. Normally if the temperature is 70 degrees (Fahrenheit) or below then you will move the temperature reading on the gauge to 70 degrees. If the temperature is between 70 and 90 degrees then you will move the temperature reading to that specific temperature. If the outside temperature is 90 degrees or above then you will move it to the 90 degree measure. When you have adjusted the temperature reading you will see that a "range" for the amount of refrigerant which should be in your car will show up on the a/c gauge. You will need to make sure that you do not put in so much refrigerant that the reading goes past the "V" on the gauge.
Step 6: Attach the gauge and charging hose to the A/C port. The refrigerant can be connected to the gauge at this time if you wish. However, when you first connect the hose to the A/C port make sure you do not hit any triggers which may start the recharging process. This is because you want to get a reading on the pressure gauge for the amount of refrigerant already in the car.
Step 7: If you find that you need more refrigerant then you should begin to shake the can of the refrigerant back and forth. You will notice that when you shake the can that the can will begin to feel cold. This is ok as the chemicals within the can are mixing. If you find that the can is too cold then you may want to wear gloves.
Step 8: Next you can begin recharging the a/c unit by pressing on the a/c trigger for 15 second and letting go. When you let go you will need to read the gauge again. If you see that you need more refrigerant then press on the trigger again for another 15 seconds and repeat the checking of the gauge. If you find that you are getting close to the limit for the amount of refrigerant then I would advice stopping the recharging. You do not want to overcharge the unit. If the can is emptied upon recharging you can discard the can and save the gauge and charging hose. If the can is not empty, then leave the gauge attached to the refrigerant can and store in a cool dry place.
Conclusion: When you are done recharging the air conditioning unit you will need to put on the cap to the a/c port. Next go back into your car and check to see that your car is blowing out cold air. If your car is blowing out cold air, then you should be all set. If your car is still not blowing out cold air then you may need to take your car to a mechanic to see if something is blocking the cold air from coming in or if there is a leak in one of the lines. Please note that most a/c refrigerants do have chemicals which help seal leaks.
___________________________________________________________________
To learn more about various other car maintenance and repair information, click the articles below:
More about car maintenance and repair information:
- How to change the oil in your car?: Article discusses the process for changing the motor oil in your car.
- Swapping out your car's battery:Article discusses how to safely swap out your car's battery, as well as how to dispose of your old battery.


