Ghost trap from Ghostbusters


My ghost trap project
The Ghost Trap
The Ghostbusters ghost trap; now this is a replica that all avid Ghostbusters fan want to have in their collection. But getting hold of one of these props can be expensive and you don’t really know the quality of what you are buying until you get the product delivered. So having purchased myself a Ghostbusters costume last year for Halloween, I decided to see if I could get hold of a trap as part of the costume. This was not to be but I had set my heart on owning a trap and I wanted it to be a good replica.
Now I didn’t have hundreds of pounds to buy a trap; so I had the bright idea of building my own. You know how hard can it be; a box with a handle (How wrong I was.) So I downloaded so blue prints from the internet and decided to start work on my own.
The plans for the trap are easily found over the internet and scaling up the plans was also relatively easy. But as I did this I realised that this was going to be a much bigger job than I first thought. Now I went for the most detailed plans I could find; but if you are a beginner at this sort of thing you can get simpler plans that will give you a great looking prop at the end of your project. After scaling up the plans I started to visually break down the prop into it key parts, panels and components. This took some time but it was worth it when I can to making each bit. I drew each piece and panel out on paper until I had the whole trap broken into it parts. Then I used these plans to draw out each piece I needed on the material I was using before cutting them out.
A good tip to remember when drawing out your pieces; is to take into account the thickness of the material you are using so you don’t end up having to plain down some of your parts when putting the thing together.
I used a combination of wood, plastic and metal to build my trap but you can use whatever you want and whatever you feel comfortable using. At this point I have to thank the staff in the workshop at the Sage Gateshead for their donations of scrap materials; which made this project much more affordable.
Thanks gents…
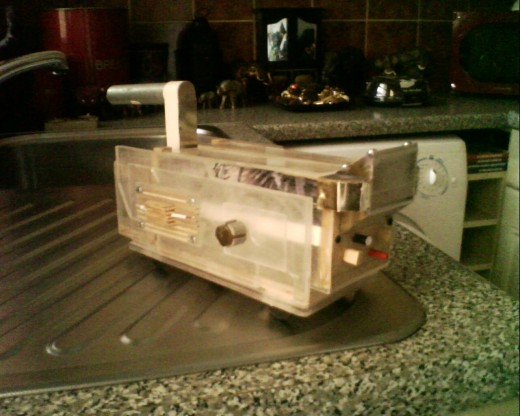
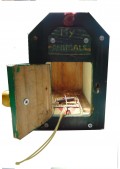
I started by cutting out the pieces for the trap box holder, handle and the base. Once I had all the bits for this section I began to put them together. As you can see from my photos of the project there is a lot of detail in the trap holder and handle before you get to the fine detail of the trap.
Next I moved onto the trap box its self and I found this bit to be much less tasking than the first part of the trap, although the doors can be tricky. If you have followed the plans you should find that the trap holder and box fit together with ease and that your trap is now starting to look like the film prop.
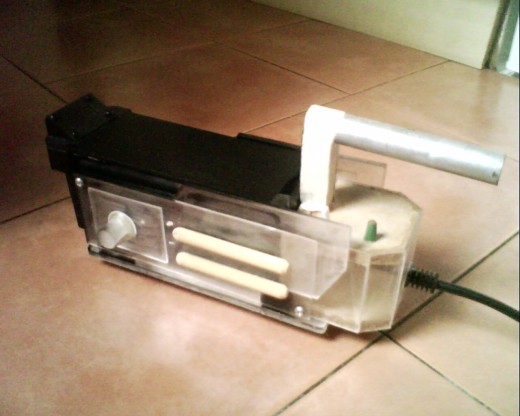
Next I started to deal with the detail of the trap; you know the switchers and visible electronic parts that were around in the 80s. Now again; you can buy these bits over the internet but the cost will build up on the prop you are making. I on the other hand made each piece from scratch using wood metal and plastic. Don’t worry about fitting real electrical parts; as if you want the thing to work then modern technology is much smaller and will fit inside the trap out of sight.
Painting the trap; now this was the fun bit and the bit where the trap really takes on the look of the film prop. I sprayed my trap with black car spray paint as a base colour and then painted on the details and other colours using miniature paints. I suppose that this is a good point to say if you have used wood for your trap and want to make it look like metal; clad your prop with a thin card or plastic to get rid of the wood grain. I used plastic so this was not applicable. But to get a worn metal look on your paint job remember to lightly brush the edges with a silver paint. This highlights the shape and gives the prop a great finish.
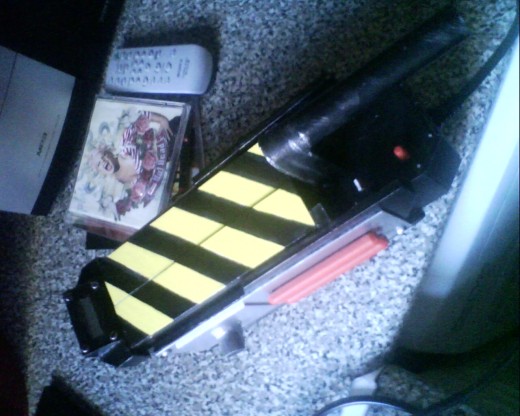
Labels and stickers; this was difficult to source due to the lack of visual references where you can see the words printed on the trap. I found some of the warning signs you can use on the inflatable proton pack you get with the costume; or you can make them up. Who will really ever know?
But you can be sure they do finish the trap off nicely.
The trap pedal was again something to research into but if you go by the plans very little can go wrong. Although you may struggle to get a spring that fits the prop to its exact size. But again ask your friends what the peddle looks like and I bet they can’t tell you.
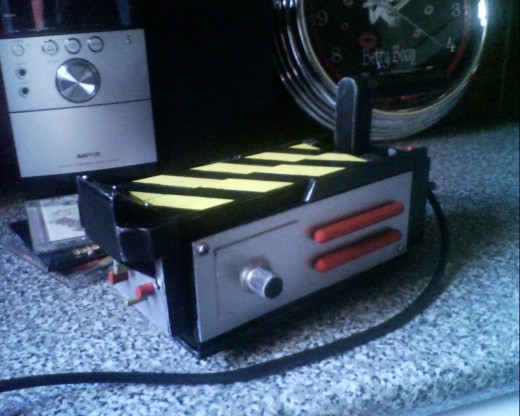
All in all I found this project to be both challenging and fun; and I’m sure you will agree that from the photos I have added of my ghost trap it was all worth it in the end. Also the whole thing cost me a total of £9.00 (yes under a ten pound note) which is pretty good as they can sell for up to £200.00.
Now that made me smile even more. So maybe I will build the Proton pack and gun next?


: The Etching and Encryption of Dynasties I to IV")

