A Beginner's Guide to Beginner's Piano

A Different Language
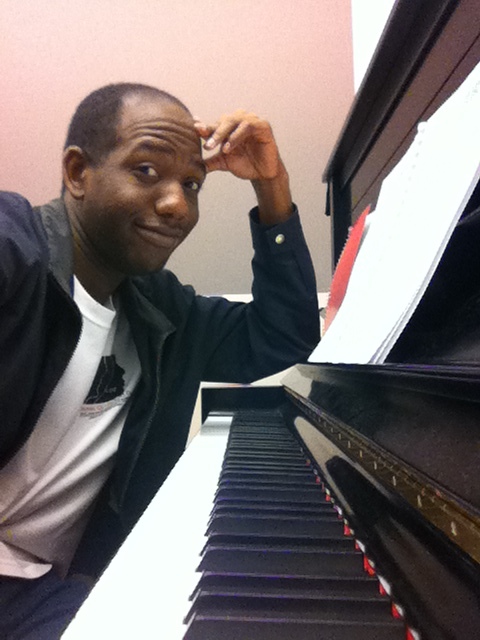
It seems like forever that I've wanted to learn to play the piano. For a long while, my forté was pecking out "Happy Birthday" with one hand. During this past spring, however, I took a beginner's piano course. Picture this: a small room containing nothing but me, my tutor--who seemed to come out of the womb playing the piano--, and a sleek Steinway piano, like the one in the picture.
I soon learned that my hands spoke a completely different language from the new, formal language that my tutor was trying to teach them. My pinkies--the stubborn things that they are-- always stayed up in the air, and the rest of my fingers tried to imitate the fluid, jazzy motion that they saw on tv. But little by little, I gained more control over my hands and learned to play a few songs with both hands from memory. I've said all of this to simply say that if the piano is new to you, learning it will be like learning a different language. Just as you must learn to control your lips and tongue for French or Spanish, you must learn to control your fingers and hands for the piano. It takes time!
Getting Started with the Notes
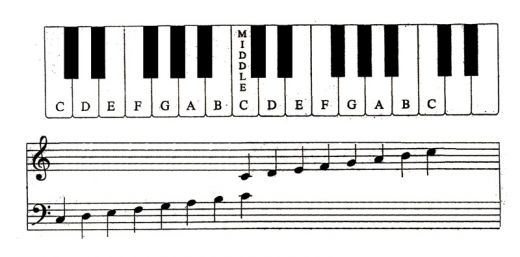
Naturally, I started off at a snail's pace. Though years of playing the trombone had accustomed me to the bass clef (the one that looks like half of a heart), the notes of the treble clef (the one that looks like a fancy S or G) are my Achille's heel. However, aside from recognizing the note on the printed sheet music, I think that learning how the notes lay out on the actual piano keys are essential to learning to play. So, here's the first step: get acquainted with the notes and piano keys.
The treble clef notes--the staff on top-- are played by the right hand while the bass clef notes--the bottom staff-- are played by the left hand.
Your Fingers on the Keys
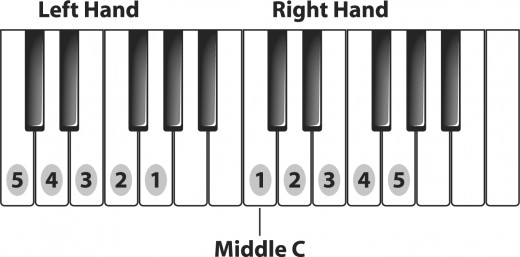
Next comes the part where you actually get to touch the piano. You must know, however, that your fingers have certain positions. To begin, it'll be important to know the assigned numbering for your fingers:
- Thumbs: 1
- Index fingers: 2
- Middle fingers: 3
- Ring fingers: 4
- Pinkies: 5
With the numbering in mind, now arrange your fingers on the keyboard according to where they should fall. Start in the middle of the keyboard--the right thumb on what's called middle C. Remember to always keep your fingers curved; otherwise, your thumb might not be able to reach the keys. This was/is my problem. My thumb, with a mind of its own, never wants to stay on the key; it always wants to hang off the edge. Stubborn fingers!
A snapshot of my beginnings
Time to Play
Okay. Now that your fingers are in the right place, I suggest trying to play a simple scale, one hand at a time. For the right hand, move from left to right, or thumb to pinky (CDEFG) and then back the other way (GFEDC). For the left hand, move from left to right, or pinky to thumb.
Now, once you become accustomed to these separate playings, I suggest trying to play the scale with both hands. You should notice that while the left hand starts with the pinky, the right starts with the thumb. Get used to this feeling--this parallel motion of hands. Both hands are moving in the same direction.
After a while, you might then find yourself ready for the contrary motion and then much more complexity. However, I'll leave that up to more experienced musicians. For now, though, my video may help you visualize how the progression goes.
My most recent accomplishment (still a few dings, though)
Parlez-vous "piano"? (Do you speak piano?)
I'm proud to say that I speak piano a little. It's truly refreshing to be able to say that I am accomplishing one of my many goals. Was it challenging? Yes. Was it annoying how the instructor seemed so fluent in the language while I struggled to spit out a syllable? Absolutely. But, through it all, I now can play simple songs like "Alouette" and "When the Saints Go Marching" and am on my way to learning more.
So if you're on this musical journey with me, don't stress out. Take it one key at a time.
The book I'm using

Don't have a piano?


