A Hobby guitar builder’s guide: Tools of the trade

Measure twice, cut once.
You will need tools to measure with, I use and recommend a good metal yardstick it will do double duty and be used as a straight edge for making center lines and marking bridge placement. A good precision marking ruler will come in handy and so will a 6" Utility Caliper. A 6 in. Digital Caliper is cool to have but is only necessary if you are going to be doing custom scale lengths.
Build an electric guitar from scratch?
Many of you have probably wanted to build an electric guitar from scratch yourself, you most likely looked up a few tutorials on line or maybe even bought a book on the subject and after a few minutes of reading and some research you though to yourself “This is going to take a lot of special tools that are extremely expensive and there is no way I can afford them” many of the articles and tutorials on the internet can be very bias and most of them are trying to get you to buy something from them or one of their sponsors and the books are written by seasoned professionals that have well equipped shops and they have forgotten what it is like to be an average joe with a fold out workbench in his driveway. So we are going to take a look at what tools a weekend warrior will need to make a nice electric guitar, you won’t need to spend $10k you may be able to get everything for around $100
A good assortment of clamps will come in handy
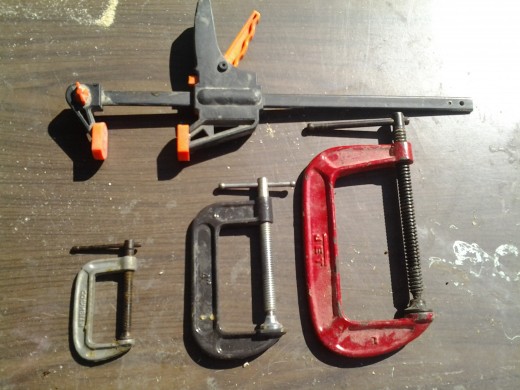
You can never have to many clamps
If you plan on gluing up your own guitar body blanks you will need an assortment of clamps. a set of 18 inch sash clamps and 6 or 8 C clamps of various sizes should do the trick. You could also use spring clamps to glue fretboards to the guitar neck and also glue tops on the guitar body.
Cutting out the guitar body and neck
The first thing we will need to talk about is cutting out the shape of the guitar body and neck. You could get a large good quality coping saw but for a few bucks more you could get a good jig saw that would make the job much faster and a lot more enjoyable, what size I need you may ask, 4.5-7.0 amps and the cost, new $30-$50 you can look at a pawn shop or even yard sale and you could pick one up for $5-$20. You can also use a wood router to cut out the shape it will be a little more time consuming but if you don’t already have a jig saw it will be one less tool you will need to buy, what size and style, a small trim router will do the job it will just take a little longer because you will have to do a lot of sallow passes, cost: about $30. A 1-2 HP fixed base router for about $50 will get the job done much faster. A 1.75-2.25hp plunge router will be the quickest and easiest to use but will be $75-$300.You could use a hammer and chisel for the control area, pickup and neck slots, you will need to be careful and if you take your time you can do a good and accurate job. You should already have a hammer and a good chisel is less than $9.
All the power you need.
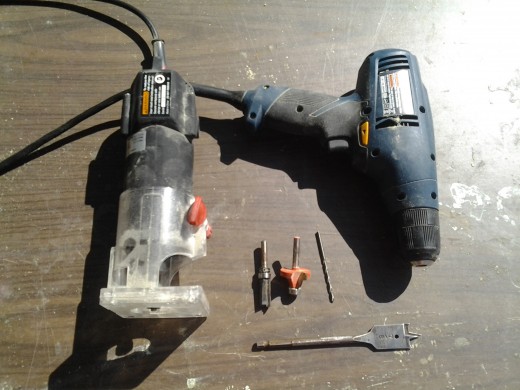
I got the power (tools)
If you don’t have one you will most likely need a power drill and a good set of bits. You will need one extra-long bit for drilling the hole that connects the pickups and control areas. Don’t worry about needing a drill brace, a cheap one will be inaccurate and a good one is expensive just search the internet and you can find ways to make one that will be as good or better than a store bought one.
Plunge router in action
Carving tools
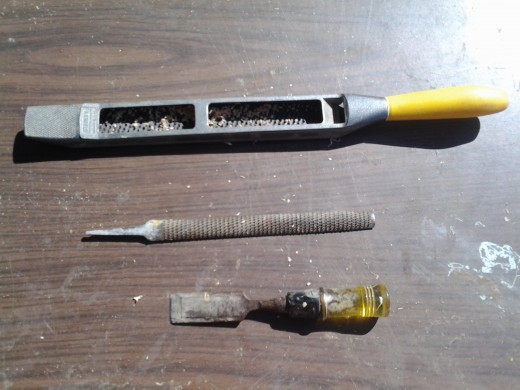
Basic tools for carving the neck and body.
Unless you're like me and you like a neck that is almost square and a slab style body then you will need some tools to carve the neck out and put comfort cars on the body. A sure form will make quick work by removing most of the wood then you will clean it up with a good rasp and sanding blocks of various grits.
My fretting tools, inexpensive but vary effective
$1000 Worth of tools
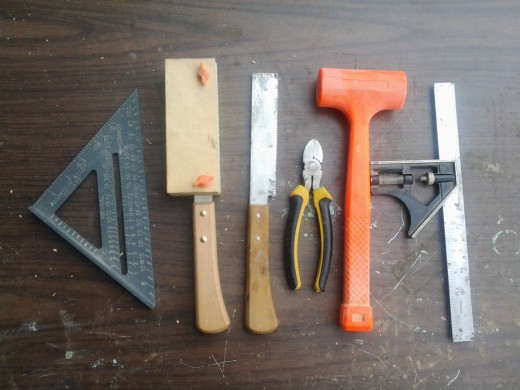
Building a guitar neck from scratch is going to require the most tools. Do a quick search online and you will find that most guitar builders will recommend about $1000 worth of tools for working on and making a guitar neck, but you can spend a lot less and get what you need to do a good job. First you will need a flush trim saw it’s just a hair thicker than a fret saw and you can get one online or at you local harbor fright store for less than $10, you will use it and a square to cut the slots in the fret board. A 1lb-3lb rubber dead blow hammer will set the frets just fine without putting a bunch of dings in them and a set of modified wire cutters can nip the fret ends flush with the fret board. A good large flat file and a set of diamond hobby files will work for cleaning up the ends and tops of the frets. You can also use the flush trim saw a hacksaw and the hobby files to slot the nut.
Sanding & finishing
Power sanding equipment is nice to have but the cost adds up quick so I recommend using sanding blocks, they are just flat blocks of wood with sandpaper sticky taped to them. You can also get sanding pads and drums that you use with a power drill and if used right will give good results.
As far as spry and finish equipment go you won’t need them, a hobby builder will only need to use spray cans or rubbed on finishes. If you really feel the need to spray a custom nitro finish a prevail power sprayer is less than $10 and will get the job done.
For final assemble and set up a good set of screwdrivers, a small adjustable wrench and soldering iron should do the trick.
One tool that can do it all (almost)
The router is going to be the one tool I am going to really recommend you have. You can cut out and shape the body and neck with a router and you may also want to use it with an edge guide to rout the channel in the neck for the truss rod and it can be used with templates to rout out the neck slot, pickup and control areas on the guitar body. With the right jigs you can do just about everything with the router. You can edge joint the wood for the guitar body blank, level the guitar body blank to proper thickness, radius the fret board and with the right bit you can drill the holes for the bridge and neck screws and even rout for binding and the inlays. About the only job you can’t do with the router is slotting the fret board for the frets.
Tips from a Pro that was a novice.
I have a few tips to help keep the cost of tools down, if you are going to use a router there are only 2 bits you are going to use, a straight bit with a top guide bearing and a round over bit with a bottom guide bearing their size and length will depend on what style of guitar you are building. A 120 piece drill bit set may sound handy but you will only need 3 drill bits for most guitar making needs a small 3/32nd for drilling pilot holes for most bridge screws, an extra-long ¼” bit for connecting pickup and control cavities and a 7/8” for drilling the side mount output jack. most builders will recommend buying readymade guitar body blanks, but there are many places that sell s4s lumber that is ready to be glued up that is sized right for a guitar body and it will cost 30%-50% less than readymade blanks.


