My Adventures in Cheese Making and Present and Past Stories of The Good Old Days on the Farm

Family Background
If you read my profile, you know that I grew up on a farm. There were nine of us children, six boys and three girls. I was the youngest. We all had assigned chores. For example, the boys worked in the fields and the girls helped our mother with the housework, the gardening, the poultry, and everything else associated with homemaking.
One summer, when I was in high school, I milked the cows when my brothers were late coming in from the fields. I earned a Bulova watch for this uncharacteristic assignment. At that time, we had a Brown Swiss, a Guernsey, and a Jersey. The Guernsey was a bit hyper but our father had stanchions in the milking area to secure their heads and necks. My fingernails were fairly long at that time and, though the cows' heads were restrained, they were able to switch their tails mightily and attempt to kick over the milk bucket which I held between my knees. Since she was very agile, the Guernsey was sometimes successful with her kick and rump movements.
We had a milk separator which was a large and very complicated piece of equipment (with many smaller pieces) but often my mother just skimmed off the cream with a large spoon. Washing the separator was quite a chore, especially without running water in the house. We also had to heat water on the wood stove which took quite a bit of time. I assume my mother washed the separator after its use as she was a fanatic about clean utensils. I know that I never did. Remember I was the youngest of nine and, by then, she picked fewer battles. I did, however, take the full cream cans to the highway on my way to school (for the creamery pick-up) and retrieved the empties on my way home. For this reason, I was one of the few kids who had a car at school but the downside was that I also gave off a whiff of dairy scent most days. This may be why I don't drink milk.
Life on the 'farm' in Colorado
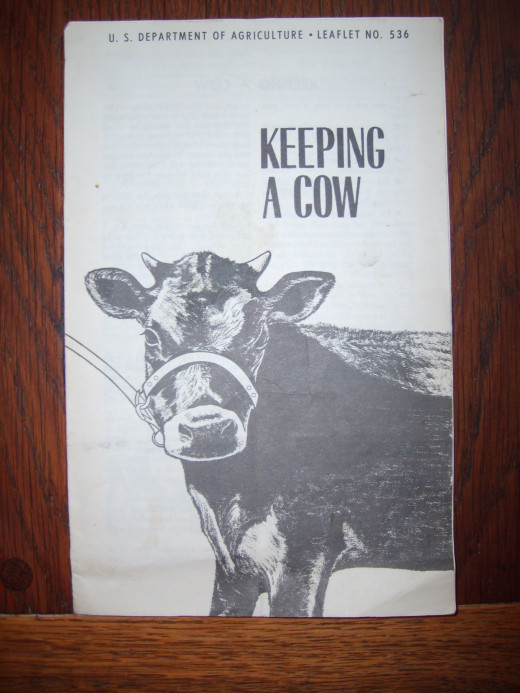
Again, if you read my profile, you will know I moved to Colorado and was married there. My husband Crow (a pseudonym for the sake of his privacy) grew up in the city, with utilities and a phone, none of which we had on the farm. Imagine my surprise (shock) when he said one day that he would like to buy a milk cow so that there would be milk to drink (ugh!!!!) and beeves to butcher (yuck!!). Even though we had two or three acres with an old house, I didn't take him seriously but then I saw he had picked up the booklet pictured on the right. One day, soon after, he went out with a friend and came home with a Brown Swiss named Sweet Pea. Luckily, the friend had milked cows and demonstrated this art to Crow. I insisted on purchasing a strainer and a pasteurizer but, good grief, what does a couple with three very small children do with five gallons of milk daily!! If we had had pigs and chickens, we could have fed some clabbered milk to them but I was NOT about to mention THAT option.
Crow's suggestion
After Sweet Pea successfully gave birth to a healthy calf and began to produce even more milk, my helpful spouse suggested that I consider making cheese. The only cheese my mother had made was some type of cottage cheese. The raw milk was clabbered and the curds were heated. She then hung the curds in a cheesecloth bag from the wringer of our gasoline-powered washing machine. I never ate any.
I was young and full of optimism, however, and decided that I would be able to make great cheese. I found a variety of USDA booklets on making cheese at home, some library books, and, on a trip back to my roots, I talked with neighbors who had cheese-making experience. I was sure I understood the whole process and was ready to go with it.

What cheese should I make first?
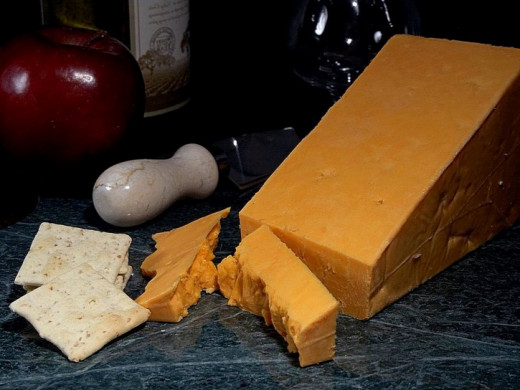
After reading through instructions available in library books and my booklets for the umpteenth time, I decided that a semi-hard white cheese would be a good beginning. By the way, did you know that cheese is not any darker (or more yellow) than the milk it is made from? Cheese is pretty much white until a color is added. Previously, I had not given it much thought until a friend stopped by, saw a sample of the white cheese, and asked how I got it so white (see the picture on the right).
Materials I used
- cow's milk -- Since the milk had been through a pasteurization process, I used a buttermilk starter and then rennet was added to cause curds to form. Before the separation of the curds and whey, we called this 'clabbered milk'. Whole milk from the store works well for your beginning cheese.
- rennet tablets -- Enzyme tablets that can be purchased at a grocery store. I always used the tablet form but a liquid is now available and I understand there is a vegetable rennet available also.
- strainer/colander -- I preferred stainless steel but did not have one like that so used an aluminum one with several layers of cheesecloth inside.
- cheesecloth -- I bought mine from a fabric shop and always washed it with mild soap and warm water and dried it well..
- paraffin or wax -- I used warmed paraffin to cover the cheesecloth-wrapped cheese before aging.
- cheese thermometer -- When on the hunt for materials, I saw a cheese making kit at a garage sale and the thermometer I used was in the kit.
- curd cutting knife -- I used a slicing knife and and long-bladed spatula for this purpose.
- Miscellaneous supplies: a long handled slotted spoon; large stainless steel bowls and pots; measuring cups and spoons.
- Cheese press
The directions below are for a a white cheese that is a fairly hard cheese but easy to make:
- Heat one gallon of milk in a stainless steel pan to 84 to 86 degrees F. Stir frequently or constantly to make sure the milk does not scorch.
- Add the starter, 1/2 cup ... I used buttermilk purchased from the store. Keep the temperature between 84 to 86 degrees.
- Add the rennet ... 1/3 tablet dissolved in 1 cup of cool water. Crush the rennet to make it easier to dissolve. I suggest non-clorinated water. Distilled water would work well. Stir a few minutes to make sure it mixes well in the milk.
- Cover the pan and let set undisturbed for 40 to 60 minutes, keeping the temperature at 84 to 86 degrees. At the end of this time, remove the cover and test the curd for firmness. To do this, insert your finger into the mixture about two inches. Bend your finger upward and lift; if the curd breaks apart, it is ready to cut. If it does not break well, let set longer and check periodically.
- Cut the curd with a long knife or spatula that reaches to the bottom of the pan. Cut the curds in about 3/8 inch cubes. In the other directions cut, the best you can, across . Stir for about 15 minutes, from the bottom to bring up and cut any that are longer or larger than the 3/8 inch size.
- Start heating the curd, raising the temperature from the 86 to 102 to105 degrees ... this should take about 40 to 50 minutes. Stir gently six or eight times; being careful not to scorch the mixture. Check the curd by squeezing it between your fingers. If it crumbles, it is ready to dip.
- Dip off all the whey you can remove, down to the curds. Tip the pan hold the curd to one side to drain it and dip off more. When the whey no longer drains, add one tablespoon salt and continue stirring until the curds stop draining.
- Line a colander with layers of cheese cloth and place the curd in that. After draining stops, gather the cloth and tighten it around the whey. The cloth should not be wrinkled if you plan to leave it in the cloth for pressing. Otherwise, you can force it into a container similar to a small brick or round cylinder. One end needs to be ajar so that the whey can continue draining if needed. During the workshops I gave, I used different utensils to show that, when making a first cheese, one didn't need to buy something expensive. No matter what we used, the cheese turned out fine. If you really get into cheese making, evaluate the different presses available before purchasing.
- Make sure the cheese holds it shape when removing it from the press. Rinse it with warm water and check for cracks or holes. If there are some, dip the cheese in very warm water to remove these and again press to stabilize the cheese. Let set for about 90 minutes.. Again, check for cracks and, if none, set on a dry cloth and dry for one week at about 60 degrees.
- Wrap in cheese cloth or plastic wrap and cover with wax. Cure for ten weeks at 45-60 degrees.
Differences in cheese types
The chart below demonstrates why cheeses are different; for example, curd size when cut, culture amount and types, temperatures, and times during heating and resting. The pressing, curing, and aging also changes the taste and texture. When making your first cheese, keep it simple and make two or three batches of the same type spaced over days or weeks.
1 gallon milk
| Cheese Type
| Monterrey Jack
| Colby
| White
| Pizza
|
|---|---|---|---|---|---|
Heat
| Bring milk temperature to
| 86 - 88 degrees
| 84 - 86 degrees
| 84-86 degrees
| 90 degrees
|
Add culture
| Buttermilk
| 1/3 cup
| 1/3 cup
| 1/2 cup
| 1/4 cup
|
Let set
| Time & temp. held
| 1 hour @ 86-88 degrees
| 1 hour @ 86 degrees
| 1 hour @ 84-86
| Do not let set; continue to next step
|
Add Rennet
| Rennet amount
| 1/3 tablet
| 1/3 tablet
| 1/3 tablet
| 1/4 tablet
|
Let set
| Time & temp held
| 45 min. @ 86-88 degrees
| 30-45 min. @ 86 degrees
| 40-60 minutes @ 84-86
| 30 minutes @ 90 deg.
|
Cut curds
| Curd size
| 1/4 inch cubes
| 3/8 inch cubes
| 3/8 inch cubes
| 1/2 inch cubes
|
Heat to
| Heating curds
| 100 degrees for 1 hour
| Slowly heat to 100 deg; cool to 80
| 102-105 for 40-50 minutes
| Raise to 118 deg. IN 45 min.; hold for 15 min.
|
Pressing, curing, ageing steps
| Press - 24 hours
| Press- 24 -30 hours
| Press - 1-1/2 hours
| Brine for 24 hours
| |
Dry - 2-3 days
| Dry - 3-4 days
| Dry - 1 week at 60 degrees
| Dry overnight
| ||
Wrap in cheesecloth & wax
| Cover & wax
| Wrap in cheese cloth & wax
| Can be used right away
| ||
Cure: 6-8 weeks @ 55-60 degrees
| Cure: 2-4 months @ 55-60 deg.
| Cure - 10 weeks or more at 45-60 degrees
| |||
The wood stove

Cautions, precautions, and successes
I am also a fanatic about cleanliness and hygiene so I thoroughly washed everything I used. When giving workshops, I always began with an admonition to start with clean utensils and be sure to keep all work places clean as well.
During the time I made cheese at home, the results were a very nice white cheese (semi-hard) and a great Monterrey Jack, one of my favorite cheeses. Since I loved making the Jack so much, I wanted to demonstrate the steps during a gathering at a popular pioneer event. We all stirred, cut curds, drained, squeaked, wrapped, and had a great time. Of course, we were not able to taste that particular batch because it wasn't ready, but I had brought along some blocks I had made previously. Everyone loved it and wanted to know the variety. I couldn't tell them what kind of cheese it was but did give the history, which follows:
One morning, I decided to make cheese for the workshop I was signed up for. I wanted to have something special (as I always attempted to have for the people). I was at the stage of heating the milk after adding the starter and rennet, and set the pot on the open oven door of our wood-burning stove. The weather was quite cool and I had a fire going in the stove.
Before the milk reached the allotted time, the phone rang. A man said a name that I did not understand but he kept telling me calmly not to hang up because he had the right number, though my name might be wrong. My neighbor had had a heart attack in a grocery store parking lot as he was walking by. My neighbor's wife was ill with Parkinson's disease or something very like it. She used a wheelchair and was unable to speak clearly but was able to say my phone number so that he could understand. The man asked that I call a relative, that it was extremely necessary. I called their son who lived in another state, emphasizing what I had been told. After gathering my keys and purse, I noticed the pot of milk and just put it in the refrigerator. I left the hospital when the son arrived at 11:00 that night. I remembered the refrigerated curds and when I arrived home but just left them in the refrigerator. The next morning, I went on with the cheese-making process as if there had not been an interruption. It was the best cheese I have ever made.
My adventures continue and yours begin
I don't make cheese at home now. The most difficulty I had was with an appropriate environment in which to age the product. Otherwise, it was such fun and I felt incredibly talented. I also enjoyed giving the workshops ... I met so many great people when doing that!.
If any of you decide to make a cheese product, either purchase a cheese-making kit or just follow my directions. If you want to learn more, check out a well-written book from the library and make a white cheese or Monterrey Jack from one. Follow those directions carefully, tuning out superfluous comments and it will turn out fine. You can branch out later. Remember that the primary differences in the end product is how the curd is cut and the temperatures along the way ... as what happened with 'my neighbors cheese'. That will be your adventure in cheese-making. Just have fun with it!!!