Beginner's guide to Water Bath Home Canning

Canning food is fun, frugal and very satisfying, but it can also be intimidating when you are first learning. I suggest learning from a friend or older family member--I learned from my grandma, but if you don't have anyone to teach you, you CAN teach yourself. This hub will provide you with all of the basic information you need to know to start canning today!
Why Can Your Own Food
People usually start canning for one of two reasons. First, home-canning is a frugal way to preserve high quality food in your home, as canning homegrown food can save you half the cost of commercially canned food (from the USDA). Second, home canned food is often healthier than commercially canned food. Most store-bought canned foods are high in sodium, and can be very low in vitamins if not preserved within the first few days of harvest. Home-canned foods can be:
- Low sodium
- MSG Free
- Altered to match your families exact tastes
- frugal
- Combined to compose Gift Baskets for frugal, but thoughtful Christmas and birthday gifts.
- Satisfying--There is something about the process of turning food from your garden into a delicious meal for your family that makes you feel connected to life.
A Note about Canning Low-Acid Vegetables
Many older home canners, having learned from their mothers, can low-acidity foods using a water bath canner. My grandmother has canned green beans and corn for 50 plus years using a water bath canner. I feel comfortable using her recipes; however, the USDA suggests using a pressure canner for canning low-acidity foods due to the survival of botulism bacteria, a deadly type of food poisoning, up to 240 degrees. Look under the "Links" section below for information from the USDA. Please always use caution when canning your own produce and follow USDA guidelines.
How Does Canning Preserve Food
Canning basically sterilizes the food inside the jar, and keeps oxygen, mold and other bacteria from reaching the food. With proper canning practices, the home canner can be reasonably assured that their food will preserved for about one year. These practices include: (adapted from the USDA website)
- Selecting quality produce and washing fresh food well
- Peeling some fresh foods
- Hot-packing many foods
- adding acids like lemon juice or vinegar to some foods
- using sterilized jars and self-sealing lids: jars can be sterilized by boiling them in a boiling-water canner for 10 minutes.
- processing jars in a boiling-water or pressure canner for the correct amount of time.
- Store jars below 95 degrees (Ideal temperature is 50-70 degrees)
These practices remove oxygen, destroy enzymes and prevent bacterial growth and molds.
Canning Supplies

What You Need to get started
A Canner:
There are 2 types of canners: water bath canner and pressure canner. A water bath canner is a large pot that you heat on the stove, with a rack to keep your jars from touching the bottom of the pot and allows you to lift them up out of the water. A pressure canner works much the same way, but the sealed lid creates pressure, allowing you to can foods such as meat and low-acidic foods safely.
Water bath canners work great for canning acidic fruits and vegetables such as tomatoes, applesauce, fruit jams and jellies, or pickling vegetables such as cucumbers or peppers. My grandma also cans green beans, and corn with a little extra salt, although many canning sites do not recommend it due to the low acidity level--water bath canners do not get hot enough to kill potential bacteria in the air. You can purchase a water bath canner at Walmart, Meijer, or most grocery stores for under $20.
Jars:
Canning jars come in the following sizes: quart (32oz), pint (16oz), 1/2 pint (8oz) and jelly jars (4oz). Jars usually come in boxes of 12 (except for 4 oz jelly jars, which sometimes come in packs of 4) and cost between $7-$12 depending on the size of the jars. All Jars-no matter what the size-come in two standard mouth sizes--wide mouth or regular mouth. The mouth size you choose is a matter of personal preference. I think that wide mouth jars are great for canning green beans, pickles or jams, while regular mouth works great for anything that you pour, like applesauce or salsa. Jars come with one set of rings and disposable lids. The jars and rings can be reused, but you will need to use new lids every time you want to seal the jar. Lids come in packs of twelve that cost about $2.50-$3.50.
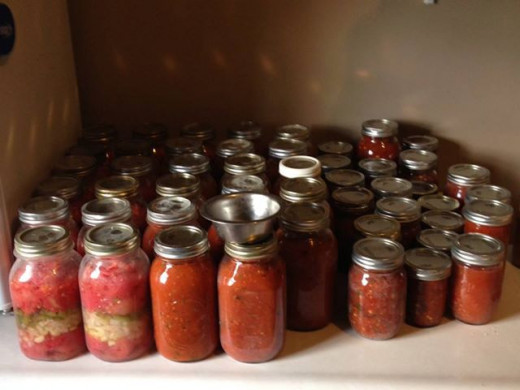
Canning Funnel:
A canning funnel is a funnel whose narrow end just fits inside of a small mouth jar. Funnels are very helpful when canning tomato products, jams and jellies.
How to Can Foods
Although exact steps vary greatly depending on what is being canned, the following holds true no matter what you are canning.
- Fill water-bath canner with water (water level should be about 1" above jars) and turn burner on to bring water to a boil.
- Prep the contents. You may need to peel and/or chop your produce. Perhaps you are making a sauce or jelly. Get everything ready to can ahead of time.
- Sterilize your jars
- Fill jars with either hot, prepped foods, or raw foods, depending on recipe, and wipe jar rim clean and dry.
- Place lid and ring on jar. Screw ring on, leaving 1-quarter turn unscrewed.
- Place jars in jar rack and use the handles to lower jars into the water.
- Turn heat to its highest setting, and cover the canner. Start timing once water is boiling. If temperature drops below boiling, bring temperature back up to boiling and restart timer.
- Remove jars and place them on a towel, allowing 1" space between jars. Leave undisturbed until cooled.
- Jars should seal within 20 minutes, and cool in 12-24 hours.
Tips for Ensuring a Good Seal
- Wipe down lids with a dry paper towel just before attaching to jar
- Wipe jar lip clean and dry before attaching lid
- Don't leave too much headspace--1/4" for jams and jellies, 1/2" for fruits and tomatoes, 1" for low acid foods
- Process jars for the proper length of time as listed in the recipe.
- Never try to re-use lids.
Sealing Your Jars
Sealing the jars is the most nerve-racking part of the whole process, and for good reason. It's not that it is a difficult process--it actually is incredible simple--but after hours of prep work, it all comes down to one simple, but crucial moment--the pop of lid. That sound is one of the most satisfying sounds a home canner can hear, and so the sealing process warrants a little thought.
The seal on a canning-jar is attributed to two things: one, the canning jar lid itself; and two, the vacuum that is created through the heating process. Canning-jar lids are composed of a disposable lid, which is coated with a slightly sticky rubber coating, and a metal ring which holds the lid in place during the heating process. During the heating process, this rubber coating adheres to the jar, creating a seal. As the contents heat up to boiling, they expand and push the air out of the jar. When the jars are removed from heat and begin to cool down, the contents contract again, creating a vacuum that seals the jar.
How do I know the Jars have Sealed
After removing the jars from the water, look for a bulge where the "button" is. This is the center of the lid. Before sealing, this "button" can be pressed down and makes a small popping sound when pressed. When the jars seal you will usually hear a popping sound. You will not be able to push down the "button" because is will be permanently sucked flat. Jars can seal in the water bath, so don't worry if you don't hear the "pop." If it looks and feels sealed, it is! Jars should seal within 20 minutes. If a jar does not seal, use a new lid and re-process.
Learn More about Canning
- http://www.pickyourown.org/
This easy-to-use web site lists all of the pick-your-own fruit and vegetable farms the U.S., Canada, Britain and other countries Find a farm or orchard near you to pick apples, strawberries, blackberries, blueberries, figs, peaches and tomatoes at be - Produce Buying and Storing Guide
Buying fresh produce is crucial to feeding your family well, as the nutritional value and taste of fresh produce is unmatched by either canned or frozen. Sadly, many people shy away from buying fresh... - UGA Canning Guidelines
Complete information about safe home-canning from the US Department of Agriculture. - History of Home Canning
Prior to the early 19th century, people preserved their food in ceramic crocks, using vinegar, sugar, salt, spices and lard to keep meats, vegetables and fruits from spoiling. Then, around 810, a Frenchman...
Canning Recipes
- Canning Recipes: Spaghetti Sauce
Make and can robust homemade pasta sauce. Preservative, additive, and chemical free, you can make sauce for under $3.00 a jar, less if you grow the ingredients yourself in your own back yard.


