How To Cake Decorate The Easy Way Step 3

Cake Decorating Techniques
Getting started
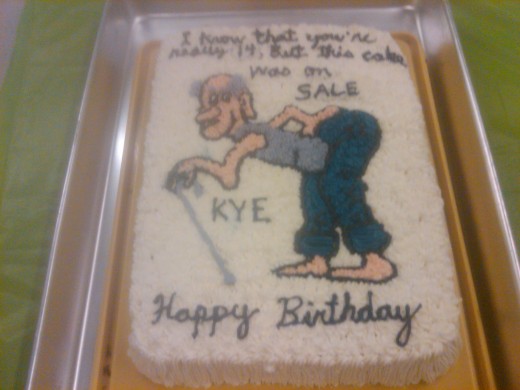
I am going to show you the basic cake decorating designs that you can do with the 3 tips I have mentioned in “How To Cake Decorate The Easy Way Step 1”, which are # 3, 16 and 18. But before I do that I will show you some photos on how to use the coupler inside the decorating bag, and attaching the tips to it. The next is how to fill the bag with icing and how to hold the bag when decorating and what angles are used for doing certain designs. Just keep in mind there are different sizes of round tips and star tips that can give you the same effect but in different sizes. When practicing with these tips or any other tip you use, make sure your icing is stiff enough to work with to get the proper results that you are looking for. If the icing is too soft it will not work. Also the more you work with your designs with the same icing in the bag the softer the icing will get from the heat of your hands. When you find that the icing is getting too soft, squeeze it out over the top of your container of icing, remix it, then put the icing back into the same decorating bag. Keep squeezing a little of the icing back into the container until you get that thickness, then start decorating again. You can also put the icing and the decorating bag with the icing in it, in the fridge to get a little stiffer. When practicing the thicker the better. But don’t have it too thick the icing that you are finding it hard to squeeze out of the bag.


How To Use The Coupler
(Photo 1) Unscrew the coupler.
(Photo 2) shows the coupler inside the bag.
(Photo 3) Cut the tip of the bag so the coupler can go up to the end. To do this when the coupler is in the bag (Photo 2) you take your thumb and finger and press hard along the last ridge of the coupler. Then push the coupler up a bit, you will see the crease then that is where you cut. Then push the coupler back in place.
(Photo 4) You put the tip on the coupler, and then screw it in place.


How to fill and use the Decorating Bag
Next you will be putting icing in your bag. There are two ways you can do this; by holding the bag with one hand and scooping the icing into the bag with the other hand. If you find this hard to do, then there is an easier way. Put the bag inside a glass standing upwards and fill the bag that way. Look at Photos 5 (with hand), and Photo 6 (with glass).


How to use your Decorating Bag filled with icing
Using Your Decorating Bag
Once your bag is filled with icing, push the icing down. Now you want to twist the top of the bag so the icing does not come out while you are squeezing the bag to practice with your tips and when you are ready to decorate your cake. Keep twisting the top of the bag while you are decorating or you will have a messy problem. Photo 7 shows a drawing from the back of a Wilton's box of Disposable Decorating Bags.
In this video " HOW TO USE YOUR DECORATING BAG", shows the 90 and 45 degree angles on how to hold the decorating bag. But this is shown using one hand. But when you are decorating a cake you need to use both hands to get a nice steady flow decorating.This is shown in Photo 8.
Four different Star Tips

")
How to Decorate with the Star Tip
Working With Star Tips
In Photo 9 shows four different star tips: # 14, 16, 18, and 21. Watching the video below will show you how to make the stars on a cake. And when making the stars, you hold the bag in a 90 degree angle (straight up and down) so the stars stand up.
Rosettes, Zigzags, Shells, Reverse Shells, making Fleur-de-lis and making a Rope are other decorating techniques using the star tip. I try to take a picture with those techniques on my cake pan that I have done but the picture did not turn out good enough for you to see what they look like. That is in Photo 10.
To make Rosettes, hold the bag at a 90 degree angle. While squeezing the bag move the tip in a circular motion raising the bag slightly as you go around till you get to where you started, and then stop pressure. Rosettes make nice borders and very easy flowers for beginners.
To make Zigzags, hold the bag at a 45 degree angle (tilting bag slightly). Now while you squeeze the bag move your hand in a side to side motion. Make sure your zigzags are tightly close together. When making zigzags on the sides of a cake, you go up and down with your hand squeezing the bag with an even flow. You might find this a little hard to do, but with practice it will get easier.
To make a Rope, hold the bag at a 45 degree angle. Touch the tip slightly on the surface to the left then lift while squeezing bag towards the right and down, then stop. Now do the same thing again touching the tip next to the first “s” you made and keep doing this till you make your rope. This technique is good for making borders on top of cakes.
To make Shells, hold the bag at a 45 degree angle. While squeezing bag with heavy pressure make a full base to start then pull towards you leaving a little tail then stop. Repeat this shell on top of the tail of the first shell. But I would practice just one shell at a time before you join them together.
To make a Reverse Shell, hold the bag at a 45 degree angle. While squeezing bag make a shell. But instead of pulling straight towards you, make a curved tail by moving the tip to the left to make a curve. Now do the same thing but in reverse. Once you practice these shells separately, then join them to make a border.
To make a Fleur-de-lis, hold the bag at a 45 degree angle. You will be making one shell and two reversed shells to make a Fleur-de-lis. Start by making a shell. Now make a reverse shell starting from the left and bring the tail on top of the tail of the first shell. Now do the same thing making a reverse shell starting on the right side bring the tail on top of the left reverse shell tail by pulling the tail slightly towards you then stop.
Four Different Round Tips

How to us a round tip
Working With Round Tips
The video below shows you how to make dots, lettering, writing, and waves. Straight lines would be the same as making waves, and writing using a steady flow with a 45 degree angle. For the dots, the bag would be at a 90 degree angle. These techniques are also shown in Photo 10 on the right side of the pan.
In Photo 11, shows four different round tips. # 3, 5, 7, 12. Number 12 is good for figure piping. 5 and 7 are good for making the white part of eyes. 3 is the most popular tip. It is used for outlining, printing, writing and making small dots for eyes,etc.
Now that you have practiced using your decorating tips and using the decorating bag , you are ready to go to the final step by putting all the steps together in “How To Cake Decorate The Easy Way Step 4”. This is where you will see the final results of what your cake will look like fully decorated.


