How to Make Buttercream Roses

Making a buttercream rose can be challenging, but with some patience and practice, you will master this poplar skill and be ready to create beautiful works of art out of your cakes.
The kind of buttercream to use all depends on you and what works best for you. I like a dry buttercream, but that may not be the best for you; I suggest you try them all until you find the one that will work well for you.
What you will need
- · Frosting
- · Pastry bag with a coupler
- · Rose tip
- · Flower nail
- · Small squares of wax paper
Step 1
Get your piping bag ready with your rose tip. I like the 122 direction by ateco. The size of your information will affect the size of your rose. The more little; the end, the more minor the finished rose will be. Hold your bag in your main hand for e it is my right hand and your nail in the other hand. Add a drop of frosting to your flower nail and lay a small piece of wax papper on top of your Flower nail. The small amount of icing will keep the wax paper from sliding off. Place the wide end of your rose tip ageist the nail angling in.
Step 2
Squeeze your pastry bag with firm pressure to make slow constant steam, and turn your nail to make one complete circle. It would help if you ended up with a small cone that is fat on the bottom and small on the top.
Step 3
Place the rose tip on the side of the cone you just made; the top of the rose tip should extend slightly above the top of the cone you just made so that the petals will be higher than the center of the rose. Squeeze the piping bag and move the rose tip in a slight arc while you rotate the nail in the opposite direction to form the first petal stop one-third of the way around a start a new rose petal that slightly overlaps the first petal. You should have three petals when you make the full circle. If done right, petals look like they unfold outward from the center and slightly overlap each other.
Step 4
Repeat as above on the next layer; this tie makes five rose petals. Keep making layers n this way until the rose is as large as you like
Step 5
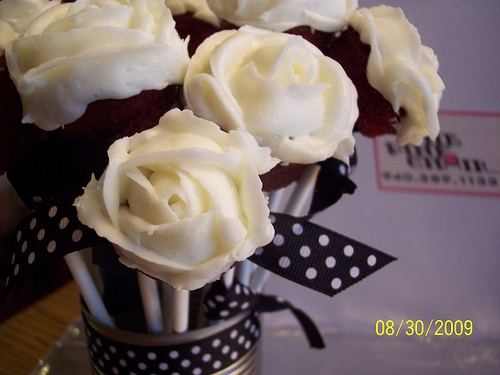
For the last layer, make sure it is neat. Place your petals evenly around your rose, still slightly overlapping. When you are done, remove the rose from the nail by sliding the wax paper off the pin and placing it on a pan. The rose can be left here while you make more. Freeze the roses until they are complex and will be easy to remove from wax paper and ready for your cake.
After you add your roses to your cake, you can pipe some vines and leaves and drop flowers for a nice touch.
What is Your Favorite Icing?
© 2013 Brenda


