How (not) to work sudoku

Let's cut to the chase: the way not to work a sudoku puzzle is to wander randomly through the grid, vainly trying to spot something, anything, that looks as if it might help.
The rub is, if you're a beginner, what else can you do? That is more or less how most of us begin--we don't know what to look for, and so may end up frustrated, perhaps even to the point of just giving up. Here are some strategies to help that early learning curve be a bit less discouraging.
First, full disclosure--as with all my "how (not) to" Hubs, I don't claim true expertise. Rather, I'm sharing the struggles I had to figure it all out, in the hopes of smoothing the way for others. (And, of course, generating a little ad revenue!)
Beginners Only: The Basic Rules Of Sudoku
If you've never attempted Sudoku before, the rules are simple.
1) Every vertical column and every horizontal row must contain one, and only one, of each of the digits from 1 to 9.
2) The 81 x 81 Sudoku grid is subdivided into 9 9 x 9 large boxes--I call them "subgrids." Each subgrid must contain one, and only one, of each of the digits from 1 to 9.
These two basic rules are illustrated below.
Basic Rules Illustrated

Preliminaries
You're going to learn a set of strategies I like to call "CSI"-- but before we get to that, let's organize our approach to the grid. We're going to do that by starting systematically at the top left corner.
First, we'll horizontally scan the top row of three large nine-square boxes--I'll call them "subgrids" from here on out. Once we've scanned them back and forth, we'll move on to the second row, then the third. After that, we'll follow a similar pattern, but scanning vertically: first, the leftmost three subgrids, then the center three, and lastly, the three on the right.
If this description isn't completely clear yet, don't worry; the pattern of scans is illustrated below.
Oh, and one last thing--sometimes the images for the many practice questions in this Hub don't load correctly. They are there, I assure you! Try reloading the Hub if this happens--perhaps after closing out any other applications you may still have running to free up some computer memory.
Scanning the grid
 to bottom (yellow.)")

"C" is for "Cross-reference."
OK, what do I mean by "cross-reference?"
It's the first tool you normally figure out as you try to learn Sudoku: you realize that there are configurations that let you deduce that a certain square must contain a certain number.
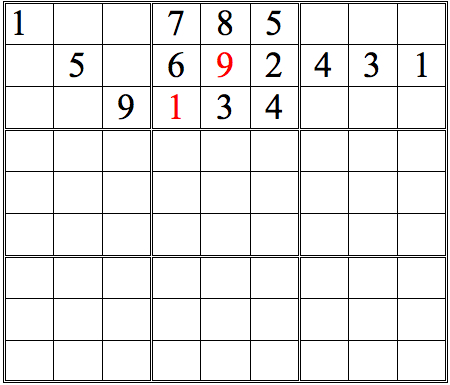
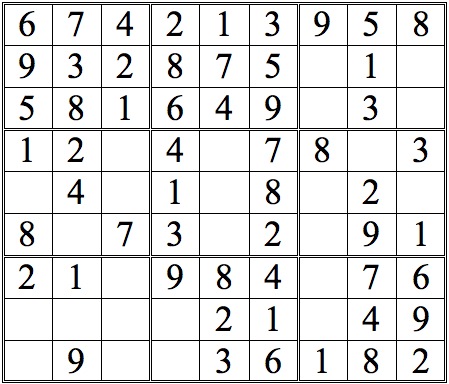
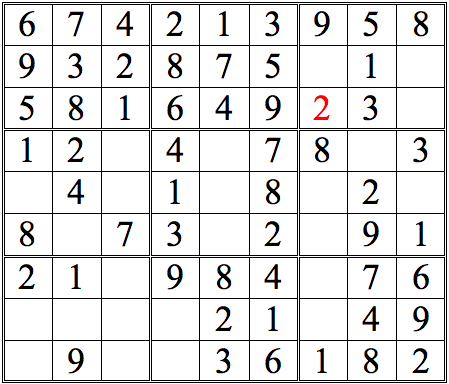
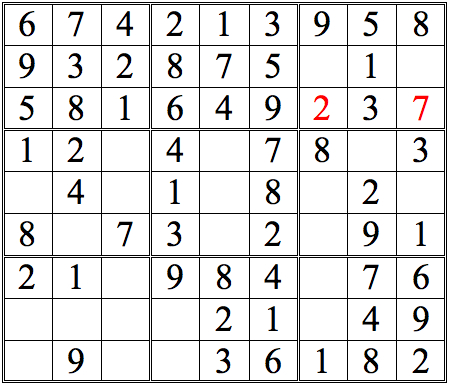
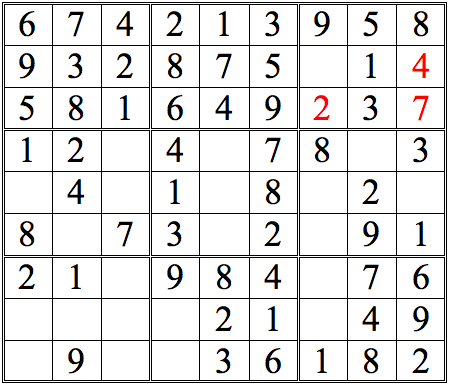
Take a look at Practice Question 1 below. By comparing numbers from the subgrids, it's possible to deduce the position of one digit. See if you can spot it.
(Hint: look first for digits which appear more than once in the area you are scanning--in this example, 1s and 3s.)
- Blank Sudoku Grid
Here is a blank Sudoku grid you can print out. It is the work of this author, and you are welcome to copy, scan or otherwise reproduce it in any way which will enhance your Sudoku knowledge or enjoyment!
For Best Results
One last note: working through the practice questions will give you the most benefit if you really work them!
It's always tempting to just click through the answers quickly, nodding sagely and muttering, "yes, yes, I see. . ." But taking your time, putting real effort in, and thinking through why I chose the sequence of deductions I did--and what other sequence might have been followed!--will be of much more help in actually upping your game.
To help in working through the questions, I've included a link to a blank grid you can print out and work through in pencil or pen. (Yes, I solve in pen--my philosophy is that if you aren't sure, you probably shouldn't be writing it down anyway! And yes, sometimes this leads to scratchovers.)
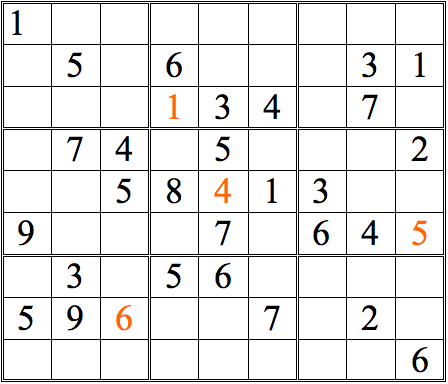
Practice Question 1-how many boxes can you fill?
Click thumbnail to view full-size
")

")
The 1 in the left subgrid eliminates the upper three boxes of the middle subgrid; the 1 in the right subgrid does the same for the middle three boxes. Since only one of the bottom three boxes is open, that box must contain the 1.
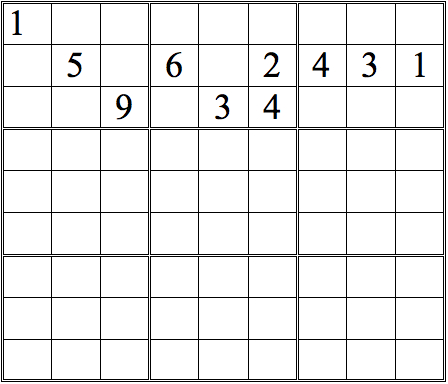
Let's develop this grid further, so we can practice some more. See how many numbers you can fill in in the grid below, just using straight horizontal scans. As before, when you are done, click on the "forward" button to see answers.
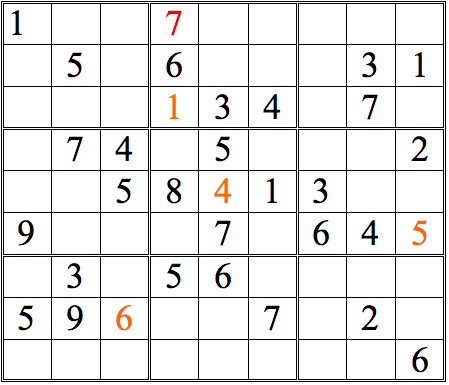
Practice Question 2--how many with horizontal scans?
Click thumbnail to view full-size


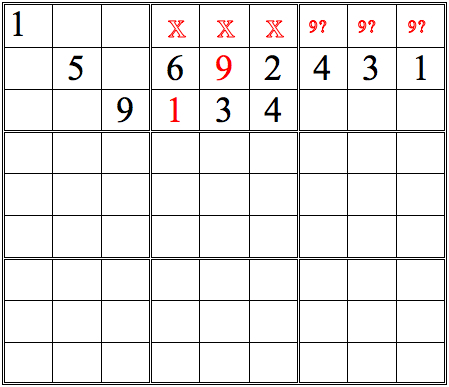
Now see if you can add more numbers by scanning vertically. (The numbers we added in the horizontal scans are now shown in orange.)
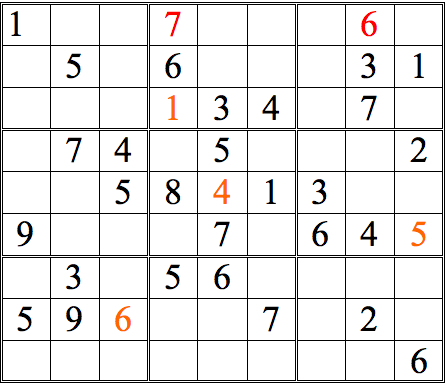
Practice Question 3--How many with vertical scans?
Click thumbnail to view full-size


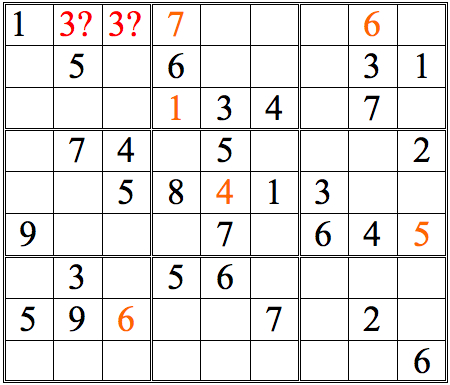
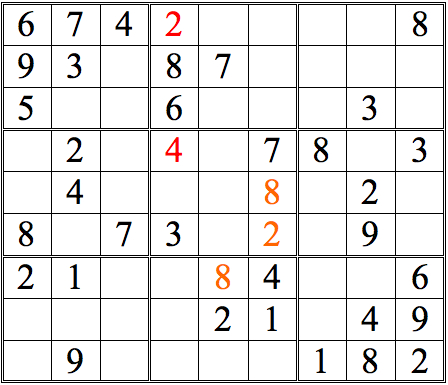
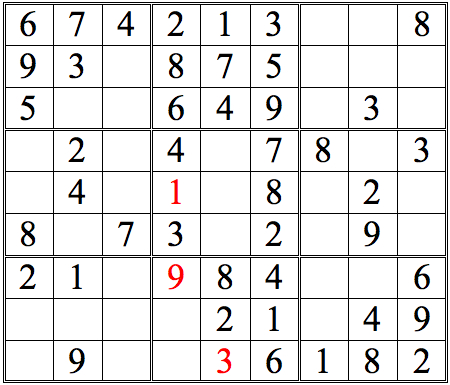
There are just two numbers added with straight vertical scans. However, there are many more squares that can be completed by a more complete form of cross-referencing—one more true to the name. For an initial example, let’s take the 3s in the top row of subgrids. Scanning horizontally lets us conclude that there are two possible locations for the remaining 3, as shown below.
Example 3
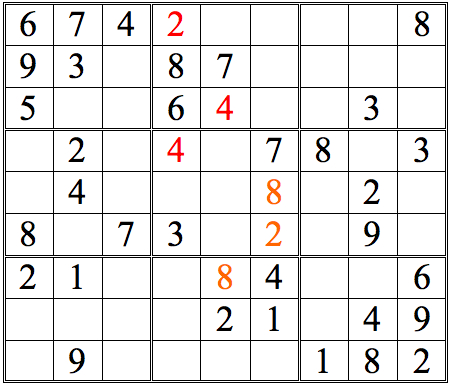
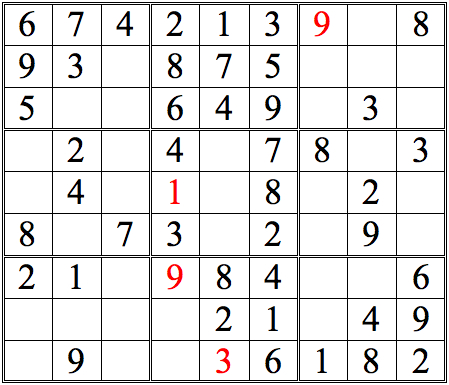
By scanning vertically from the subgrid with the two 3s, one can easily eliminate the left box as a possible location for a three, since that box is ruled out by the 3 vertically under it. Note that this 3, once filled in, implies a new cross-reference. Don’t ignore such implications. Follow up right away—though try not to lose track of where you were in your scanning pattern.
Ex. 4
Now see how many more digits can be added with this form of horizontal/vertical cross-referencing.
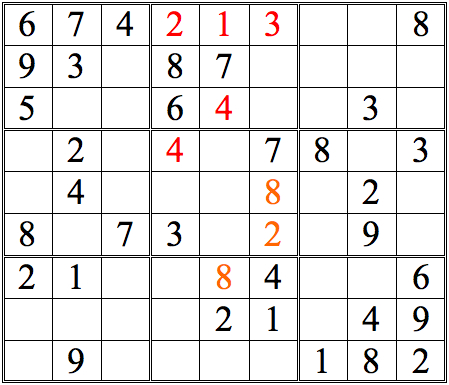
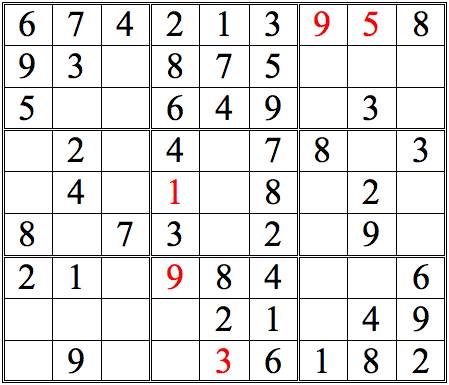
Practice Question 4--cross-reference!
Click thumbnail to view full-size


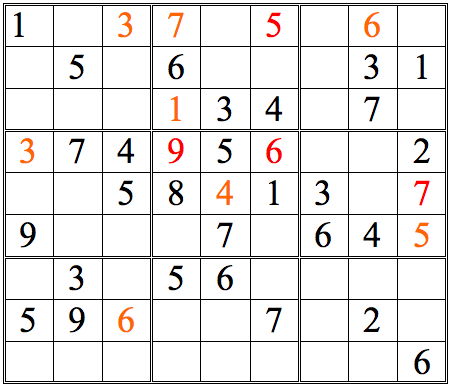

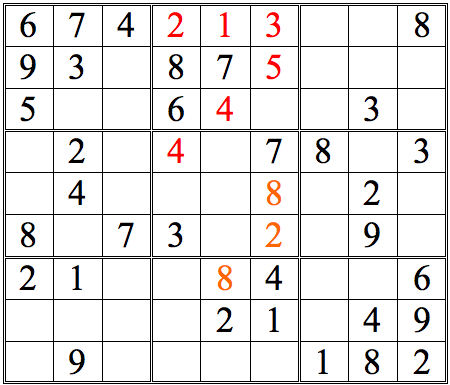
Short answer: lots!
Clearly, cross-referencing is a powerful technique—although it wasn’t enough to finish this grid completely. For that, we’ll need to introduce our other techniques—which we’ll do in a moment. But here’s one last note on cross-referencing, which will let us sneak up on the concept of “Shadows.”
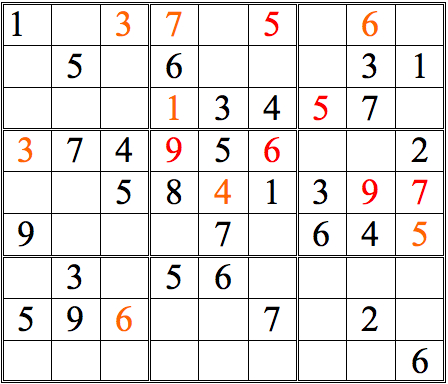
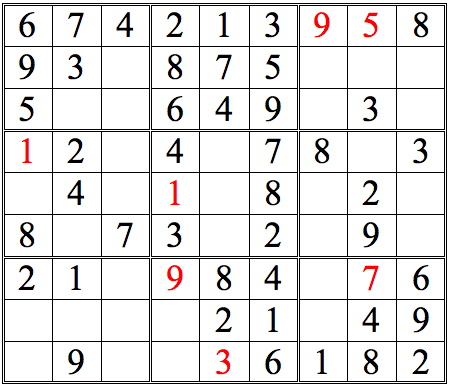
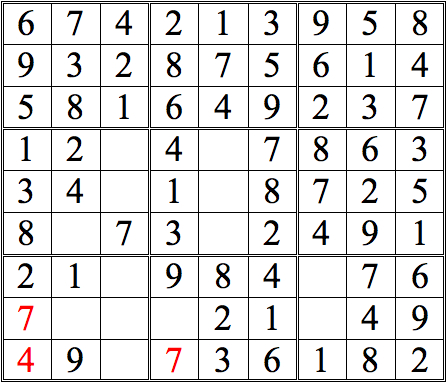
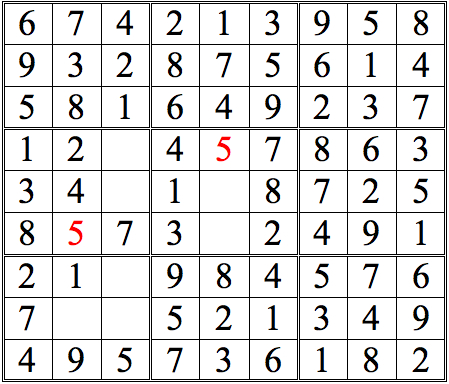
You probably noticed that it’s most efficient to look for rows or columns with two instances of a particular digit—1s, say, or 7s. But sometimes a single digit can be enough, so don’t forget to check singles, too. For example, consider the partial grid below. Can you find the single digit that allows an inference?Practice Question 5--single digit check!
Click thumbnail to view full-size

As you can see, it turns out that two inferences are possible!
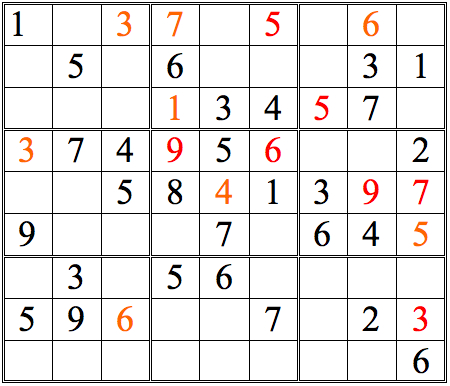
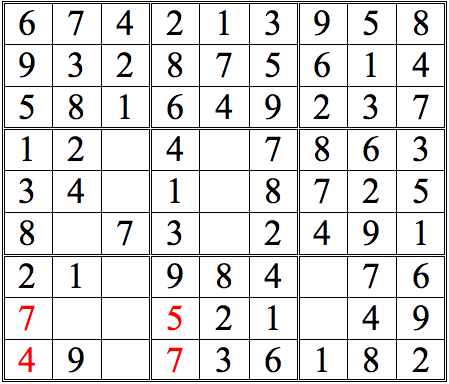
But what if the top row in the middle subgrid had not been conveniently filled in? Would we be “stuck?” Look at the grid without those numbers in the upper row of the right subgrid--and think hard.
Practice Question 6--single digit check, again!
Click thumbnail to view full-size

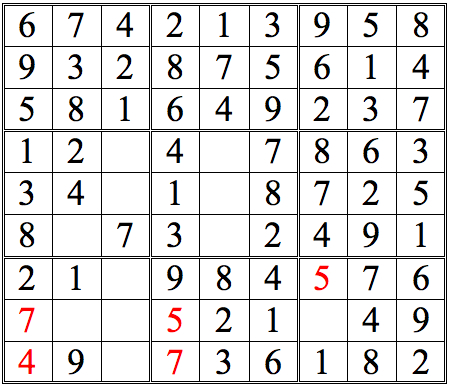
Shadow Theory
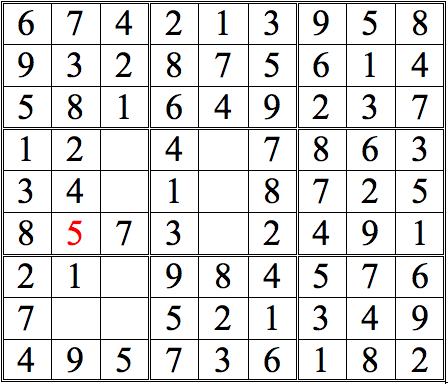
Actually, as we see in this Practice Question, the result needn’t change. The 9 in the left-hand box eliminates all 9s in the lowest row of the right-hand box—which in turn implies that there must be a 9 in the upper row. This then allows us to infer that there must be a 9 in the center cell of the middle box.
This “shadow” effect—in which the knowledge that a particular digit must be located somewhere within a particular row or column casts a “shadow” eliminating locations in another subgrid—is a powerful tool to add to our repertoire.
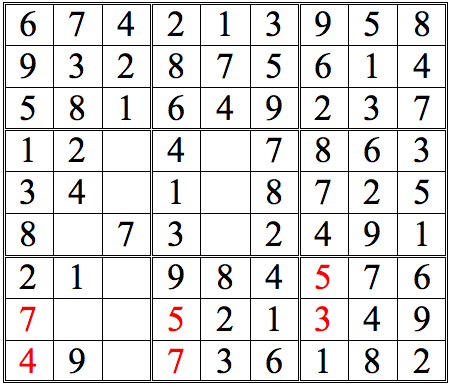
Let’s practice this a bit. For the grid below, it’s possible to determine a digit in the upper right subgrid by using Shadow Theory. See if you can find it. (You may also spot some possibilities via cross-referencing. If so, good!—you’ve absorbed the idea. But the answer below only includes the Shadow Theory result.)
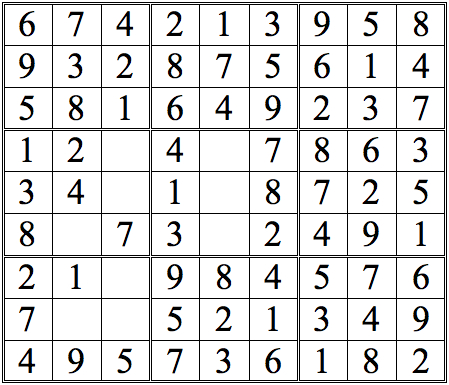
Practice Question 7--shadow theory check.
Click thumbnail to view full-size


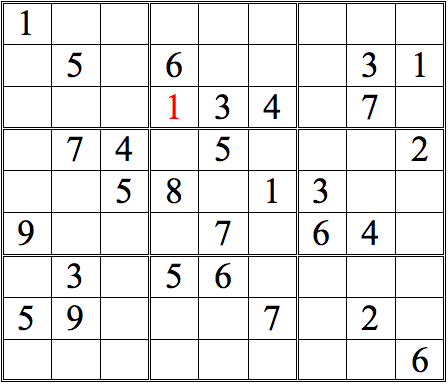
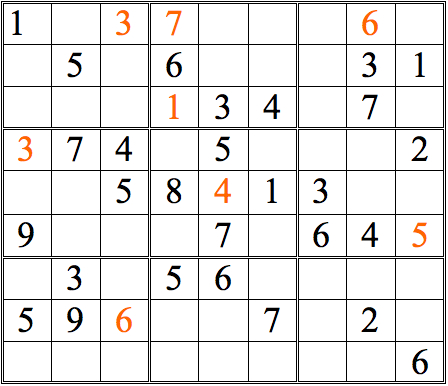
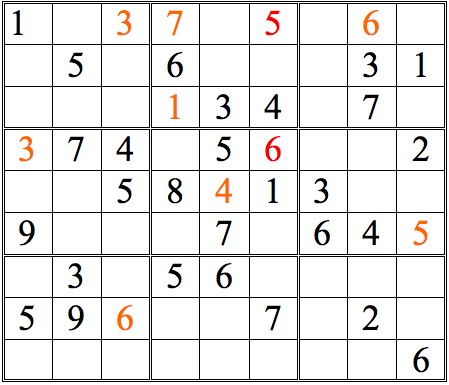
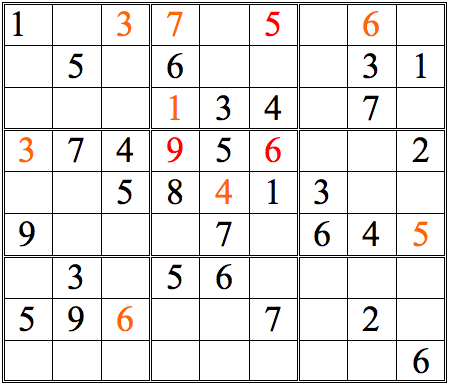
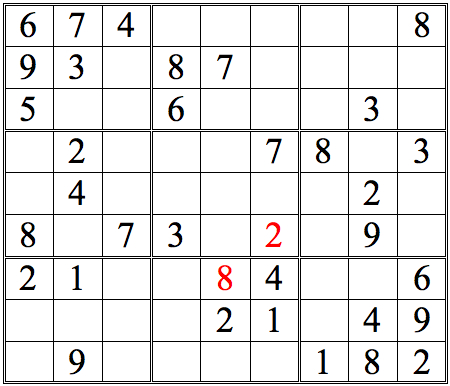
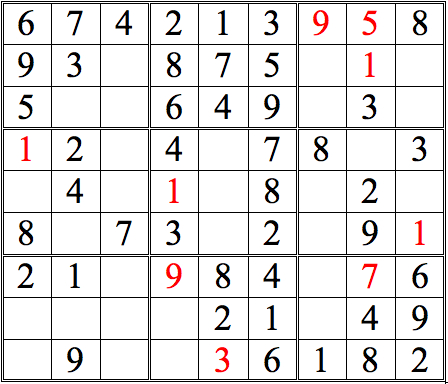
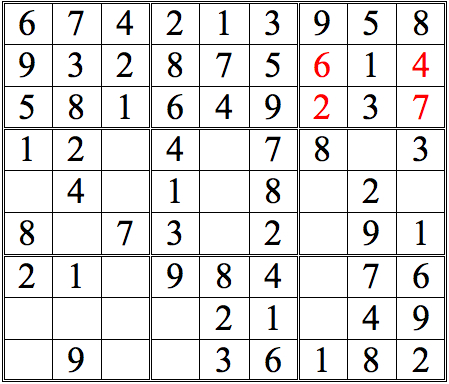
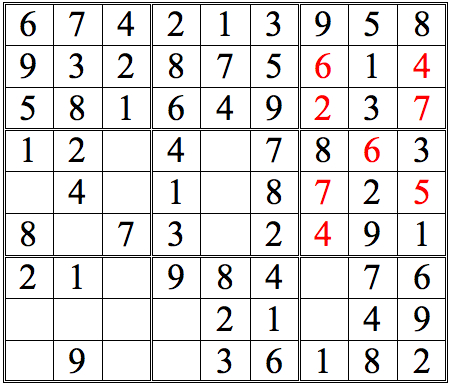
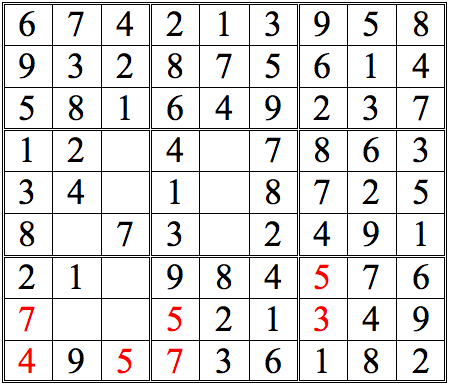
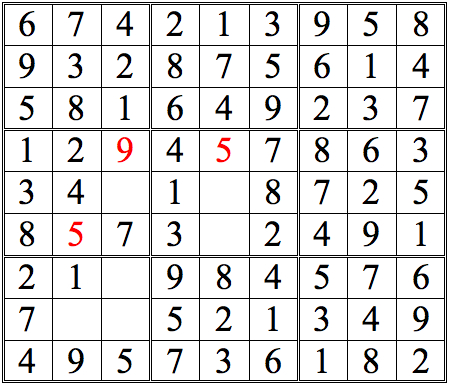
For a tougher challenge, see if you can find 2 digits in the lower left subgrid using shadow theory. (Again, pure cross-referencing will provide other digits, but these will not be shown in the answers.) It's possible to either digit first, but I show just one sequential possibility.
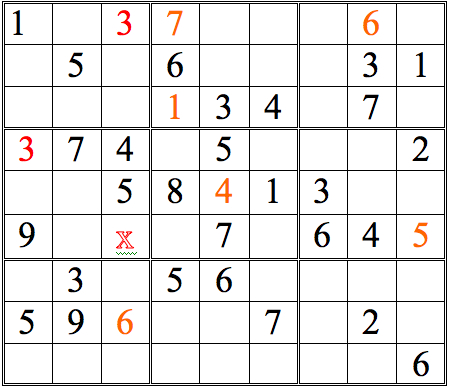
Practice Question 8--more shadow theory.
Click thumbnail to view full-size


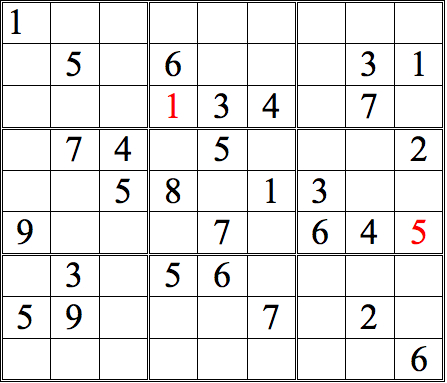
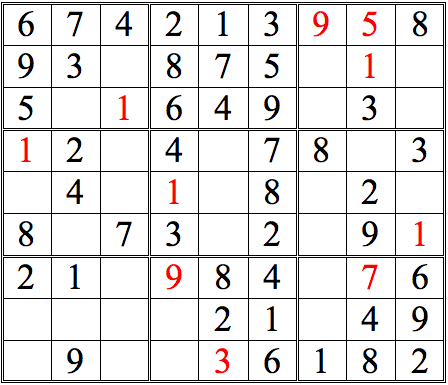
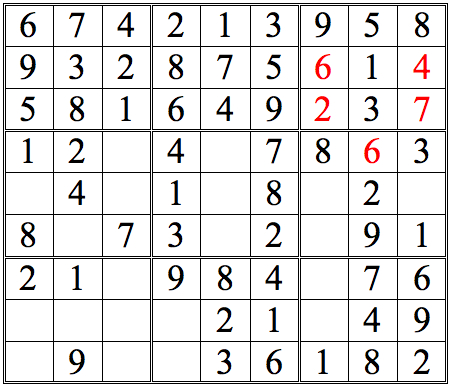
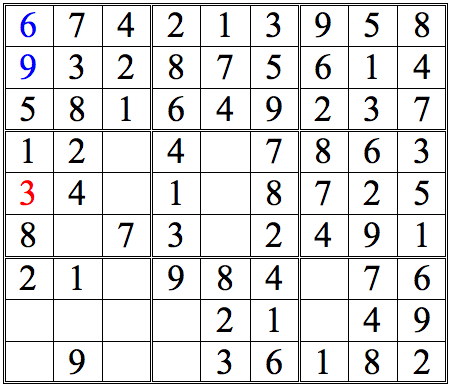
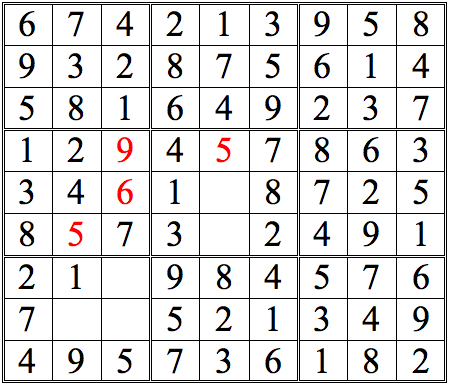
Now let’s combine Cross-referencing and Shadow Theory to move this grid forward. Remember to keep scanning systematically, and to follow up implications at once.
Practice Question 9--combinations.
Click thumbnail to view full-size


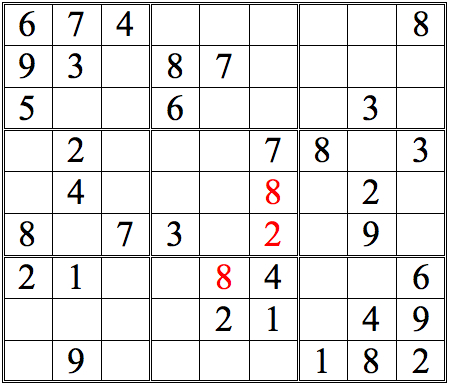
Scanning the second row of subgrids, I saw there was a possible cross-reference for 8s which led me to check the middle bottom subgrid. Realizing that there was a simple cross-reference for the 8 in that subgrid, I filled it in, then went back to the middle subgrid--and was then able to fill in the 8 in that subgrid as well.
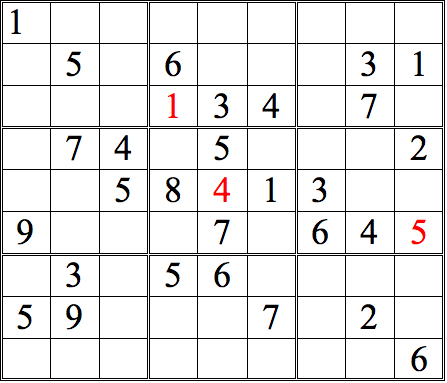
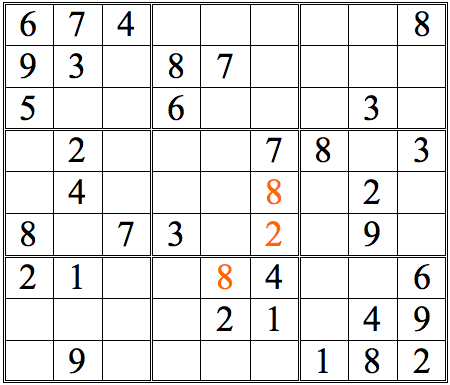
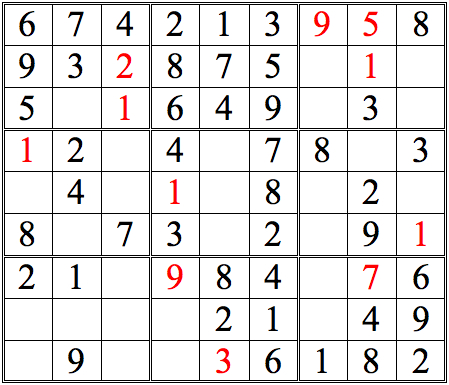
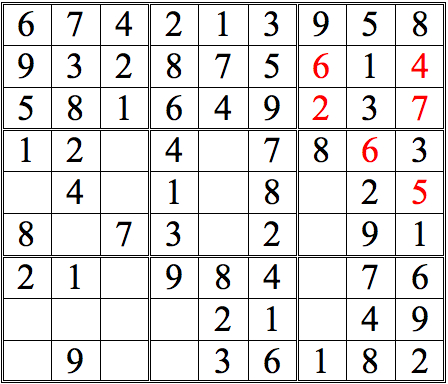
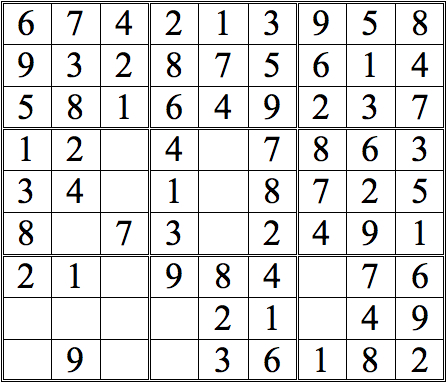
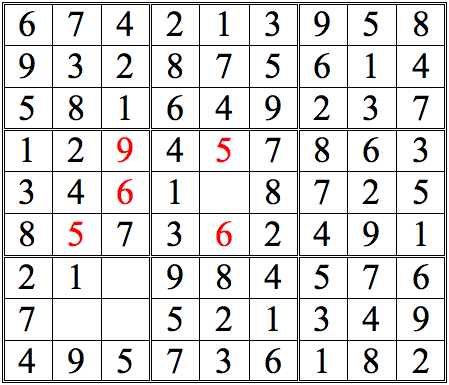
Let’s continue.
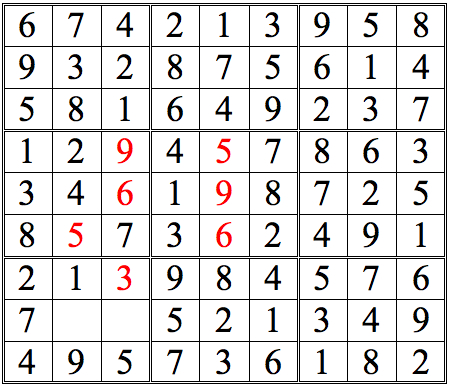
Practice Question 10
Click thumbnail to view full-size


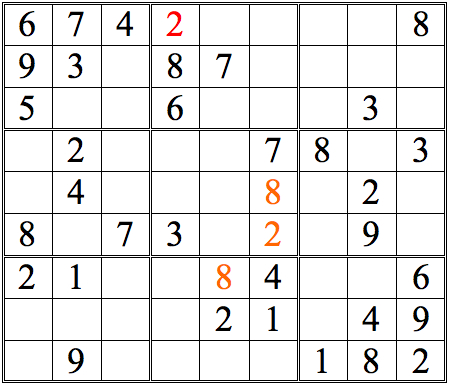

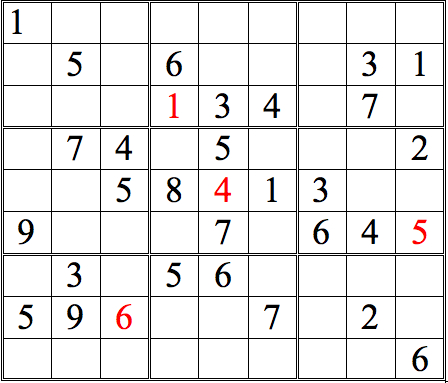
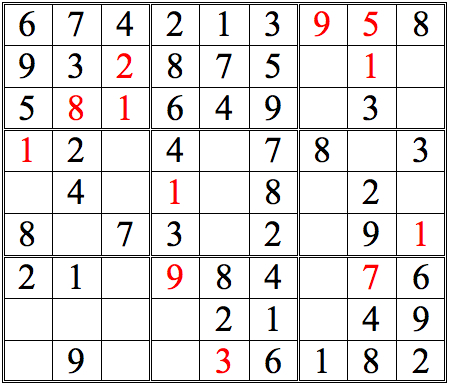
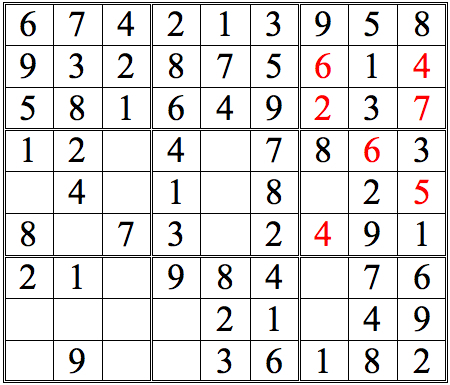
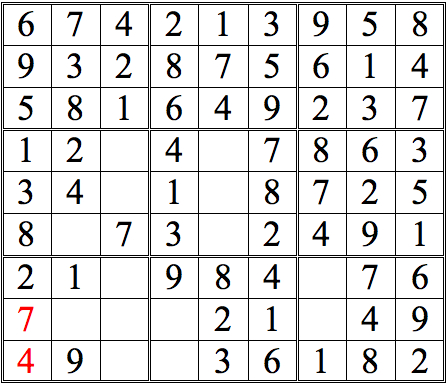
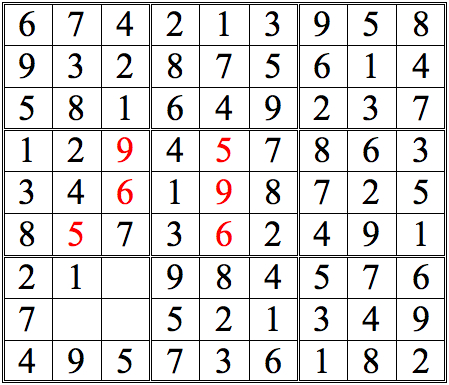
It’s always a milestone when a entire row or column is completed. It raises the possibilities for “shadows.”
You may have noticed how cross-referencing and shadow theory tend to propagate the same digits throughout the grid. Inventorying tends to reveal “new” digits.
Many times, too, it reveals digits that you could find by one of the other methods—but you find them quicker and easier by Inventorying because your attention is directed to the important digits.Let’s continue with this grid.
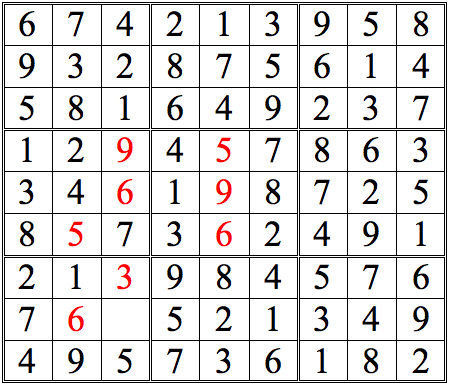
Practice Question 11
Click thumbnail to view full-size


Another milestone. From here there are many ways to continue—some quite evident, such as the box in the second column from the right. In fact, you may have been chafing to fill them in.
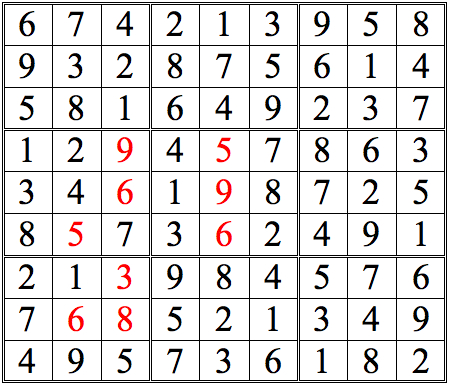
Let’s go for it. . .Practice Question 12
Click thumbnail to view full-size


Inventory
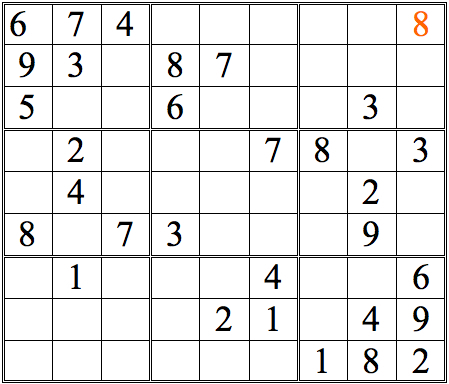
You may be stuck at this point. But there’s a way forward, using the concept of inventorying. Look at the middle row (that is, the fifth row down from the top of the grid.) If you inventory the missing digits, you find that 3, 6, and 9 are needed. Now look at the highlighted numbers. With 6 and 9 eliminated, the leftmost box in the row must be the missing 3.
It’s not so much a new concept, as a very useful corollary of the principles we already learned.
Example 5
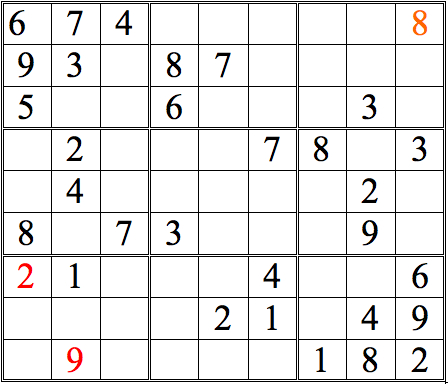
With that hurdle out of the way (and a new corollary of the Inventory tool in play), let’s practice the integrated use of all these tools.
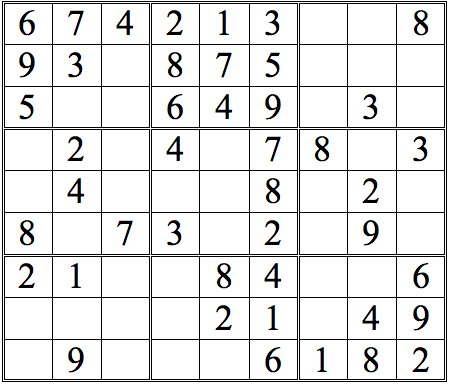
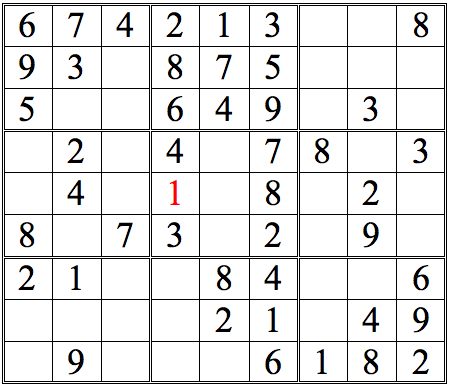
Practice Question 13
Click thumbnail to view full-size


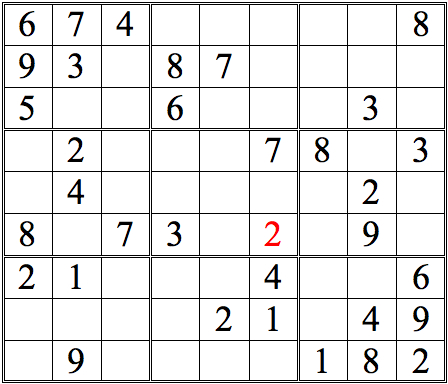
You could very well choose to finish the lower left subgrid here; placing the 3 and the 8 would be trivial, and the 6 would follow. I chose instead to follow up with the 5s. In the end, it makes little difference which way one chooses.
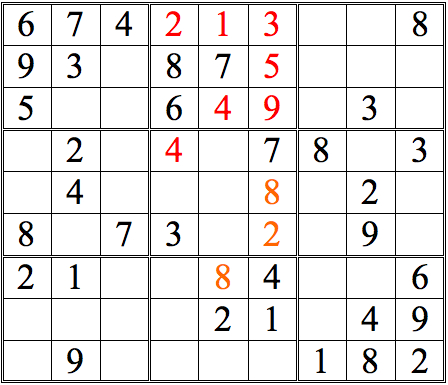
Practice Question 14
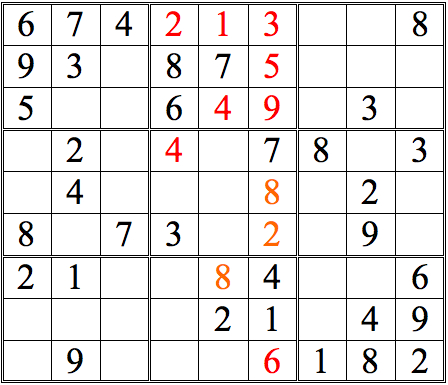
Click thumbnail to view full-size


Hallelujah! Finally, a completed grid.
This has been a tedious Hub to pull together—much scrolling, mousing, and file conversion—but I hope it will help increase your enjoyment of Sudoku puzzles. They are an activity that is fun, challenging, and good for your brain.
Thanks for following these examples right to the end—and if you have questions, thoughts, corrections or suggestions, feel free to comment here, or send me a message via Hubpages.
Happy solving!
Some other Hubs by Doc Snow
- Global Warming Science And The Wars
The story of Guy Callendar and how he brought CO2 theory into the 20th century. "Nearly everybody likes to be right, and scientists perhaps more so than the rest of us. . ." - Understand Chords, Part One: What's A Triad?
What's a triad? Find out! "Chords are a guitarists best friendand a listeners. Without the chords most modern melodies will sound bare and lifelessbut add them back, and sparkle and color return..." - Lavender: The Best Little Asian Bistro In Gwinnett C...
A local attraction here in the Atlanta area--if you like great Thai and Chinese food (and great service!) check it out! "This isn't a restaurant review. In some ways, it's more of a love letter..." - Inuk Was A-Positive: A Brief Meditation
Science news and the imagination. " Inuk was A-positive. For some reason, that information hit me with a certain imaginitive force." - How (not) to apply lap siding
A fellow duffer's tips to lap siding a shed, copiously illustrated. "I was told I was so not Canada's worst handiman--it may seem self-evident, given that I live in Atlanta. . ."


