Metal Gear Rising: Revengeance walkthrough, Part Fifteen: World Marshal Top Floor

Raiden has boldly invaded World Marshal's headquarters in Denver, and without trouble he's dispatched their cyborgs in the lower offices. This is just the beginning, though, as he now has to head upwards and find the brains of the poor kids World Marshal is attempting to reprogram into killers. What fun!
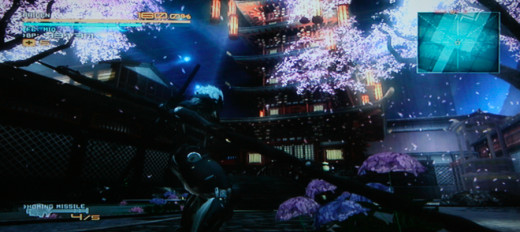
Head down the hallways of the upper floor, noting the much-changed aesthetics, to a door. Beyond is a beautiful Japanese garden… and you'll immediately be attacked by cyborgs when you enter. There's nothing overly difficult with these guys, though they have a tendency to blend into the background. Use AR quick to pinpoint your next target. Be sure to weave when you're not attacking, as there are a few soldiers with RPGs.
Check the sides of the pagoda for items, then look along the right side for a platform you can climb. This will allow you to get into the rear of the pagoda without being hit by the soldier with the rocket launcher targeting the normal entrance. Take him out and you can steal a Rocket Launcher from the room he's in.
Turn on AR up here. You'll see a slew of soldiers patrolling the grounds, and to your right and left, on the rooftops, two Mastiffs. You are in for some very painful experiences if you try to kill all these enemies in a straight brawl. Hop up on the roof to your right and stay on the side opposite the Mastiff to sneak up and Ninja Kill it. Make your way towards the second Mastiff, across the rooftops, but only get close enough that it notices something is wrong. Hide and it will likely jump down onto the ground to patrol. You can Ninja Kill it from above. The other cyborgs patrolling 'round here can easily be dispatched with more rooftop kills.
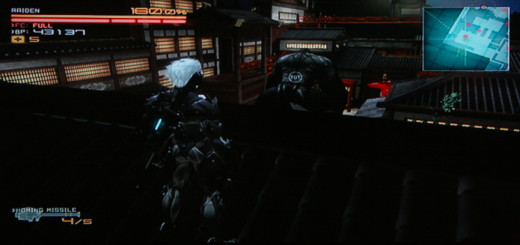
Now that the area's clear, have a look around. Items in the vicinity include a Rocket Launcher, two Grenades, two Hold Chips, an RP Grenade, a Repair Nanopaste, an Electrolyte Pack, and a Data Storage in a blue box (look in the far-right corner of the area, near your next waypoint). You'll also find an RP Grenade by the waypoint, located atop the buildings. Inside is a normal corridor again; run down it and go through the next security door.
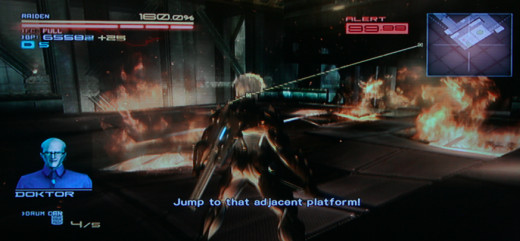
You're back in another large area filled with enemies. Grab the Drum Can to your left and have a look at who's ahead. Three enemies on one of the lifts in the next area will lift off and away after a few seconds, leaving you with less to deal with. Wait for the heavy cyborg immediately ahead to turn around, Ninja Kill him, and do the same for the next two enemies you find on your way to your own lift. Grab the Repair Nanopaste by the lift and the Rocket Launcher atop some boxes not far from there before activating the controls.
Once the lift takes off you'll face a few waves of enemies.
- First, two normal soldiers and one beefy cyborg. Nothing difficult.
- Second, two Gekkos. You have limited space to play around in, but if you've been upgrading consistently the Gekkos can't take much punishment before they get stunned. If that doesn't work, wait for them to charge for Zandatsu kills.
- Third, two shield soldiers and a Raptor. The Raptor takes a second to jump down; use this time to wipe out at least the shields.
- Fourth, two Fenrirs, one of which is more or less a straight up copy of the Blade Wolf fight. You're more than capable of destroying these mutts with an onslaught of attacks, as they're quite vulnerable to your strikes. They're still fast, though, so be ready to parry if one comes at you.
- Fifth, two RPG soldiers. These guys are a cake-walk - but you have to watch out for the fire on the elevator. Tread cautiously.
- Sixth, a bunch of Tripods. These little jerks will cling to the elevator rail and slow you down. Trash them before they can get to it, and keep thrashing the soldiers who show up. Despite what Doktor says, don't abandon the elevator immediately; instead, wait to demolish the one bulkier cyborg that shows up. After he's dead you'll find a Data Storage on his body.
- Seventh, on the new elevator, a heavy cyborg and some Sliders. Ignore the cyborg and concentrate on trashing the Sliders as quickly as you can manage - they'll get annoying while you try to parry the hammer-wielder.
- Last, two Mastiffs. These giants are always a pain to deal with, and that's no exception here, where there's little space. Do your best to avoid getting grabbed, and use your secondary weapons to get some more reach so you don't have to get too close. Your pole-arm works wonders on these guys, as does straight-up parrying to avoid their brutal attacks.
The top at last. Check the room next to the lift (you'll have to climb some boxes and slide through a small space to get to it) for a Repair Nanopaste and an Electrolyte Pack, slash the box for a surprise guard and a goofy reference, and slide through the wall at the other end. Slash up the two boxes below you for VR Mission 016, check the other end of the hall for a Hold Chip, and make a beeline for the server room.