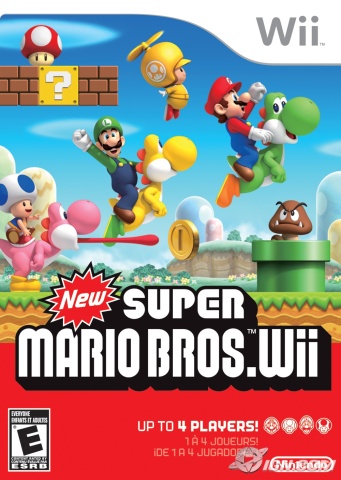
New Super Mario Brothers Wii Walkthrough: World 2

Not the part of the New Super Mario Brothers Wii Walkthrough that you are looking for? No problem! Here is the other chapters.
New Super Mario Brothers Wii Walkthrough: Introduction
New Super Mario Brothers Wii Walkthrough: World 1
New Super Mario Brothers Wii Walkthrough: World 2
New Super Mario Brothers Wii Walkthrough: World 3
New Super Mario Brothers Wii Walkthrough: World 4
New Super Mario Brothers Wii Walkthrough: World 5
New Super Mario Brothers Wii Walkthrough: World 6
New Super Mario Brothers Wii Walkthrough: World 7
World 2-1
In this world, fear the rising pillars of sand. There is always a puff of dust before they rise, and that is the best time to get on them.
Eventually, you will see the First Star Coin. Getting it is sort of tricky. It involves doing a slide down the wall on the left of it, and landing perfectly on the tiny place to the left of it. Then it comes down to jumping on the rising sand and getting to it. Then you have to slide down the wall on the right side this time, back to that tiny place again. Jump back on the rising sand on the left, and you will have succeeded.
Just to let you know, there is a 1UP near this first star coin here, but it is difficult to obtain. You have to stomp on that red turtle, and hurl its shell into the brick block to its left. Because of the rising and falling sand, obtaining it may cost you your life. There are some risks worth taking in this game, and some not to take. Make your choice.
By the way, watch the next area with the Goombas. Seems like I always lost a life here.
Soon you will reach a place with a Chomper planet and a rising sand thing. Getting the Second Star Coin, is like getting the first one back there. Just do a slide down the wall and you’ll soon be in the right place. It is easier.
As for this Third one, all I’ve got to say is “Good luck to you”. The coin is in between some rising sands, and you have to hit the Third Star Coin with a turtle shell. The problem is there is only one available. You have to knock him out of the air, and then pounce him while he is standing on some rising sand. Then you have to time it perfectly so you release the shell on the rising pillar of sand one pillar back from the platform. It is a nigh impossible move.
World 2-2
Here you will have a lot of fun using barrels to take out the Goblins. I’m not certain what they are actually called, but I call them that.
The barrel is the perfect weapon for taking out the first Goblin.
When it comes to the second one, I usually just go underneath it. Also, to the left of this Goblin is a block which will reveal a pound. Pounding this will cause a lot of blue coins to be revealed. I would get them all if I were you.
As for the third, you should be able to get an ice flower before here. That comes in handy for taking out a Goblin. You just have to be higher than it in order to do it.
What comes next is what I call the Turtle Elevator. What you need to do is jump to the first level, and then hop on the first turtle. Send its shell sliding and it will gradually take out all the turtles. If you do it right, then you get a 1UP.
Okay, at the Midway point, you will see an area with quicksand and a block. You can get under that block to get a bonus, and you should go down into the quicksand. I realize that this goes contrary to all your beliefs, but it works. In fact, you will fall into a whole bunch of coins. You will also find yourself in a place where to Goblins guard the First Star Coin. You have to go around them, and you will have it.
Now, you will soon be in an area with another Goblin, just before a rising and falling platform. Take out the Goblin first, by jumping on it, but there is a more difficult jump to be made. To the right of the rising and falling platform is a brick area, and you must hit the first brick in the series, from the bottom. This involves a very precise jump. From there, a vine will grow, and you must climb it to the top of this one area. Some platforms will come by, and you can grab a lot of coins. By the time you get to the end, there is a POW that must be snagged. Get it and throw it down, just as you see the Second Star Coin. That Coin will fall, and you can snag it. Nothing to do but jump.
You will end up in an area, and you will have to run to the left if you want to get to a bonus area. It involves going through a green pipe tunnel located below the ground and to the left of a rising yellow platform. You will need to use the question block to get a micro-mushroom, and then use it to run across the water, bounce off the wall, and get all the coins. You can leave as you entered in.
As for the Third Star Coin, you will need to still be small to get this. You will find a mini pipe before the exit, and it is blocked by two barrels. Remove the barrels, and go through the pipe. You will be vulnerable, but it is the only way to get this coin.
World 2-3
This level is in the dark, so it helps to have some Flame Power handy.
I like to use that Fire Power to take out some particularly nasty fire breathing plants.
You will soon come to a place that has some yellow block pyramid formations. Atop one of these and to the left is a very hard to see yellow pipe. What you need to do is get there by jumping, and then go through the tube. What you will see there is to avoid any of the sharp beetles and just hit the pound. You will get so many 1UPs, I swear.
The First Star Coin is located at the bottom of some yellow block pyramid formations. It is pretty easy to get, just avoid those flaming guys.
After you pass the Midway point, there is a guy who is throwing flames. I usually just go underneath him and take him out from below. You can then go left underneath him, and you will get the Second Star Coin.
To get to the Third Star Coin, you will need to go to the area where two fire breathing plants are on the ceiling. It is the same place with two fire-breathing plants and two platforms. If you run and jump off the floating platform when it is at its highest point, you will find another platform. You can then jump to get to another area, and you can find the star coin.
You can then get out of here, and you will find the fabled turtle. Pounce on it, and you can get a lot of lives.
World-2 Fortress
This is about getting up and using some doors. Don’t forget to use the yellow doors on the left and right side for a chance to get a lot of blue coins.
The First Star Coin is right in plain sight. Unfortunately, you have to go all the way up the right side, and then jump down the left side to get it. Then you have to work you way all the way up.
Now, after you pass through the first yellow door, you will be at a place where there is a Midway point right there. You will need to go down to where the Dry Bones is and go all the way to the right. There is a secret passage with the Second Star Coin.
When you get to a certain point, where there are three Dry Bones on the Right. On the step above the lowest Dry Bone, you can go all the way to the right to a secret door. There will be a place with an Orange Circle, and you can get a 1UP or some sort of bonus reward.
As for the Third Star Coin, it is located in plain sight, right by a grating with some spikes. It’s a little risky, but you can take it.
Now, there is nothing more to do but defeat the baddie there. He is pretty tough, and has to be brought down with the usual strikes. If he leaps in the air, you had better too. If he lands while you are on the ground, then you get stunned.
Other than that, the same rules apply. Jump on him, and then avoid his spinning top of death, and then jump on him again until he dies.
World 2-4
In this world, there is a mighty wind that will come and sweep you away. Soon you will come to a red pipe. If you go down into the pipe, you will be in another world. There are a lot of coins there, and you can take to your heart’s content.
Soon after you come out of this world, you will come out to a place where a rope ladder is. Climb the rope ladder, and go all the way to the left, and up to the next level. You can then jump to reveal some invisible blocks, and one will have a vine. Climb the vine to a higher level, and you will find lots of invisible bricks you can hit, and the First Star Coin.
Right as you come to the Midway point, there will be a green pipe just below a sign with an arrow. You will need to get to that green pipe, and you will need a Propeller hat for what you will find on the other side.
For in this room is the Second Star Coin, but it is under a rock. You actually have to run to the coin itself, and get it as you fall, then you use the propeller hat to get you to the other side.
As you come out, you will be at a place where you will need the propeller hat again. You might want to take the rope ladder to get to the next level, and follow it to the right until you see the Third Star Coin.
You will need to head back down, and use a gust of wind to jump to it. Then use the propeller hat to get you back to solid ground.
Now, there is a Secret that you can get here. Before you get to the end of the course, there are two platforms with spiked Beetles on them. After them is a secret area above you. To get it, you will need a propeller hat. You will need to run and jump and it will allow you to be blown into the wall that must be wall jumped up in order to get there. It requires some timing, but you will eventually find a red pipe that will get you to the secret flag.
World 2-5
I’m sure you have probably figured this out by now, but you will need to do some serious leaping in order to get to the next area. Eventually, you will find a Yoshi, and you can eat those prickly caterpillars.
Eventually, there is that guy who goes on Mr. Happy Cloud. He can be killed by simply having Yoshi eat one of his big things he throws and spit it back at him. It is pretty hard, but the key is getting Yoshi to hover in front of him at the right time without getting hit.
Before that first guy is a small cloud, and the First Star Coin is located in it. You might be able to get him by swiping his cloud.
Just before the Midway point, you will find a chomper plant that is in between two yellow blocks. You will need to either spit an enemy at this plant, or use fire power to get there. You will then need to jump into the hole where the plant was, go to the right, and then down. You will be following a trail of coins down to a level with two plants. Kill the plants with fire or Yoshi, and the light cube which you can grab will reveal the Second Star Coin, located atop in this room. Yoshi’s hovering ability can get you there. If you don’t have that, then use the light brick to place in the proper place, and jump on it, then off the wall to get you up that high.
Past the Midway point is a giant chomper plant. You will need to kill one of those Mr. Happy Cloud riders and use its cloud to go up and up somewhere above this Chomper plant to get the Third Gold Coin.
From then on, it is just stay alive!
World 2-6
The First Gold Coin is on the rolling cube, and it has to be got at just the right jump, or you will fall over.
There are some swinging bricks that will show up on your path, and you will need to jump up on them, and then into the end of a green pipe. You will then find yourself into a world full of clouds, and you should be able to get the Second Star Coin with the help of some propeller blocks. Just grab them and let them take you higher.
Now, when it comes to the Third Star Coin, you will need to get it as you get on a rotating pink square.
There is a secret exit to this level. You will need a Propeller hat, though. It is when a pink square comes to a halt by the exit flag, and there is a red pipe that you can go up through to get it.
World 2-Castle
If you want the Star Coins here, then you will have to do some serious repeating. You will note the first is in the middle passage. Go ahead and go through here, but use the middle passage to get the First Star Coin. When you go back, take the uppermost path.
Soon you will arrive at a place where you must be large to get the Second Star Coin. You will have to again go down the middle or top passage to repeat here, and then just smash through the bricks to get it. You might have to kick-jump off a wall as well. You then must take the bottom passage out of here.
As for the other one, you need to hit the big P-switch and turn the blocks into coins. This means that you have to really gun it to go to the middle passage this time. Don’t forget to get the Third Star Coin on the way out.
From there, it is about beating a bad guy. This time he has powers to go up into the pipes and randomly change his location. Of course, you have to not be on the floor when he stomps on it. So make certain to jump when he goes down. It is hard to tell when he is going to pounce from the pipes, but I think the noise that he makes when he peaks out is slightly different, maybe.
Anyway, it is all about pounding him on the head, avoiding his spinning shell of death, and repeating steps one through two until he is gone.