Revisiting Old Console Video Games

The Request
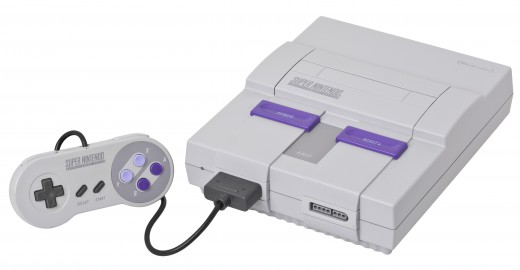
Imagine getting a physicians prescription to play video games. It happened for my father when he underwent eye surgery. The premise was it would help with hand-eye coordination and depth perception and speed up the recovery time as well as make the recovery time a bit more enjoyable. This happened back in the early 1990's so a new Super Nintendo found its way into my fathers' house. He was retired, in his sixties and computer literate, so it was a learning curve for him. There were many long distance calls between me and him on setup and howto's which soon changed to calls about gameplay and high scores. That was one smart doctor for my father's recovery was 100 percent.
Fast forward twenty years. My father called last week and asked if he could track down an old Super Nintendo. Of course, his was well used and worn out Super Nintendo had long since been thrown out and trying to find one on eBay is ridiculous. Any Super Nintendo around is only available at inflated prices. So I did the next best thing.
What I Came Up With
So I dug around in my junk room and came up with an old HP mini netbook. It was running an old version of Windows XP but that was fine. It had a working USB port and that was all I needed.
I went online and found a freeware emulator for Super Nintendo as well as a copy of the game ROM that my dad wanted. Who wouldn't want to play Zelda over and over again?
There are lots of different emulator's to choose from so make sure you get one that matches the system you are installing it on. Windows, Mac Linux or even Android.
- Download the correct emulator for your system.
- Extract the files from the compressed file you downloaded and put the files in a directory you can get to.
- Download the ROM's of the games you want to play and extract them into a folder or sub directory of the emulator folder.
- Click on your emulator install and let the files be created that need to be.
- Click on the emulator icon and load the game you wish to play.
Now you can play your games using the keyboard. Each game has an options menu to config the controller. If you have a joystick or gamepad you'll have to make sure you setup that up in Windows before you set it up in the games.
Enjoy!
Troubles You May Run Into
My biggest trouble was finding all the parts I needed without having to buy anything new. Now everyone has a least one junk drawer in their home so you know how frustrating it can be looking for just the right part, cable or whatever in a messy drawer. You know it is in there but it just seems to elude your grasp.
Me, I have a junk room. Maybe I am a hoarder like all those weird and wonderful Reality TV shows. Anyways, it took me the longest time to wade through that room to find all the parts I needed, and some I didn't.
- Netbook
- Power cable
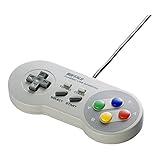
- gamepad
- VGA cable
Now the Netbook was easy to find and for a change, the power cable was right where it was supposed to be, in the case with the netbook. What I didn't expect were the hours I wasted just looking at the old system and remembering when I installed this program or that utility. That's a few hours I'll never get back. Finally, I got down to deleting everything that I needed to and was left with just a bare bones system.
You Need A Game Controller

Installing the emulator and Rom was easy, there were no issues. The game worked great on the small screen of the netbook. The troubles started when I tried connecting a gamepad and hooking the Netbook up to the TV. When Dad had his Super Nintendo he just plugged in into his huge 21 inch Sony Trinitron. He was the envy of the family. Now I know he'll want to do the same with his new system. Problem is they don't make TV's the same way anymore. I found a VGA cable which was all the Netbook had for video out and tried the Netbook while connected to my computer monitor. After a few minutes tinkering with the Netbook screen settings I could see the desktop of the Netbook on the monitor. Let's hope his flat screen TV is as easy to setup.
The biggest trouble I had was with the gamepad. I had an old Gravis gamepad which was be perfect but it required a gameport on the computer. That port was made obsolete with the advent of the USB port. Now there are converters available out there, and I may end up getting one because I would like to use my old Gravis Gamepad, but for this build I had to look elsewhere. Places you could try to find old hardware are flea markets, garage sales, second hand stores or calling up old friends.
Once you have our gamepad, you need to first set it up in Windows then in the game. Like everything else I can't go into too much detail as everyone has a different gamepad or version of Windows so it makes it hard to do an exact step by step. On my version of Windows XP you went into Setup, Control Panel then Game Controllers. Right clicked on the USB Gamepad icon and went to properties. In this window you either calibrate your gamepad or test it. In the test window you should be able to move the x in the window and flash the buttons on the screen. If you get nothing then you need to install or re-install the drivers. If you get movement but the x is off center when you are not moving the gamepad then use the calibrate wizard.
Once you have that all set then you have to go into the emulator, select config, and set the controller to gamepad. You just follow the instructions pressing the appropriate buttons on the gamepad and you are all set. Don't forget to save the configuration when done. I had to go through the setup a few times to figure that one out as the save configuration was in a different menu all together. Now it all works at this end. Let's hope it works as well when I take it to Dad's..