Super Mario Galaxy 2 Walkthrough Part 18: World Four Prankster Comet Stars

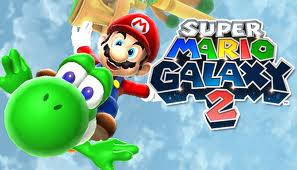
Super Mario Galaxy 2 Walkthrough Part 1: Introduction
Super Mario Galaxy 2 Walkthrough Part 2: World One Stars
Super Mario Galaxy 2 Walkthrough Part 3: World Two Stars
Super Mario Galaxy 2 Walkthrough Part 4: World Three Stars
Super Mario Galaxy 2 Walkthrough Part 5: World Four Stars
Super Mario Galaxy 2 Walkthrough Part 6: World Five Stars
Super Mario Galaxy 2 Walkthrough Part 7: World Six Stars
Super Mario Galaxy 2 Walkthrough Part 8: World S Stars
Super Mario Galaxy 2 Walkthrough Part 9: World One Hidden Stars
Super Mario Galaxy 2 Walkthrough Part 10: World Two Hidden Stars
Super Mario Galaxy 2 Walkthrough Part 11: World Three Hidden Stars
Super Mario Galaxy 2 Walkthrough Part 12: World Four Hidden Stars
Super Mario Galaxy 2 Walkthrough Part 13: World Five Hidden Stars
Super Mario Galaxy 2 Walkthrough Part 14: World Six Hidden Stars
Super Mario Galaxy 2 Walkthrough Part 15: World One Prankster Comet Stars
Super Mario Galaxy 2 Walkthrough Part 16: World Two Prankster Comet Stars
Super Mario Galaxy 2 Walkthrough Part 17: World Three Prankster Comet Stars
Super Mario Galaxy 2 Walkthrough Part 18: World Four Prankster Comet Stars
Super Mario Galaxy 2 Walkthrough Part 19: World Five Prankster Comet Stars
Super Mario Galaxy 2 Walkthrough Part 20: World Six Prankster Comet Stars
Super Mario Galaxy 2 Walkthrough Part 21: World S Prankster Comet Stars
Super Mario Galaxy 2 Walkthrough Part 22: World One Green Stars
Super Mario Galaxy 2 Walkthrough Part 23: World Two Green Stars
Super Mario Galaxy 2 Walkthrough Part 24: World Three Green Stars
Super Mario Galaxy 2 Walkthrough Part 25: World Four Green Stars
Super Mario Galaxy 2 Walkthrough Part 26: World Five Green Stars
Super Mario Galaxy 2 Walkthrough Part 27: World Six Green Stars
Super Mario Galaxy 2 Walkthrough Part 28: World S Green Stars
Super Mario Galaxy 2 Walkthrough Part 29: The Grandmaster Galaxy
Supermassive Galaxy
Big Wigglers Speed Run
I think I have already written about this the first time, and you will only have 2 minutes and 30 seconds to deal with this. Here's a few things you can do to avoid wasting time.
Hurry up and get to the big coin and jump up to the extending green pipe. Quickly use long jumps to leap to the other side with the Whomps, and long jump to get past them. Backward somersault to the Star Launcher.
You will then get to the turles and the spin drill. This is one part where you don't want to waste time for. Remember what I said about lining up a drill shot to defeat a turtle. Don't do it unless you got the shot, or you will waste very precious time.
Take the Star Launcher and get yourself to the other Star Launcher very quickly. As you go through the air, use the other Star Launcher, and then you will be in the Big Wigglers area.
You will probably really be hurting on time by then. Just keep running across bridges, and do long jumps. Then you can climb that pole and get the Star.
Sweet Mystery Galaxy
Bulb Berry's Purple Coin Glow
Okay, as you might have guessed, you need to get the Yoshi Egg and then use it to eat the glowing fruit.
You will also need to get 100 coins. There are 10 in the first area alone.
Go ahead and eat the glowy fruit, and you will have to get 10 more coins in the interim place between the platforms for a grand total of 20.
Get the 5 on the platform, and you have 25. You are now one fourth there.
I found that this next one is tricky. I found it was easy to get the fruit, and then go to the area where the 1UP is, and then go back. You can get a row of coins along the way.
Go ahead and grab the fruit, and go all the way to the left. You should be able to grab the fruit all the way there, and, if you missed some coins, you can go back. In and between is about 27, for a grand total of 52 purple coins.
If you did grab all the coins, and you want to get that next fruit, then you will be able to get 11 more for a grand total of 63.
You can then grab the fruit and run all the way to the next area. By the time you get to the moving package platforms, you are safe. Go on and jump on those green tiles that shrink up, and get the 1UP while you are at it. By the time you get to this platform, you should have picked up 20 more for a grand total of 83.
You can then eat the fruit here and go to the next platform. You will have eaten 10 more for a grand total of 93.
You will then need the spindles to get up higher to get the glowing fruit, and then run to get the remaining coins. Fortunately, there is a bulb fruit in the midst of this that you can easily get. Now you can go and get the Star.
Flipsville Galaxy
Purple Coin Spin Speed Run
Okay, you only have 2 minutes and 30 seconds to get all the purple coins. Start in the room you are in by grabbing the drill when the gravity is right, and then getting all the coins in this room.
You should then go to the room directly to the right, and there is a monster here that can be taken out if the drill hits it, so make sure it does. You will then have about 17 purple coins total.
Go to the right, and you should take out the monster here with the drill as well. Go all around the edges and you will find 20 coins for 37 total so far.
Go ahead and drill up. You can then get all 9 coins here for 46 total. You might want to get the 1UP too.
You will then want to drill to the left. Go ahead and get the coins in here, and then drill up.
You will probably want to get all the coins in this room and then drill immediately to the right. Use wall jumps to get the circle of coins here.
Drill to the left, and then left again. Get all the coins here by jumping on that thing in the room here.
Now, this is very important. You need to drill down and left, but not all the way left. The trick is that you must drill in this particular place, as I can't find another way to get the last 8 coins but to go here.
Once all 100 coins are received, you can simply go and get the star. There is no longer any time issue.
If you feel that you cannot complete the level to get all of all the purple coins, then you should Return to Starship Mario and begin again. Or you could just lose a life and start again.
Starshine Beach Galaxy
Purple Coin Beach Dash
Okay, in this game, you only have 35 seconds to get100 coins. That isn't long, true, and there are no timers to extend your time. You need to get the Yoshi egg and then the Dash Pepper plant and let her rip.
Control means everything. I found that going straight on the controller will lead you to get most of the first batch.
Quickly get a pepper plant when you can to get the next batch of purple coins. You then need to simply go to the batches of coins with the peppers.
Before you get to one of the last ones, be certain that you get the Dash Pepper with tongue-targeting before you start to sink. That is pretty critical, or you will lose precious seconds.
The coins come at three-at-a-time, and, if you are lucky, you can slalom through them.
There is then one final stretch, and you should the rest of your 100 coins there and get the Star.
Bowser's Gravity Gauntlet
Gravity Star Speed Run
This game starts with only 30 seconds. That isn't too long, so pick up time along the way. For example, there is some time on a box as you follow the path.
Keep going, and you will see another timer on a grate. Better get it.
Don't worry about the ? box as you go along, but you will eventually come to an area where the time is on top of a box. You will need to do a backwards somersault to get it, and make certain that you do.
You then have to keep running, avoiding lava geysers and pick up another timer.
The next time will be above you, which means it is sideways. You can wall jump left or up to get to it.
You will then go to a place where you need to swim to get the the right time. You can knock out the fish with a spin attack. Get the two timers in this area.
When you are out of the "wet-lands", hurry and grab the next timer.
You will then need to enter into Whomp territory. Go ahead and go around the Whomps (or through them) and get the timer there.
From there, run to the area with the revolving fires. You will find several timers here, and go around the spinning wheel until you can jump to the left spinning wheel. Follow that one all the way around until you are going clockwise. Wall jump off the wall and get the Star.