How My Daughter And I Made Easy Easter Eggs

The Egg Dying Kit We Chose

Happy Easter !
Ever since I can remember coloring Easter eggs was a family tradition. I have continued it now with my own child. I remember my Mother going all out when we were kids , and also a big mess that went with it. Now that I'm a Mom I don't like messes but still would like to continue the tradition with my daughter. Here is an easy way of dying eggs that I have used.
Do you make Easter Eggs ?
Are Easter Eggs part of your Easter tradition ?
Preparing The Eggs
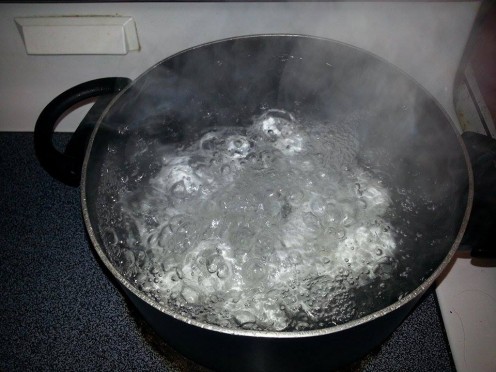
I boiled 14 eggs in enough water to just cover the eggs for 15 minutes. I also added vinegar to the eggs because my Mother used to and I have read it keeps them from bumping into each other so much reducing the chances of cracking.
I used large eggs for ours. If you use medium eggs you should boil them 12 min and for small eggs 10 minutes. If you use Jumbo eggs they should be boiled for 20 min
There are 2 ways you can do it. I add the eggs to the water after the water is already boiling. This way I know exactly how long to leave them in. I have also read where you can put the eggs in the pot first and cover them until there is an inch of water over the top. Use cold water for sure if you do this method because it takes the eggs whites longer to cook and they won't be so rubbery. You do have to keep an extra eye on them this way to see when they start to boil so the boiling time is correct. Over boiled eggs get a funny color and are very rubbery.
Removing The Eggs From The Water
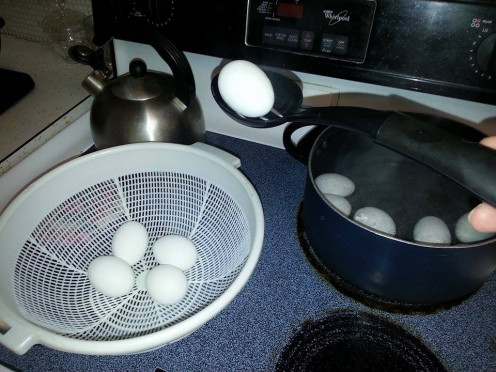
Take out the eggs one at a time very carefully and gently put them into a strainer or bowl. Don't dump them in from the pot or they will crack. I like to use a strainer because it makes the next step easier. You can put them into whatever you wish .
Rinsing the Eggs
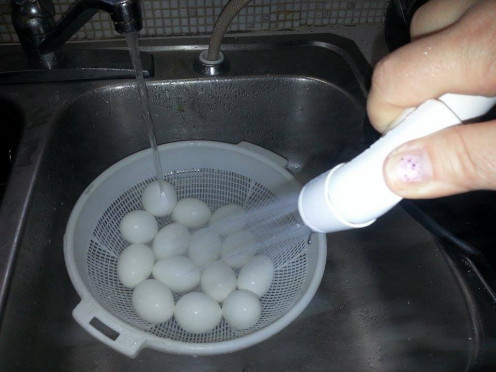
Rinse your eggs after boiling under cold running water to cool them off rather than just letting them sit and wait to cool. This serves two purposes. One obviously to cool the eggs so you or your little ones don't burn your hands on the eggs. Also I have read that running them under cold water immediately after boiling stops the cooking process and makes the eggs easier to peel afterwards.
Older or Newer Egg
view quiz statisticsPreparing The Egg Dye
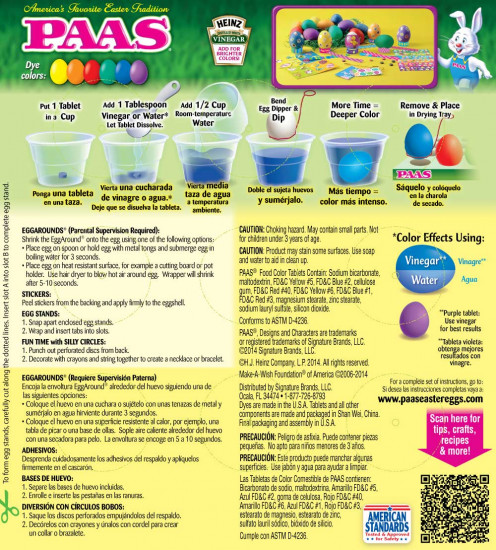
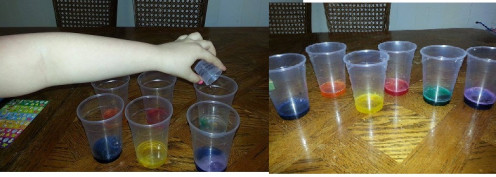
We followed the directions on the back of the package. The first step was to put one colored tablet in each cups. You can use pretty much any type of cup or container you wish. I have used ceramic coffee cups in the past but they always land up stained and then I have to do dishes after so this year we went for throw away plastic cups. Just make sure they are big enough for the eggs to fit in and out of without hassle.
The second step, that is pictured here, was to put 1 TBS of white Vinegar in every cup. This starts the tablet dissolving process and makes for brighter colors. There was an alternative of using hot water if you don't have vineger. The egg colors just wouldn't come as vibrant.
Adding The Water
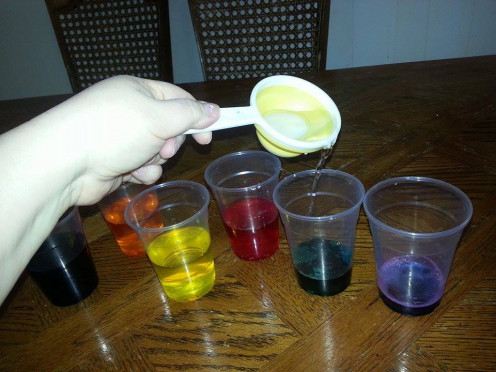
The next step was to add a half of a cup of room temperature water to each of the cups. I waited a while before I did this to let the color tablets dissolve in the vinegar first.
Let The Dying Begin
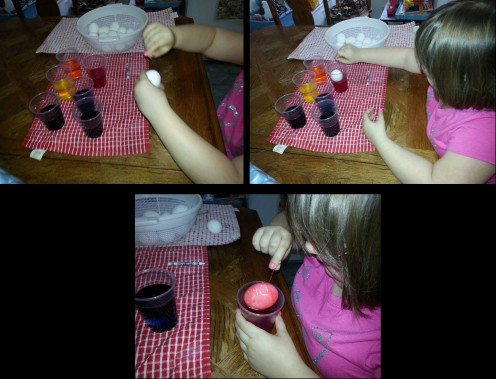
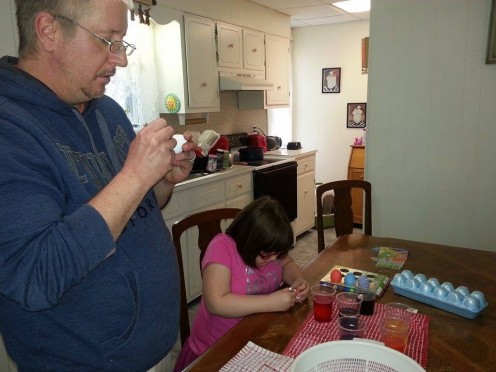
Now it's time to start the fun. Here my daughter made a pink/red eggs for herself. To put your name on the egg or any other drawing like she did you simply use a white crayon. Some of the kits come with a crayon, but this one did not. Dry the egg thoroughly, and write on the white egg with the crayon before you put it in the dye. The longer you leave the egg in the dye the more color it will have. In the picture above my husband and daughter are personalizing their eggs.
Multi Colored Eggs
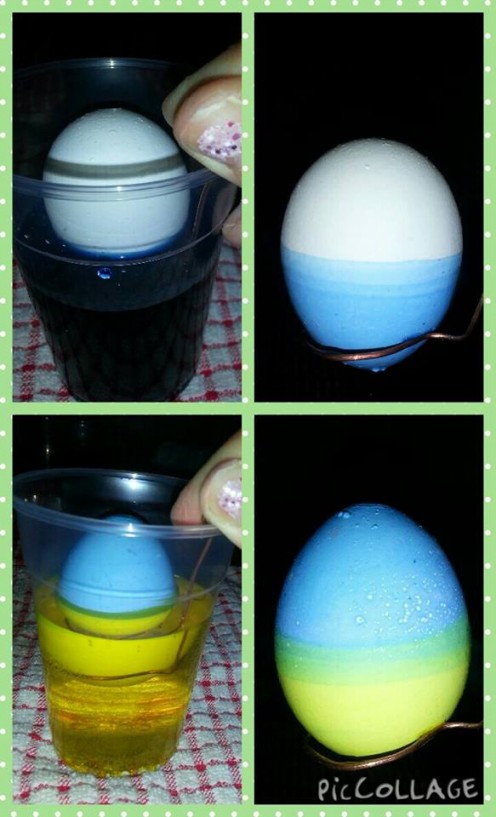
I made a multi colored egg by holding half the egg with the dipper in one color until I was happy with how it turned out. In this case I did blue first. Then I chose yellow for the other half so that they would combine and make green in the middle. You can do this with any of the primary colors that mix to make a new color. So, I turned the egg around and dipped the white half into the yellow dye making sure to overlap on to the blue a little for the 3rd color.
Finished Eggs
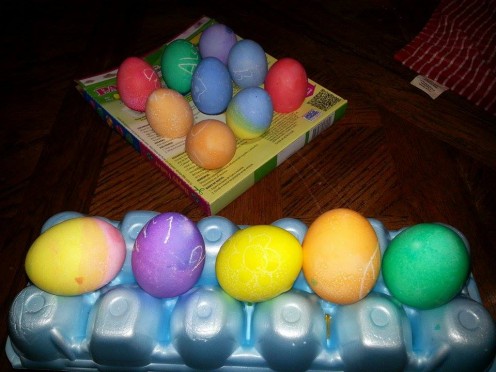
Here are our finished eggs. Looking very springy in their bright colors. You can see another multi colored egg made from yellow and red to put orange in the middle on the blue egg carton. I will admit that there are tons of other ways to make fancier eggs, but for me and my family this way works. I hope if you haven't tried coloring eggs before or even not in a long time because you thought it was too much trouble... you might consider this method !
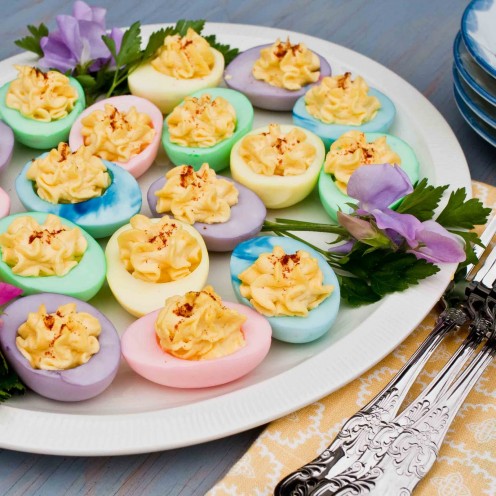
Dyed Deviled Eggs
- FOODjimoto: Easter Eggs
A link I found for deviled Easter Eggs where you dye the actual egg instead of the shell. An interesting variation on the original colored egg and what fun to take to a party !!! Check out the link for the instructions.