- HubPages»
- Technology»
- Computers & Software»
- Operating Systems
Howlermunkeys Essential Guide to Install, Use, and Tweak Windows 8

Microsoft Windows 8 has been released to the public and is free for "Consumer Preview". What this means is that you have a chance to download the complete Windows 8 Operating System before it's been officially released to the market (expected date is October 26th, 2012, but has been released to manufacturing already).
You should check this new Windows edition out (before buying a new gadget) as it includes the new “metro” interface and at first glance appears to be missing some core Windows 7 features. Most features are actually still there (or can be), you just need to know how to get to them.
In this hub I’ll completely guide you from start to finish. Downloading the Windows 8 release, Using the ISO image (on a Real or Virtual Machine), Windows 8 installation, navigation through the new metro interface and the desktop, (hotkeys you must know), as well as offer some great Windows 8 tweaks to use. I'm starting from the very beginning so if your familiar with burning an ISO and installing Windows you may want to click to Part 2 - "Using and Tweaking Windows 8"... BUT --
If you have never created or used a Virtual Machine, Read On! I'll take you through the entire process step by step!
Section 1 -- Download and Use the Windows 8 ISO
In this First section I'll completely cover the download and use of a Windows 8 ISO on a Test machine. (Real and Virtual). If you already know how to do this, you may want to skip to -- Section 2 "Installing Windows 8"
You'll need a Test PC
The first thing you'll need to do is decide where your going to install your copy of Windows 8. Please note -- This is a full copy of an operating system, and I would not advise overwriting (or upgrading) your current Windows PC.
I will cover two different install options for your Windows 8 test PC:
1. Use a Real "Test" PC -- Burn an iso to a dvd and perform a full, clean install on an actual test pc, in my case my "test" laptop. I'll walk you a very easy process to burn an ISO to disk.
2. Use a VM on your PC -- Create and Use a Virtual Machine (VM) on your computer with a free trial of VMWorkstation 9. Have you ever used VMWorkstation? If not this may be a good time to try, as I'll walk you through the entire process of creating your own Virtual Machine!
Either way we will first need to download our free copy of Windows 8. You can download a copy of Windows 8 "Consumer Preview" from here:
http://windows.microsoft.com/en-US/windows-8/download
You'll have your choice of 32 or 64 bit versions. (If you are unsure which you need, right click "computer" and go to "properties". If setting up a VM and unsure use 32 bit.
TIP -- Here is the Windows Install key-- TK8TP-9JN6P-7X7WW-RFFTV-B7QPF -- you'll need it during the install.
1. -- Use a Real "Test" PC
Burning an ISO to disk for your Windows 8 Test PC
The download files will come in the form of an "ISO". One of the easiest ways to burn an ISO to disk is by using a free program called Active ISO. You can download it here, or google it. (You'll be prompted to reboot after install).
Once installed open Active ISO up with a blank DVD (I use rewritables) in your tray and Active Iso will automatically see the disk. Then browse to the location where you saved your downloaded Windows 8 ISO by clicking the button "..." to the right of the navigation bar. Once you've located the ISO just double click it and Active ISO will enter it in the navigation bar.


Next just click "BURN" and you will have your copy of Windows 8 on DVD within minutes!
Now that we have our Windows 8 DVD, we are ready to install. Place the DVD in your test machine and reboot. Select "boot to CD" when prompted. Thats It! (Make sure your boot order is set to boot to CD first, or you can usually select "boot options" when the machine first powers up).
Next Scroll down to Section 2 "Installing Windows 8".
2. -- Use a VM on your PC
If you would like to create and use a Windows 8 Virtual Machine on your PC (free for 30 days), you'll be happy to know that VMWorkstation 9 supports Windows 8. You may download a free 30 day trial here. Register with an email address and install the program like you normally would.
Once VM Workstation 9 is installed, open up the program, go to "File" at the top left corner and select "New Virtual Machine" or hit "Ctrl" + "N". Then follow my next steps:
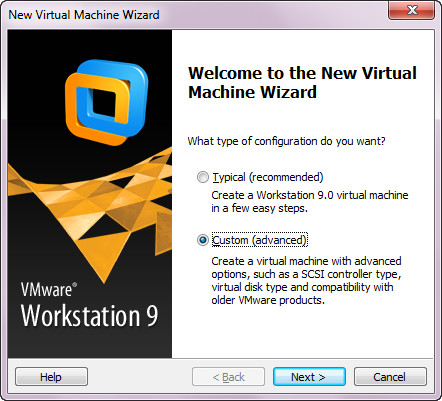
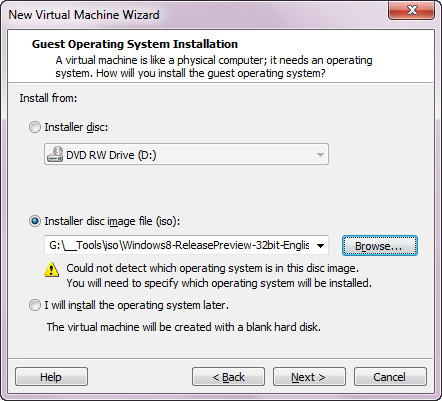
First , Choose "Custom (advanced)", then "next". On the next screen when asked where to "Install from", use the browse button to browse to the ISO you just downloaded. Double click the ISO to select it.
Once the ISO is selected, click next and follow my screen shots.

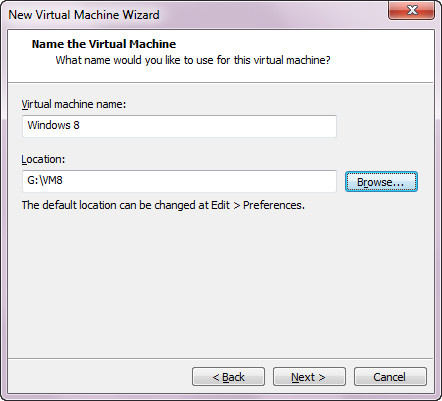
This next step is important -- Check to see how much space on your Hard drive. If you have a seperate Partition, like a "G" drive", use that. Then where it says "Location", click browse to find some free space and create a new folder. I created a folder "VM8" on my "G" drive. Note -- (I'll limit my Windows 8 VM to 60 gb a few steps down).
On the next Two Screens, leave the "Processor Information" and "Memory Configuration" alone, unless you know what you are doing. Remember, this is just a test machine, and I have been playing with Windows 8 for a couple of weeks with the default settings and it runs fine.
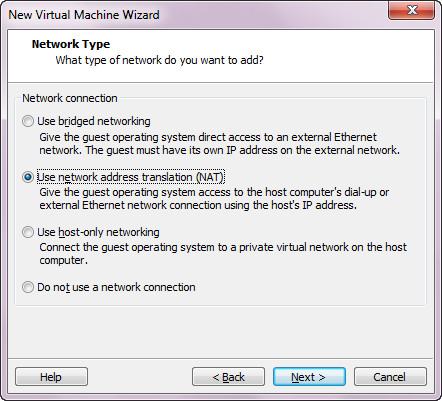
Click next through both of those screens and you should be on the "Network Type" screen. Again, unless you know what you are doing, leave it on the default "NAT" setting, and click next.
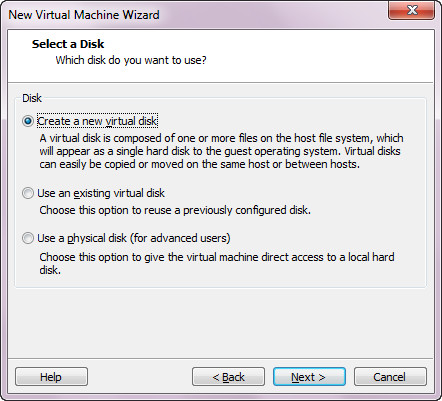
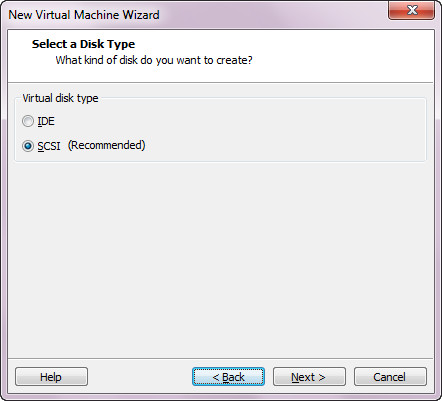
On the next three screens: "Select I/O Controller types" , "Select a Disk" and "Select a Disk Type", leave the settings at default and click "Next".

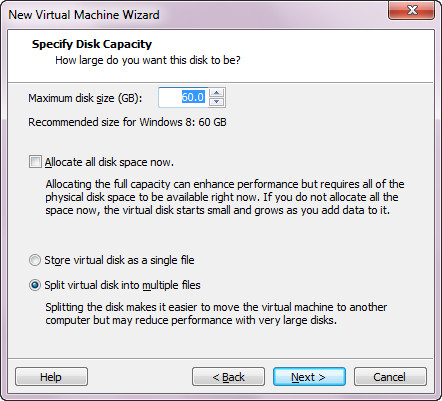
On the next page, "Specify Disk capacity" , make sure you have MORE than enough disk space available. The rule of thumb is at least ten percent more, I usually leave at least 20 percent. In other words, Remember where you created the VM8 folder? (Location)? If you have 100 GB's of free space on that HD, limit your VM to no more than 80 gb's. Since this is just a test machine, I left mine at the default of 60GB.
Leave the next screen "Specify Disk File" alone and click "Next".
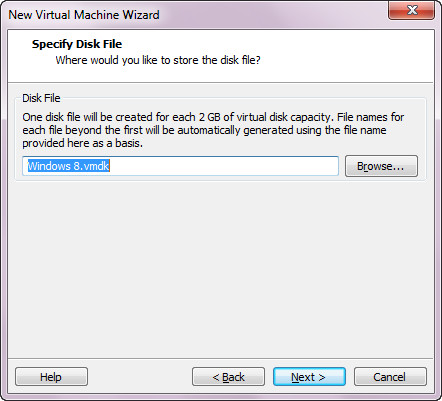
Click Next, then "Finish" and that's it! Your now ready to install Windows 8 on your Test Virtual Machine! How cool is THAT? if this was your first time pat yourself on the back, you now know how to install a VM. Read on and you'll know how to install, Use, and Tweak Windows 8 as well.
Once the Virtual Machine is done, you'll be back at the VMWare start page. Look at the top left corner. Your Virtual Machine is powered off. Click "Power on Virtual Machine" and Lets Install Windows 8!
Section 2 -- Installing Windows 8
Now that we have our Test machines prepped and ready it's time to install Windows 8. Whether your booting from your DVD or with your newly created VM, the process is the same, and only takes a few minutes to complete. Let's get started!
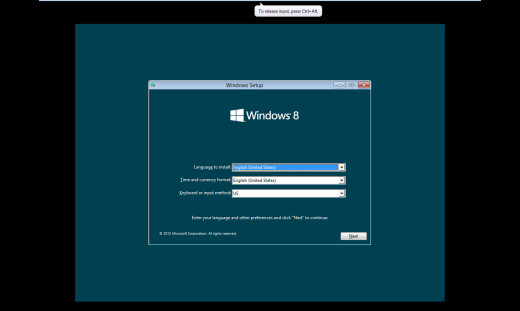

On the first Windows 8 screen you'll select your settings, click next, and on the next screen clck "Install Now". You'll then be prompted for the key.
TK8TP-9JN6P-7X7WW-RFFTV-B7QPF
Once the Key is entered , click next, accept the "Licensing Terms" and click next.
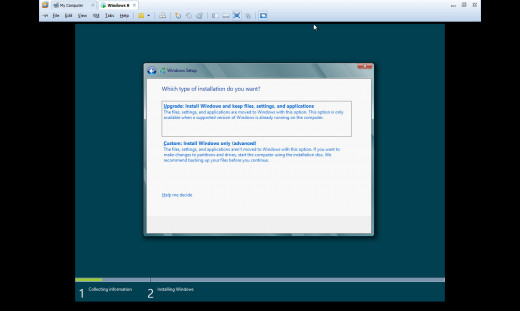
Choose "Custom: Install Windows Only (advanced), and click next. Then you'll see a screen asking "Where do you want to install Windows?" Since we are using a fresh "test" machine, You should see "Drive 0 Unallocated Space". No need to touch a thing, click next.
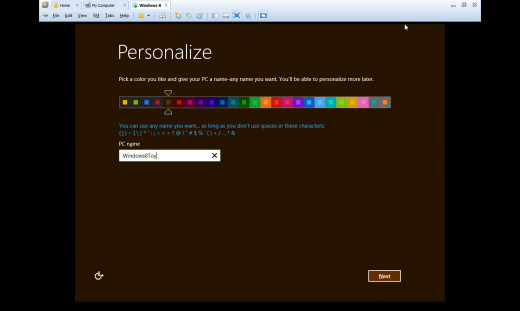
Now you should see the "Installing Windows" screen. You'll be surprised by how fast Windows 8 will installs (and boots). When complete you'll land on the "Personalize" Screen. Use the slider to pick a color scheme. Not surprisingly, I picked Brown :).
Name your PC and Click "Next".
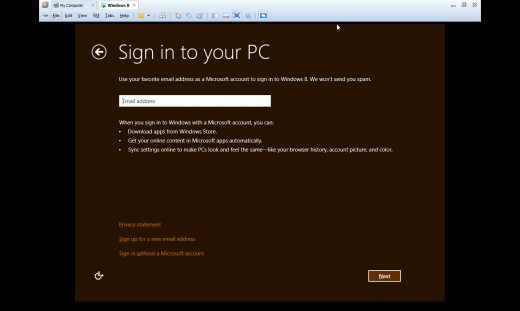
On the "Sign in to Your PC" screen, you'll be asked to use a Microsoft (hotmail) account. I use one for Windows 8, and recommend you do to. Many of the new Windows "metro" features will use this account, and if your signed in when the PC boots up it will make the entire experience way smoother. If you choose not to use a Microsoft account, click "Sign in without a Microsoft Account" at the bottom, and click "Next".
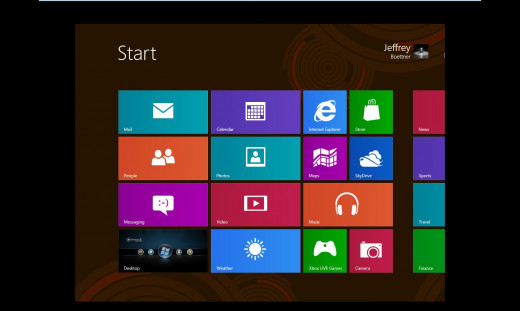
You'll then get prompted for some additional info for security, or, If you opted not to log in with a Microsoft account you'll get prompted to create a user name. That's it! Give the PC a few minutes to finish up and you'll be greeted with your new Windows 8 Metro Desktop.
Lets get started on Part 2
Congratulations! You now have your very own Windows 8 Test Machine to play with, and OH, there is much to play with! Go grab a coffee, Rockstar, or Redbull, and click over to: