DIY Home Improvements - Cheap Do-It-Yourself Home Projects/Remodeling

How to remodel a 1/2 bath for under $100
Do you ever wish you can redo a room in your home? What is holding you back? Many of us fear the cost of home improvements. We refuse to look outside the box. I was one of the countless homeowners who want to remodel but do not have the available funds to do so. But there are many solutions available if you just think outside the box.
I decided to remodel our 1/2 bath that is located on our first floor. This bathroom was built quite a few years ago in a hurry. My home use to belong to my great grandparents. My great grandmother was no longer able to make the trip upstairs to the bathroom because of health reason that only allowed her to climb the stairs once per day. So a make shift bathroom equipped with a toilet and sink was built in the corner of the living room. For years, especially the 10 that I have lived here, it was just a bathroom that looked thrown together. But I decided to make it look as if it were supposed to be there.
After much thought and price consideration I realized that I had to think about what material would be the most cost effective to handle this job. I found my main material by chance at our local Dollar General. There is was in the last aisle of the store, on the bottom shelf against the back wall, boxes of peel-and-stick floor tiles. But I was not using these for the floor, but instead they were the perfect color and design for the wall. Each box contained 20 tiles, so I purchased 3 boxes for my job. So at $10 per box it cost me $30 plus sales tax. We decided to tile partially up the wall and then paint the top area. We had to purchase paint that would cover paneling because the walls were panelled. Lastly the floor needed to be re-tiled. The existing tile was cracked, and also had been ruined in front of the sink by throw carpets that had dry rotted to the floor leaving a mess that did not clean up well. I had found peel-and-stick tiles for the floor at our local Big Lots store that resembled wooden flooring. These boxes were $10 per box for 10 tiles. I purchased 2 boxes costing me $20 plus sales tax.
The cost of the materials cost approximately $65 total, this amount includes all tiles, paint, and caulking.
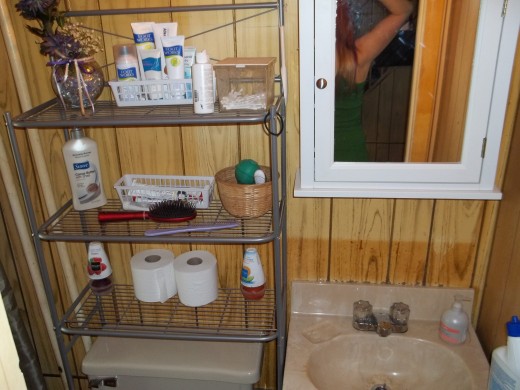
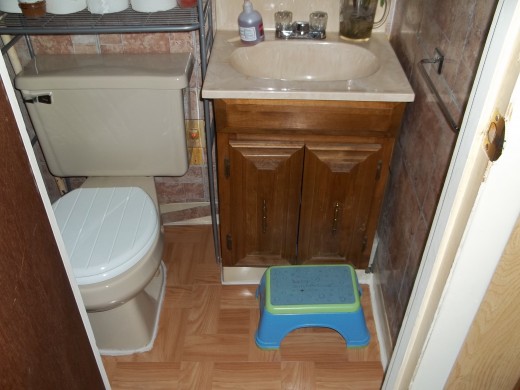
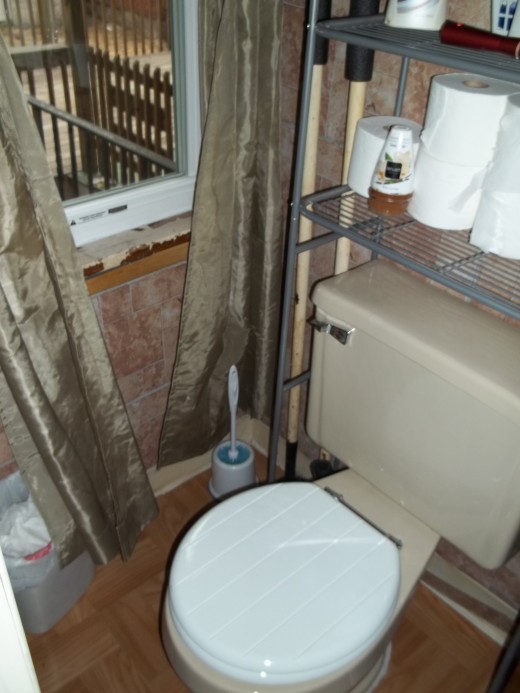
Before Pictures


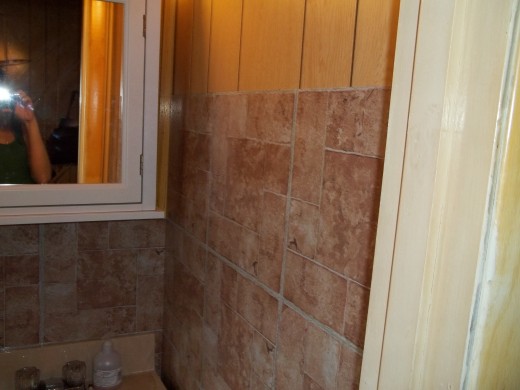

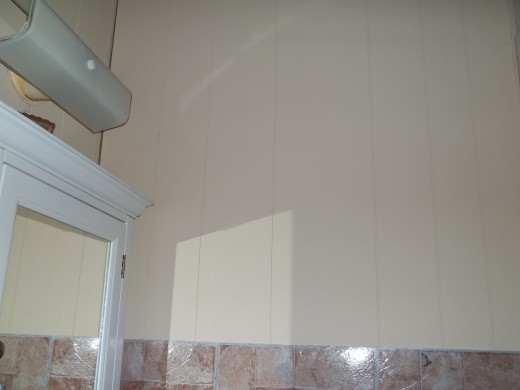
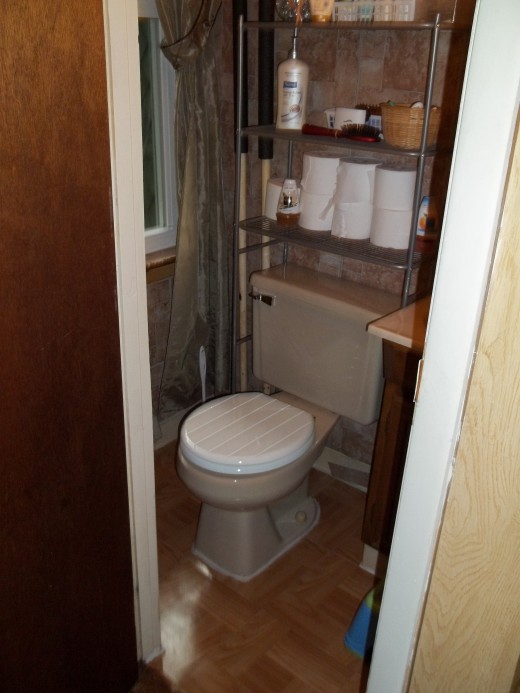
After Pictures

Remolding My 1/2 Bath
The room that I remodeled is our first floor 1/2 bath. It measures approximately 4' 10" by 3', and the walls are about 8 1/2' high. This bath consists of a toilet and sink.
First I started by wiping down all of the panelling on the walls. Then I started applying the peel-and-stick tiles we had chosen for the walls. I started from the corner of the wall at the height of which the tile would end and worked my way across and down each wall. Some tiles needed extra adhesive in order to help stick to the wall, this was the case mostly behind and around the toilet. (my guess was due to the moisture and cooler surface the tile didn't stick as well without the extra adhesive being applied) I did this job by myself and it did not prove to be difficult. The hardest part was cutting the tile to fit around the ends and at the bottom, especially because my home is older and the floors are not exactly level!!
Next the top sections of the walls were painted. I left this job to my fiancé because I am not a very great painter. We removed everything from the walls, medicine cabinet, shelve, and curtain rods. We taped off the molding around the ceiling and the top of the tiles on the walls. We also covered the toilet and sink with plastic bags just in case the paint splattered while rolling it on to the walls. It took two coats of paint to cover the panelling completely. Once dried we replaced the items we had taken down.
Then I started the floor. I first used an electric sander to remove the dry rotted carpet material from the existing tiles, also I sanded over the other tiles to remove any gloss from the surface. I then used caulking to fill in any large spaces and cracks between the old tiles. I start to lay the tiles from the right side of the bathroom across to the left. I used spray adhesive for each floor tile to guarantee a tight seal. The hardest part of this job was cutting the tiles to fit around the toilet and other piping that runs through this room.
Finally I used caulking to fill in any gaps and also to seal around the edges of the sink and toilet. I applied a thin line of caulking completely around the floor against the walls, and also down the side of the sink cabinet. I used clear caulking on a tile that I could not get to sit flat due to the tile underneath, so that no liquid could get underneath any of the tile.
The total amount of time it took to redo this room was about 9 hours. We did it over a period of three days, one day for the wall tiles, one day for painting, and one day for the floor and caulking. We did all the work ourselves so we did not need to pay anyone else to do the work for us.


