How to Replace a Broken Roof Tile


This page will explain how to remove and replace a broken roof tile.
While tiles come in different shapes and sizes, the process of extracting a tile and securing a new one in it's place is pretty much the same.
Before you begin, you will need the following:
- Ladder or other equipment to access the roof safely
- Replacement tile
- Hammer and nails (size of nails vary for each tile but between 40mm - 75mm should suffice)
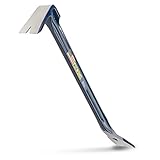
- Tools to remove existing nails, if there are any, I use this tool (see photo above), it can be
purchased from Amazon.
- Felt or tape if you need to repair a hole in the underfelt

Step 1 - Push Up Tiles
Once you have safely gained access to the tile on the roof, you will need to push up the tiles directly above it to fully expose the broken tile.
Looking at the photo to the right, you can see that these tiles are not secured to the roof with nails. This is common practice and on most roofs nails are only used on every 4th or 5th course.
If the tiles won't push up then this is a sign that they are fixed with nails, so use a pry bar and slide it under the tiles and pop the nails off.

Step 2 - Remove The Tile
Once any nails have been removed from the tile, simply lift it upwards, it should come away from the roof very easily.
This is a good time to check the condition of the roof felt located directly underneath the tile. If the tile has been leaking water then chances are the felt may be excessively worn or have a hole in it.
You could remove more tiles and insert a new section of felt (advanced) or do a patch repair by using some felt tape (similar to Duct tape).

Step 3 - Install New Tile
Step 3 is to lay the new tile into place.
Ideally you want to use second hand tiles that are the same colour as the original tiles, you should be able to get these from a reclaim yard, but you may need to hunt around a bit.
If you are unable to locate old weathered tiles to match your roof, buy the closest colour match and swap them with weathered tiles somewhere else on your roof. I usually put off-colour tiles behind a chimney, behind a dormer or around the rear of the roof, anywhere they can't be easily seen.
Once you have sourced some weathered tiles from hidden parts of your roof, use these to replace the broken tiles on the more visible parts of the roof.
More work I know, but nobody wants to see mis-matched tiles dotted all over the roof.
The new tiles should hook over the timber baton and be secured with nails - if you removed any from the original tiles.

Step 4 - Pull Down Roof Tiles
Now pull down the tiles located above to ensure the roof is watertight.
Double check that all tiles are flat and lined up neatly with the surrounding tiles.
As I pointed out earlier, it is very common for roof tiles to be laid without nails. On most roofs only a few courses are actually secured by nails, the rest are left to hang on the batons.
Replace Roof Cement
I have another article on how to remove and replace roof cement, it will be helpful if you intend to remove a ridge/cap that is secured with mortar/cement.
Please read "how to replace roof cement" for more information.
I also intend to write and article on how to re-cement a gable/verge, so check back soon.
Feedback Please!
Was This Page Helpful?
Related Help Articles
- How to Increase Gutter Capacity and Stop Gutters From Overflowing
If your property suffers from overflowing gutters then there are some steps you can take to remedy this. The occasional overspill onto the roofline fascias and soffits during heavy torrential rain is to be expected but during typical rainfall... - Gutter Foam and Brush Reviews
Over the last few years several new gutter guards have come onto the market. The gutter helmet, the brush and the foam to name just a few. Each of these products has it's own advantages and disadvantages. Today I want to write a review... - How to kill moss on roofs
This page explains how to remove and kill roof moss cheaply without the need for expensive products. Don't get ripped off, follow these steps now!


