How to Plug Your Network Cables to Wall Jacks

Introduction
If you have quite a spacious house, and you have so many devices you want to connect in your home network, it would be very wonderful if you don't have your network wires tangling crossing over everywhere.
Of course wireless network should be the answer to your problem, but some devices require you to use wire connection only, such as older devices.
If you're planning to moving to your new house, consider to run the cables in your walls.
Once you get the cables in the walls, here are the steps you can do to make the wall jacks:
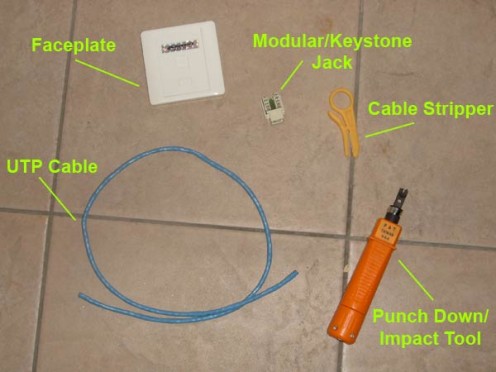
The tools required
Below are the tools required to do the job, you can find them in just about any computer accessories stores and the prices these days are quite cheap.
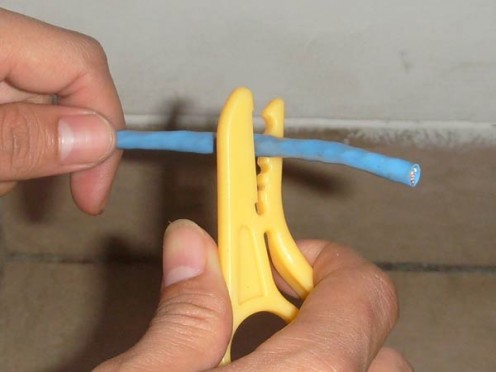
Step One
Strip the cable jacket using the cable stripper.
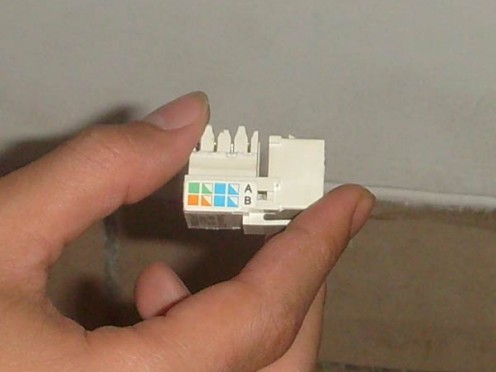
Step Two
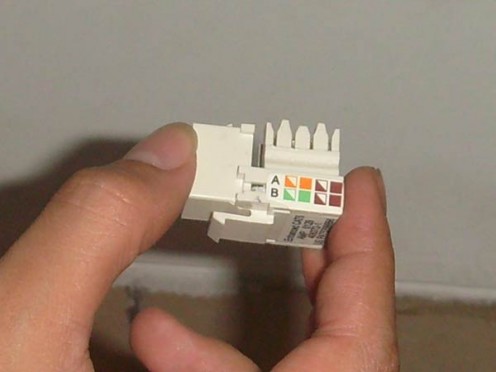
Prepare your modular jacks, you can see the jacks have the color codes printed on it.
Confused which one to use? It is really up to you to choose, I personally like to use the T568B. The important thing is you need to keep all codes same in your network.
Step Three
Position your cable and jack as the below picture, then arrange the cables to the jack according to the color codes you want to use.
Remember you have to keep the twisted part of the cables, do not untwist the cables too long from the cable jacket. This is to avoid any crosstalk or interference when you send data in your network.


Step Four
Start punching down the cables using the punch down impact tool. There's a reason they're called the impact tools, when you punch down using these tools, they produce an impact, so be careful a bit with them.
You can see at the picture below that the impact tool has a sharper tip at one end and the other is not, always remember to place the sharper tip at the outer side of the jack.
The impact tool has two function first it will punch the cable down the pin of the jack and second, using the sharp tip it will cut the excess cable.
One tip, if this is your first time using this tool, put the jack on the floor with a carton underneath it, this is to prevent the jack being damage while punching it down.


Step Five
You are almost finish, insert the punched jack into your wall plate, be careful if you put them the wrong way, the RJ45 connector from your computer can't be inserted, so make sure you put it right, if not, you can always unplug the modular jack and insert it again to the wall plate.


Conclusion
Doing this is a time consuming work, but after a while you'd get used to it. It would be a lot easier if you're building a new house and planning to run the cables in the walls.
If you want to apply this to your current house and don't want the trouble to run the cables in the walls, you can always use the cable raceways to hide your cables.
I hope this hub informative for you and I'd like to thank you.