Wall Art Techniques

Whether you are an artistic or not you can create beautiful wall art. Wall art can be the finishing touch on a room, like icing on a cake. There are many ways to create wall art for many different rooms in your home.
Painting a Mural
Supplies
Overhead projector
Pencil
Paint brushes
Step 1
Project the chosen image on to the part of the wall you want to paint the mural. Using the overhead projector project the photo or picture that you want to paint on the wall.
Step 2
Pencil in the outline of the projected image on to the wall. You will be able to get as detailed or basic as you want in this step.
Step 3
Paint in the lines of the penciled in outline. Use the original photo or picture to use as a guide for colors and shading. You can seal the finished mural with a clear coat to protect it.
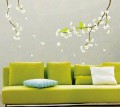
Applying Decals
Smooth wall surface
Wall decal
Measuring tap
Pencil
Plastic trowel
Step 1
Measure where you want the decal to be placed on the wall and mark the area lightly with a pencil. This will ensure a centered placement of the decal. Applying the decal to a smooth wall will work best.
Step 2
Peel the off the backing of the decal to reveal the sticky back of the decal. There are three layers to most wall decals, the backing, the decal and the top protective layer. The top protective layer needs to stay on the decal.
Step 3
Apply the decal to the wall. Carefully stick the decal to the wall following the measurements. Smoothing over the entire decal with your hands getting as many bumps out as possible.
Step 4
Smooth out any remaining bumps or bubbles with the plastic trowel. Remove the top layer carefully. Staying close to the decal and making sure that no part of the decal rips or sticks to the top layer.
Stenciling
Stencil
Painters Tape
Paint
Stencil paint brush
Step 1
Apply the stencil to the wall with the painters tape. The stencil needs to be snug against the wall, this helps create a smooth sharp line when painting.
Step 2
Paint over the stencil with the stencil paint brush. Using a bouncing up and down motion on to the stencil. Cover the area completely, shading in area if needed. You may need to allow the first coat to dry before adding shading. Some stenciling effects include just painting the edge of the stencil and others involve layering several stencils to make a detailed picture.
- The Writings On The Wall, Custom Vinyl Art for Sale
I love creativity and found a nitch with vinyl wall and window accents :) I can try to make anything you want but my specialty is wall quotes and car window accents :) Message me for estimates and I will be uploading different fonts and photos shortl

")


