Easy, Washable Do-It-Yourself Upholstered Walls

How I Got Started
One of the reasons I never bothered to upholster my walls was because, as much as I loved the look of those gorgeous fabrics, I am kind of a clean freak. The thought of not being able to take down the fabric to wash it easily kept me from even attempting the project. But then one day, as I was upholstering cushions, it occurred to me that I could upholster my walls in a different way and be able to remove the upholstery for cleaning and replace it easily, and that inspired me to undertake it. And an added benefit was that I was able to soundproof my room, and sleep even better than I had been.

And the best news of all? By buying my fabric wholesale, I was able to have three sets of upholstery (reusing the same foam) for less than the cost of wallpapering my room even once. I can now change my theme in less than half an hour, by myself.
You will need good enough sewing skills to cover a pillow.
If You Can Sew a Pillow Cover, You Can Do It!
The idea is sofa cushions, or pillow covers writ large. If you look at your sofa cushions, they often come with a zipper, allowing you to remove the fabric from the cushion, wash it, and replace it, thereby keeping your sofa clean. Whereas most instructions for upholstering walls will tell you to staple the fabric directly to the wall, any spot will have you removing dozens of staples, and all your fabric, in order to get it into the washing machine, or else you'll be scrubbing away by hand. By using the pillow cover technique, you can take your wall upholstery straight to the washing machine, and pop it back on the wall as soon as it is dry!
Prepare Your Materials
First, figure out how much wall space you have in your room. Start from the top of the baseboard and measure up to the ceiling. If you have crown molding, you'll want to stop at the bottom of the crown molding. Then measure around the bottom of the room, and you'll come up with the circumference. Keep both these numbers handy; you'll need them multiple times during this project!
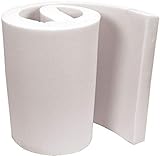
How to Fit Foam Cushions to the Walls.
Next, choose your foam cushions. If you want a tiled effect, you can choose cushions as small as 12 inches by 12 inches (for example, for a checkerboard effect). Be aware that the more cushions you have, the more sewing you will do! I wanted all the same fabric, so I went with ten-foot by two-foot cushions (I have nine-foot ceilings) and cut them down to size (that's where the floor-to-ceiling measurement comes in). Between the floor-to-ceiling measurement, and the circumference measurement of your room, you can figure out how many foam cushions you will need. Dry-fit the cushions, and cut where necessary to fit your wall, numbering them as you go. Don't forget to miter the cushions in the corners of the room for a professional look.
Once you have your foam cushions, it's time to work out your fabric needs. Measure the circumference (crosswise if your cushion is rectangular) of a cushion, and add two inches to this measurement for seams and cutting irregularities. This is how wide you will need your fabric to be for each cushion.
Now the time has come for a little arithmetic. Don't panic: it's not difficult. Fabrics typically come in widths of 45 inches, 54 inches, or some multiple of one of these. So go out and find the fabric you love, and the width will be marked on the bolt or roll. Now that you have that measurement, you will know how many widths of cushion covers you can get out of the fabric you have picked. For example, if your measurement is 50", and your fabric width is 108", you can get two widths out of the fabric. Now to work out how many yards to buy, you multiply the floor-to-ceiling measurement by the number of cushions you have to do, double it, and that number will tell you how much fabric to buy. If you are buying a natural fabric, you may wish to increase the amount by about ten per cent because it will shrink slightly in the laundry the first time you wash it.
If you have a patterned fabric and you want to match it, it never hurts to have a second person help you to figure out how much extra you will need.
Don't worry if you can't figure out all the measurements; when you go to the fabric store, someone with a calculator can help you do the math, but the basic idea is this: your walls are probably going to be eight feet high; you need to cover all four sides of the cushion, so that's eight feet, times the circumference of your cushion, times your number of cushions (adjust if you have taller or shorter walls). Then figure out how much of that circumference of the cushion you can get out of one width of the fabric. Just take your time and use a little common sense.
You will also need thread that matches your chosen fabric, and a zipper for each cushion to cover.
Pick a fabric that is washable, of course, and then wash, iron, and straighten it before you begin. Don't skip straightening your fabric, or you'll regret it, as the upholstery will begin to twist and ruin the effect! Next, lay out your cushion on the fabric, and fold the fabric over it, leaving enough for a seam on the end, and then cut your fabric. Continue until you have cut all your fabric, measuring out material for each cushion separately, as some might be a bit irregular. As you go, number each piece of fabric with washable fabric marker to match its corresponding cushion.
Measuring Your Fabric
A little example on the math: if you use a two-foot wide cushion, that's 24 inches for the front, plus 24 inches for the back, plus the twice the width (in the case of 2.5 inches, the total is 53 inches), plus 5 inches for seam allowances (1¼ inches per seam, times four seams). That gives you 58 inches, so if you have 60-inch wide fabric and those dimensions, one width of fabric will surround the entire cushion.

How to Make a Cushion (With Piping)
How to Make a Bench Cushion with a Zipper and Piping
Make Your Cushion Cover
Now, you will make a cover for each cushion piece, just like covering a pillow. Place the fabric, wrong side out, around its corresponding cushion, and pin it so that it is like a pillowcase. Remove the foam, then sew up the side seams, and iron the seams flat (use a French seam if your fabric will ravel). Still on the wrong side, sew in a tiny piece of fabric marked in permanent marker with the cushion number on the edge opposite where the zipper will go. Turn the fabric right-side out, then slip the cushion back in and mark the end, then remove the cushion, and trim if necessary. Insert your zipper into the open seam and sew up, then slip the cushion back in and zip up the zipper. Continue until you have covered all the cushions.
When you have done all that, you are ready for the next step.

Fasten Your Cushions to the Wall
The way I chose to fasten my cushions to the wall was with hook and loop tape. I used 1" wide tape that has adhesive on the hook side. That went against the wall along the top and bottom, in strips about 3" long. Then I matched the loop side to the hook, dry-fitted the cushion against it, and tacked the loop on by hand. You could also remove the foam and sew it with a machine, then replace the foam, but if you tack it on by hand, if necessary, you could remove it unnoticeably and put it on the other side, in case you get a stain that will not come out.
Then simply use your hook and loop tape to fasten your cushions on to the wall. At this point, it will take only seconds for each cushion. Where the cushions meet at the corners of the room, a little push in between the cushions with a bone folder will keep those corners sharp-looking.
When you've finished, your wall upholstery will come off in seconds, you'll be able to remove the foam, throw the covers into your washing machine, and come out a couple of loads later sparkling clean and all ready to go back on the wall!
If You Rent . . .
Use the Command picture hanging strip or similar brand of removable hook-and-loop tape. Just make sure to follow the instructions!
If you were going to upholster your walls, what pattern would you pick?
Even Better . . .
You don't have to be stuck with just one fabric! Unlike wallpaper, or like upholstering your walls in the traditional way, or paint, you can make multiple covers for each cushion, and change them whenever you like. Imagine being able to redecorate for Christmas, or any holiday, as simply as changing your pillowcases. Just remember to mark your covers on the inside to match your cushions. Fold and store the covers you're not using, and you'll be able to change your décor for any occasion in minutes.
Tips
- For extra oomph or definition, pipe your cushion covers in matching or contrasting fabric. This takes more skill, and more fabric, but it can add a fabulous effect.
- Be prepared for more dust if you upholster your walls as fabric tends to create dust.
- Want more definition? Consider adding stock molding such as chair rail between each cushion.
This content is accurate and true to the best of the author’s knowledge and is not meant to substitute for formal and individualized advice from a qualified professional.
© 2015 classicalgeek


