Setting up a Productive, Organic Raised Garden Bed

Why you might like a Raised Tin Garden Bed at your place
It's been something on my mind for a while now and when I visited my local produce centre lately I saw some locally made raised tin garden beds for $198 each. Compared to other stores and set ups $198 is a superb price for something its size. Made of thick steel so it didn't need support beams inside, it measured about 40 cm high, 2 metres long and 1 metre wide. And it wouldn't rust for 20 years according to the store owner. This was AMAZING! So, soon enough I had one of them at my place. I filled it up with what the store recommended and planted it out. I now have a very productive little veggie patch and just lately started harvesting my first crop of produce. I have had it now for about 2 months now and I am so impressed with it. I hope you enjoy this lens and maybe even buy a raised tin garden bed for yourself!
Make sure you leave a comment :)!
Choosing a garden bed.
p.oblique { font-style: oblique; }
When you're choosing a raised tin garden bed here are three main things to think about:
-Size
-Shape
-Price
Of course you need to choose if you'll buy a big one or a small one.
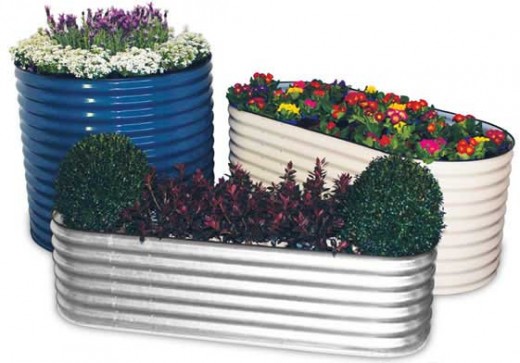
Also you need to decide what shape you'll choose, because believe it or not, you can buy circle ones or triangle ones or even tiered ones.
And of course the price. Remember to always compare prices with other stores.
I got mine from a produce centre where it was custom built by some local guy. As long as he could bend it, you could get any size & shape. Some other places to purchase a raised tin garden bed would be:
- a hardware store
- market (possibly)
- online
(Image from: http://www.td-rainwatertanks.com.au/raised-garden-beds.html )
It's difficult to think anything but pleasant thoughts while eating a homegrown tomato.
Lewis Grizzard
Filling up your Raised Tin Garden Bed and getting it ready for planting.
Time required: 1.5 - 2 hours (depending on skill of person/people)
Difficulty: medium
Cost: $220 approx. + garden bed of choice
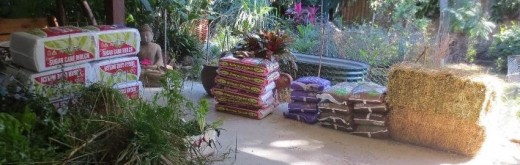
Materials:
- 1 x Tin garden bed (1 metre width x 2 metre length)
- 2 x Cow manure bags
- 1 x Mushroom compost bags
- 2 x bags Lucerne
- 2 x bags Sugarcane
- 4 x Garden soil bags
Tools:
- Garden fork
- Hoe
- Gloves
- Mouth mask
- Protective glasses
- Level
Instructions:
1. Determine the area in your garden that you will place your garden bed. A main factor to take into consideration is the sun/shade areas in your garden. Try to choose a spot that gets at least 3 - 5 hours of sun per day. Don't worry if you only have 3 hours, that's still enough. Ours really only get about 3 hours of sun each day and it does very, very well.
2. Before you can start work I really suggest getting some gloves on and a mouth mask. Sometimes protective glasses can be good too.
3. Once you have found your area of choice (and gotten your protection clothing on) remove all of the grass or weeds. Dig over the ground with a garden fork and then using your hoe try to smooth and level the ground as much as possible. Then place your raised tin garden bed on the ground and using your level, make sure it is level.
4. Now you can start filling the garden bed. First add 1 bag of Sugarcane. Try to spread it out as much as possible (with a hoe). Next add 1 bag of cow manure (& flatten out with hoe). Then add a bag of Lucerne. And yep- you can guess what I will say - flatten out with hoe. You will !NOT! have to dig it over as the worms will do it naturally.
5. After that add 1 bag of garden soil. (I won't repeat '(&flatten out with hoe)' anymore). Then 1 bag of Sugarcane. Then 1 bag of soil. Then 1 bag of Lucerne. Then 1 bag of mushroom compost. And then to finish it all off, add 2 bags of garden soil.
6. After that water it all in and let it settle overnight. The next day make sure that the soil is to the very top of your garden bed because it will 'sink' a bit. Just add a bit more soil if it is not to the very top.
And then you're all done and ready to plant!
Some products to get you started


