- HubPages»
- Gender and Relationships»
- Weddings & Wedding Planning»
- Decorations for Weddings
How to Make Decorative Table Center-pieces for your Wedding or Christmas


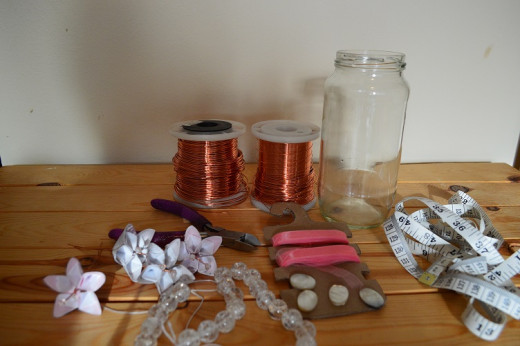
What You Will Need
- Wire - I have used two different thicknesses, 1mm gauge and 0.6mm (that's 18 and 22 gauge for those of you in the states)
- A selection of paper flowers - see the link to my tutorial at the bottom of this page to find out how to make these. You can make these out of upcycled greeting cards like I have, or use newspaper or fancy paper depending on how much money you want to spend
- A selection of beads - I have used 10mm round crackle quartz, and various shell beads. But you can use any beads you have to hand, or choose some to co-ordinate with a particular colour scheme.
- Ribbon
- A glass jar or vase. I have used an empty, cleaned cooking sauce jar
- A flexible tape measure
- Wire snippers, flat nose pliers, round nose pliers, scissors
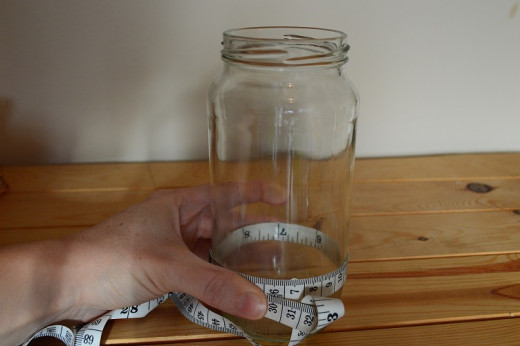
Making the Wire Frame Base
1. First measure around the jar, overlapping by approx 5cm
Double this total
= the amount of thicker gauge wire you will need to make the basic frame
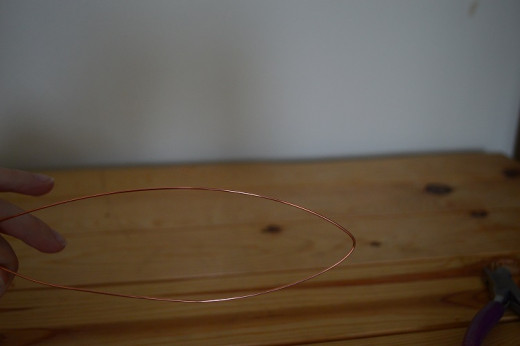
2. Measure and cut the correct length of the thicker wire
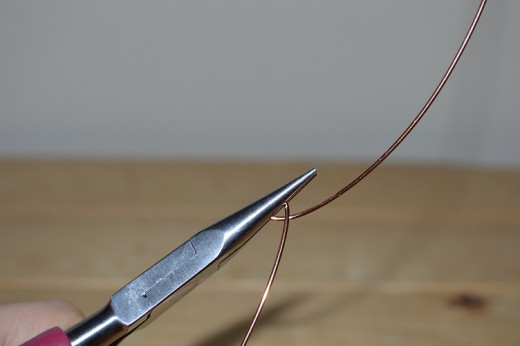
Bring the two ends together and make a V shape to find the center of the length of wire
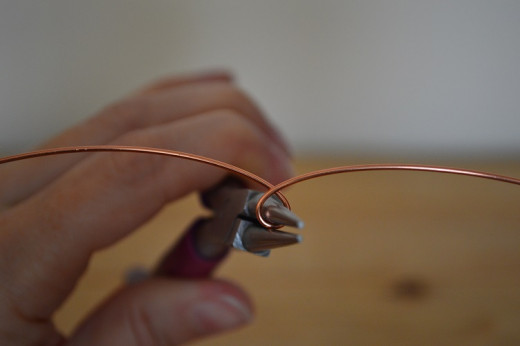
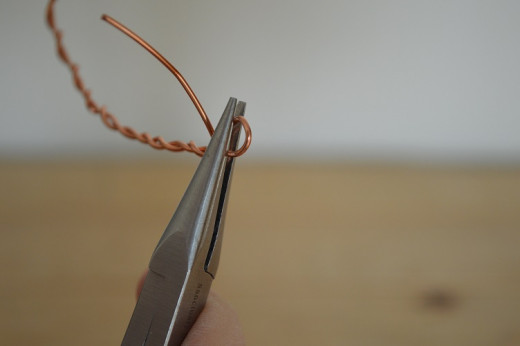
3. Place the round nose pliers at the center of the V shape
Bend the two ends so that they cross over and create a circle around the prong of the pliers, as shown
4. Remove the round nose pliers
Place the circle you created flat between the prongs of the flat nose pliers, as shown and grip
Begin to twist the two ends around each other
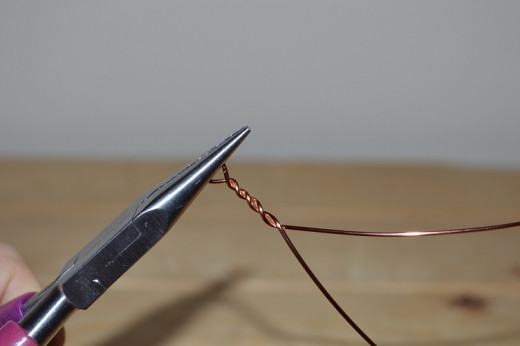
5. Continue to twist the wires around each other until you get to about 5cm from the end.
Tip - An easy way to achieve this twisted rope look is to grip the ends in one hand and hold the pliers (gripping the circle) in the other, now rotate your wrists in opposite directions and a twist will begin to form. So long as you keep hold of the wire ends where you want the twisting to stop, then the twist will not pass. Don't over-twist as the wire can snap.

6. When you reach approx 5cm from the end, stop twisting.
Curve the wire around the jar/vase to ensure the ends either meet or overlap with the circle at the other end.
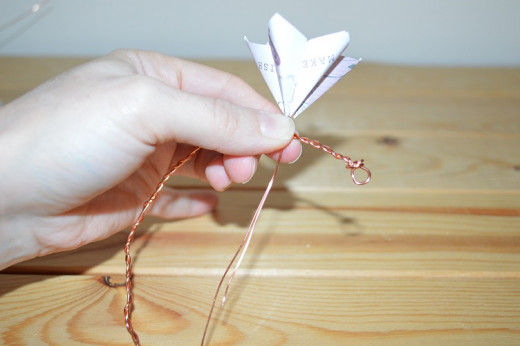
7. Remove the wire from the jar/vase
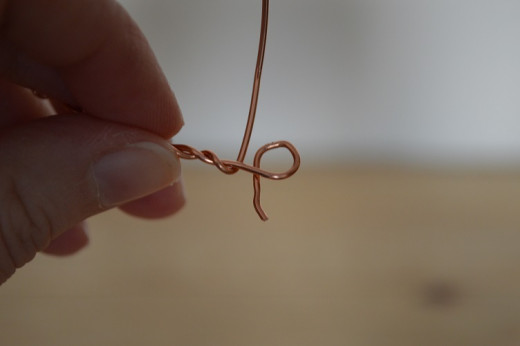
Wrap one of the ends around one prong of the round nose pliers to create a loop a little way down, leaving a little bit of excess wire
For now leave the excess, we will tidy those ends up shortly
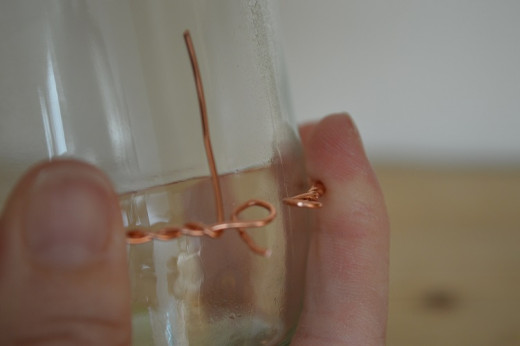
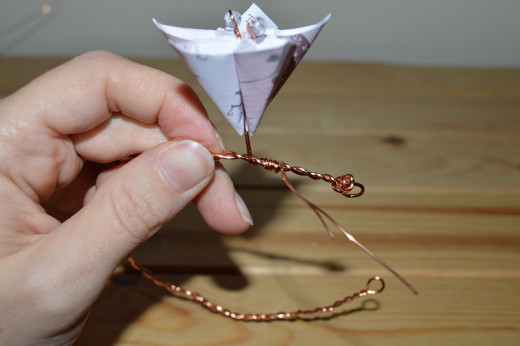
8. Check the wire on the jar/vase again.
The two loops should touch or have a tiny gap between them
Now it's time to tidy those ends.
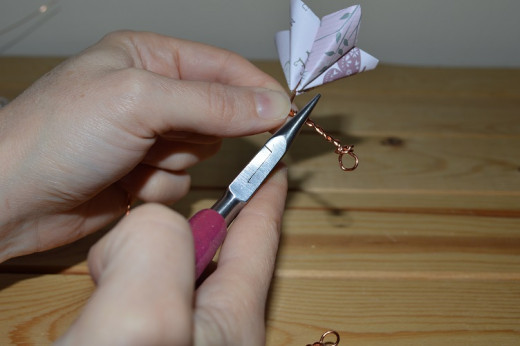
Beginning with the end that created that last loop, carefully wrap the end around wire just below the loop. Because the end is so short, you may only be able to wrap around once before it becomes too difficult. Trim the end close to the main wire frame, and then use the flat nose pliers to pinch the end, and smooth the edge
Then repeat with the other end, wrapping that around as much as you can before trimming with the wire snippers and pinching tight with the flat nose pliers

Making Bead-y Flowers
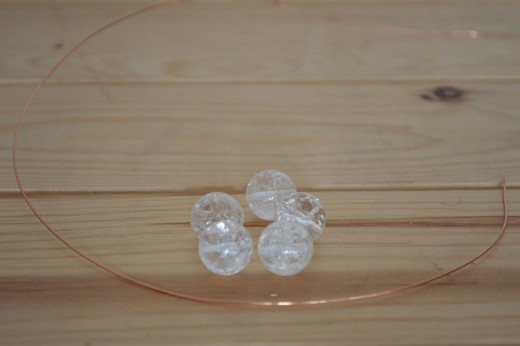
For each flower you will need five beads, and five 50cm lengths of the thinner gauge wire.
Tip - I have used 0.6mm gauge but 0.4mm would also work (and be easier to use for beginners to wire-work). However 0.25 would very likely snap as it is too thin.
Please note that if you are using beads much smaller than the 10cm rounds I have used than the amount of wire you will need per flower will be reduced
1. Cut a 50cm length of the thinner gauge wire
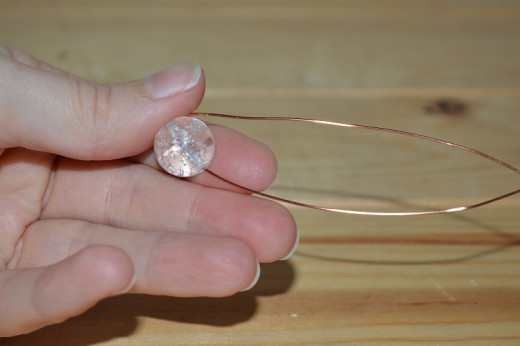
Thread on one bead, do not thread it to the middle, you want in to be approx 15cm along
Bend the longer end back to meet the shorter end
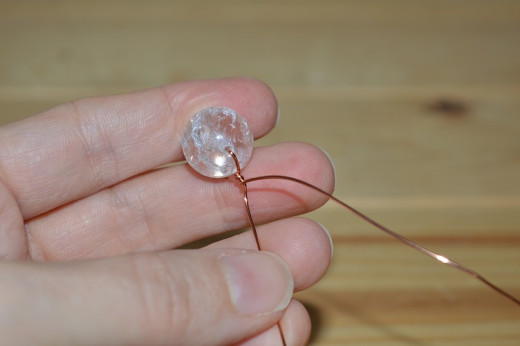
2. Now you need to anchor the bead into place
Hold the wires in one hand approx 1cm below the bead, hold the bead in the other hand
Rotate hands in opposite directions, this will cause the wire to twist and hold the bead in place
Holding the wire 1cm from the bead will mean the twist will not pass your fingers. Just don't twist too much or the wire will snap
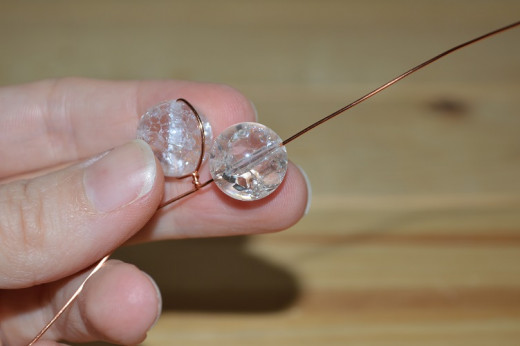
3. Now you need to thread on a second bead to the longer end of the wire
Thread it down until it is about 1-2 cms away from the bottom of the first bead's twist (if that makes sense)
The larger the bead you use, the more room you need to allow, as when you have all five beads on you will want them to sit together nicely, and not have one squashed out of the way
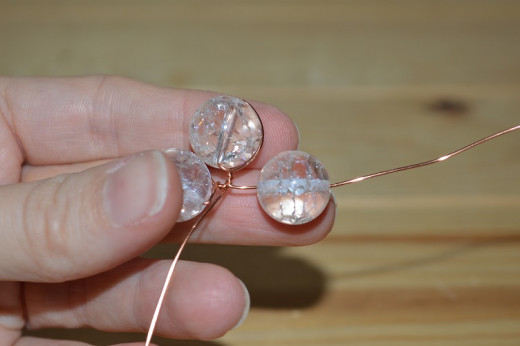
4. Repeat the action of bending the longer end of wire back, this time you will take it back to meet the end below the bead you have just threaded on.
Hold the wires at the junction where the new bead and the first bead are joined
Twist the new bead to anchor it into place

5. Repeat steps 3 and 4 until you have added all 5 beads
The beads will natural begin to make a basic flower shape
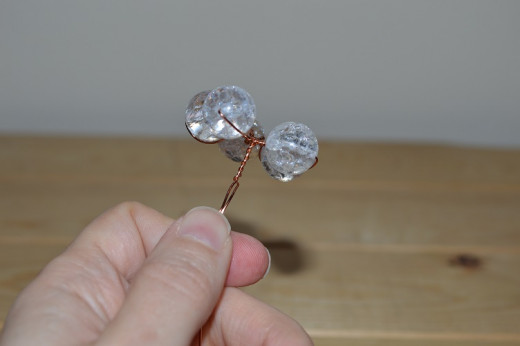
6. When you have anchored the fifth bead into place, adjust your beads if they are not quite sitting right, and then give your beads a final twist to make sure the wire is on the same side of all the beads - either hidden or prominent depending on which you prefer.
Once you have decided which side will be the front, move your ends of wire around to the back. You can simply push them between two bead-petals
Now hold the ends 2-3 cm away from the flower, and twist the whole flower to make a twisted stem.
Tip - For this particular project you only need short stems on these flowers, but if you are making them for another project you can always twist further along the wire to create longer stems
Making Buds
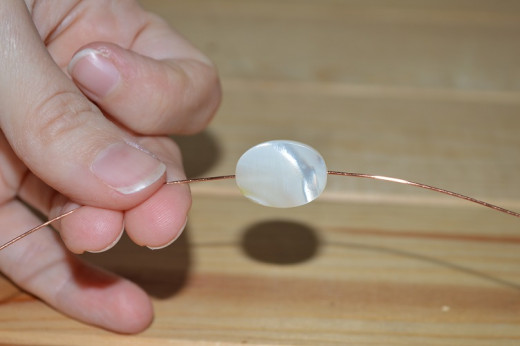
You can also make flower buds using a single bead and a shorter length of wire.
I have used a flat oval shell bead, and 20cm of thinner gauge wire
Thread the bead to approx 8cm along the length of wire
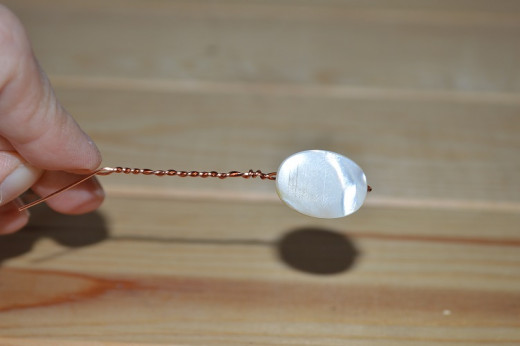
Use the same technique of bending back the longer end to meet the shorter end and twist.
For my buds I held the ends approx 5cm away from the base of the bead, giving me longer twisted stems than the bead-y flowers, as I want my buds to stick out from the rest of the design

Adding the Flowers to the Frame
1. Hold a paper flower against the frame, so that the flower is in the position you would like it to finish in.
The flower should almost touch the wire frame, but you can place the flower anywhere along the frame.
Tip - You might find it helpful to arrange your flowers on the frame by just lying them on top of the frame before you start securing them on, just to get an idea of where you would like to place them
2. Now wrap the excess ends around the frame close to the base of the flower.
Wind the wire around the frame as much as you can, the more you wind the more secure the flower will be
3. When you cannot wrap anymore, trim the ends with your snippers.
Then use the flat nose pliers to pinch and flatten the ends to the frame, try to tuck the ends in so that they don't stick out and tear through your ribbon (and possible scratch you at a later date). Run your fingers over the ends to ensure they are safely tucked away.
4. I secured all of my paper flowers to the frame, evenly spaced, before moving onto the bead-y flowers
As my flowers were in two different colours, I alternated between pink and white as I placed them on the frame, ensuring that I didn't have two white/pink next to each other
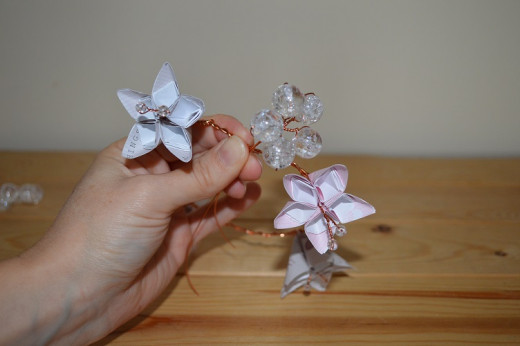
5. Now add the bead-y flowers and buds using the same technique as above. However because I want the buds to stick out a bit, I secured them at the base of the slightly longer twisted stem.
Attach all your components, spreading them evenly around the frame
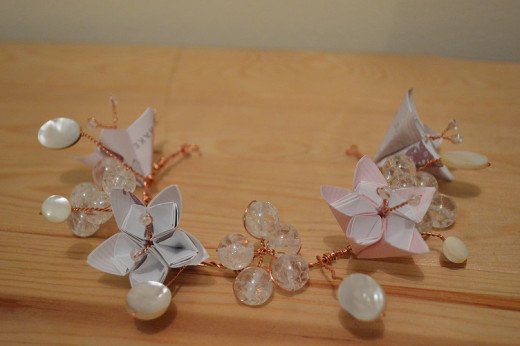
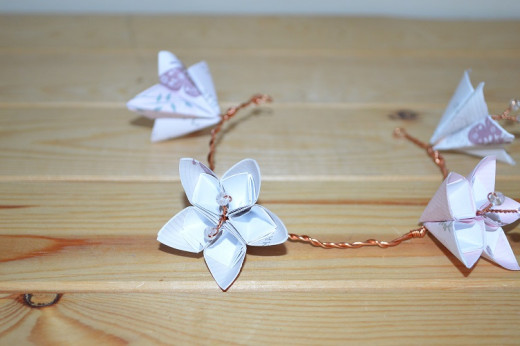
6. You should end up with something like this
Don't worry about the little mounds of wire as we are going to cover them in the next step


Covering the Frame with Ribbon
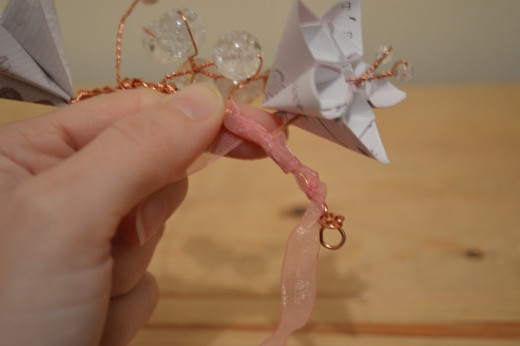
1. Attach the ribbon to one end of the frame (right next to the loop at the end) using a simple knot
Leave enough excess to tie a bow when you have finished wrapping
Tip - I am using organza ribbon which doesn't withstand much wear and tear, which is why I am using just one knot. If however you are using a stronger ribbon like a satin or grosgrain, you might consider knotting it a couple of times
2. Working your way along the frame, wrap the ribbon around the main part of the frame. When you get to a stem, make your next wrap on the other side of the stem and continue along your way, taking the ribbon all the way to the other loop.

3. Wrap all the way to the end, then come back the other way - wrapping all the way back to the beginning
Then wrap again: 3 times in total to ensure the wire is completely covered, and so you finish on the opposite end from which you began.
Tie a knot to secure the ribbon, cut but leave enough excess to tie a bow with the starting end.
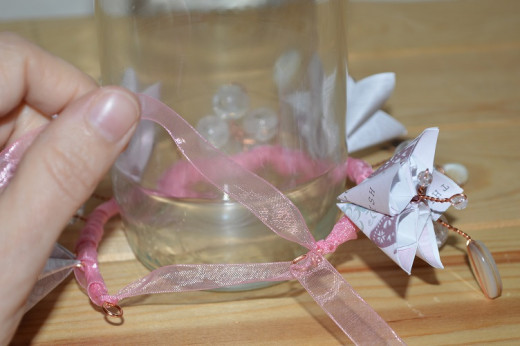
4. Place the frame around your jar/vase and thread the ribbon ends through the opposing loops. Then draw the ends together to make the frame fit snugly around the jar.
Knot the ribbon ends over the loops, and then tie a bow to finish

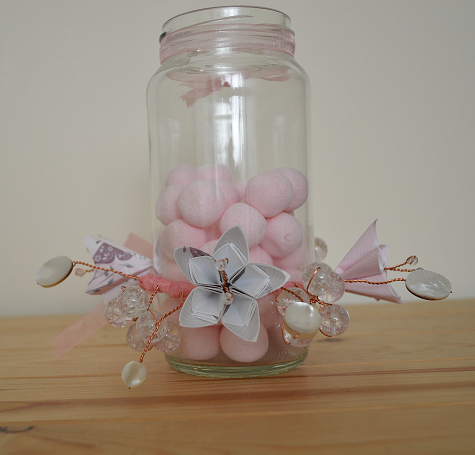
Now all that remains is to pop a tea-light candle inside the jar and maybe tie another ribbon around the top of the jar, and you have finished your dining table centerpiece.
This design can be adapted for different occasions: use complimentary colours from your wedding scheme to make a wedding table centerpiece, or use seasonal colours to make a festive table decoration.
Personalize your decoration by engraving the jar.
Or if your wedding venue doesn't allow real candles - try buying some of the electric flickering tea-lights, or using the centerpiece as a vase.
Alternatively you can add sweets, as shown, and turn it into a wedding favour holder, one for each table
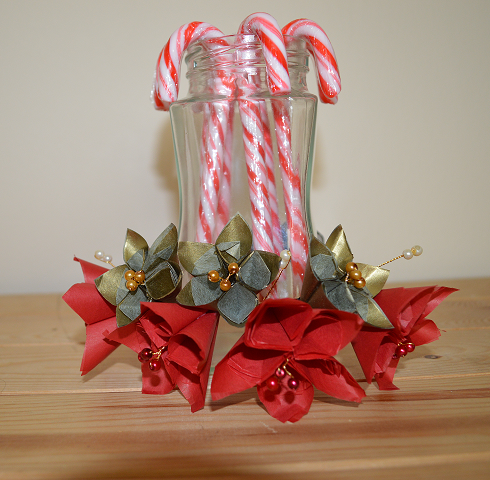
Making a Christmas Centerpiece
In my Christmas version I have used red and gold tissue paper to make the flowers, with complimenting tiny glass pearls. Add a tea light candle, or Christmas treats to complete your stunning decoration.
If you enjoyed this tutorial, you might also enjoy:
- How to Organize Your Own Jewellery Making Party
- How to Make Bouquets, Posies and Buttonholes from Paper Flowers
A step by step guide to making your own shabby chic bridal bouquets, posies and buttonholes from paper flowers and ribbon. - How to Upcycle Greeting Cards and Make Beautiful Paper Flowers
A step by step guide to creating pretty flowers out of greeting card inserts, wire and a few beads


