Modify a Crankbait Fishing Lure to Suspend

OVERVIEW
The Crankbait lure is fun to use, fun to collect and can be a very effective Bass catching device. Unfortunately they can also be very effective bobbers. Many of these lures do a very enticing bump and grind swimming thing while being retrieved, but when the retrieve is slowed or stopped they spring to the surface in a very unnatural way. The bump and grind is very desirable, but the lure should stop and suspend in the water column or rise very slowly, when the retrieve is stopped. Inexpensive lures can be easily modified to suspend, the procedure is described below. The results are very effective and modified lures have caught fish by different fisherman during field testing under different conditions.
Photo 1
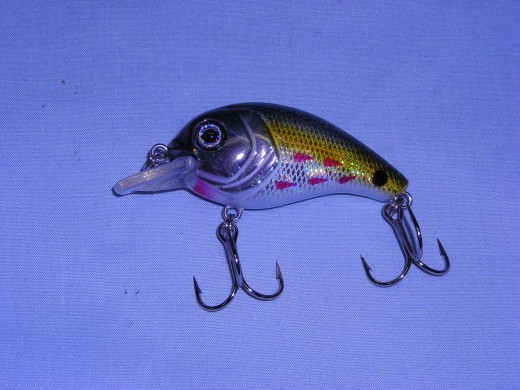
SELECT A LURE
The term crankbait can be used many ways, the crankbaits being addressed here are like the one pictured; a hollow, hard plastic body roughly in the shape of a teardrop with a diving lip. Bass Pro Shops sells a very nice line of these lures in their XPS series. They come in different sizes, different diving depths and a large variety of colors. They are very well made and decorated. Perhaps best of all they are relatively inexpensive.
Photo 2

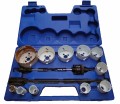
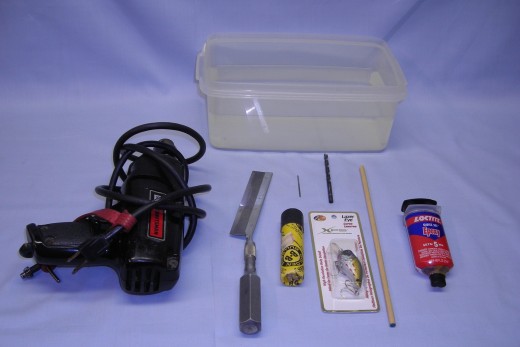
SKILL, TOOLS and SUPPLIES
Before becoming too excited about modifying a lure be sure you can do it. If you have a reasonable collection of tools (more than a hammer and screwdriver) and can do simple household maintenance (like change a faucet washer) you should have no trouble, otherwise you may want to buy a Lucky Craft lure. Tools and supplies needed are pretty rudimentary and for the most part shown in the picture. BBs are shown but and small weights will do, 5 minute epoxy is shown but any kind will do. If glue other than epoxy is contemplated be sure it is waterproof, white glue for instance is not waterproof. The wood dowel is ¼ inch as is the large drill bit. The small drill bit is just very small. The clear shoe box is the test chamber; a container of water is needed to calibrate the lure weighting.
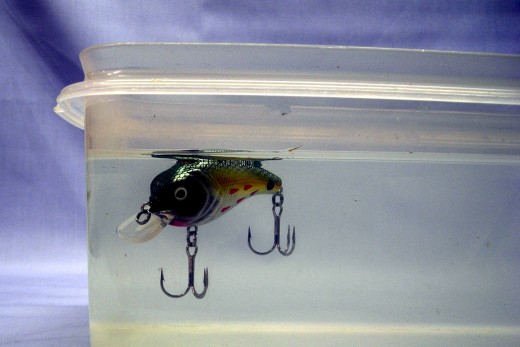
Photo 3
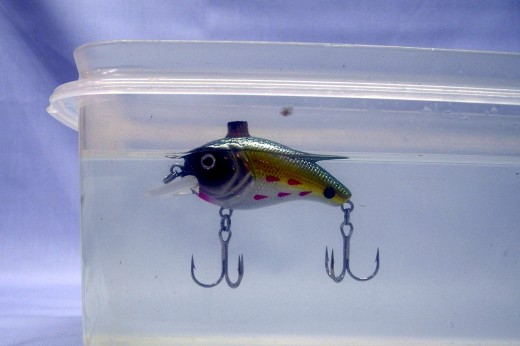
TEST the LURE
Float the unmodified lure in a container of water, note where the water line is on the lure.
Photo 4
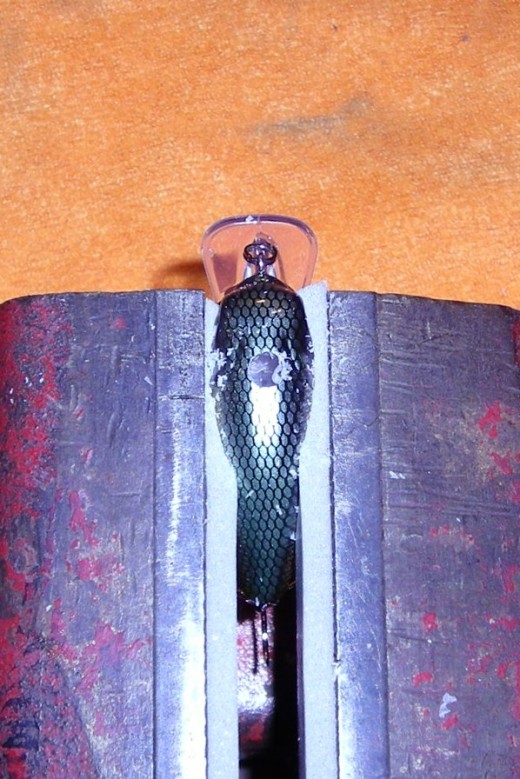
DRILL a HOLE
Drill a hole: Care must be exercised to ensure the drill does not slip during the drilling step; a big scratch on the lure is not a testament to quality workmanship. Make an indentation on the back of the lure over the front hook, a hobby knife is useful to make the indentation (be careful not to slip and stab your hand). The actual drilling is made much easier if the lure is held snuggly in a vice. Drill a small hole using the indentation as a guide and then a ¼ inch hole using the small hole as a guide.
Photo 5
CUT the PLUGS
Cut the Plugs: cut 2 plugs about ½ inch long from the 1/4 inch dowel. Flatten the ends using a file or sandpaper, cut a small notch in one end so a small screwdriver can be used to push the plug into the lure.
TEST FIT the PLUGS
Insert a plug into the drilled hole, it likely will not fit. Enlarge the hole slightly using a hobby knife, retest, continue the fit/enlarge sequence until the plug fits snuggly in the hole.
BB WEIGHTING
BB weighting: Drop a few BBs into the lure, start with 5. (The lure made for this site needed 7). Insert the plug partially into the hole, test float the lure. The lure should just float, insert or remove BBs until the just floating condition is achieved. This is a very critical step, too many BBs and the lure will sink when the glue is added, it likely is a good idea to use 1 fewer BB then it took to achieve the just floating condition. Remove the plug, remove and count the BBs.
GLUE the BBs
Glue the BBs: Return the lure to the vice in a level position. Mix some epoxy and drip a few drops into the lure, tooth picks are very helpful at this point. Drop the BBs into the mixed epoxy, be sure each is coated with glue, then using tweezers or similar tool drop each BB into the lure. Coat the hole with glue and insert the unused, dry plug. Push the plug into the hole until it is flush with the top of the lure or will not insert further. Allow glue to cure.
TRIM, SEAL and TEST
If the plug did not fully insert trim off the excess above the top of the lure. Mix another batch of epoxy and coat the top of the plug and joint where the plug meets the plastic of the lure. Allow the glue to cure and return the lure to the test chamber to see the result of your handy work. The lure should just float and be much lower in the water then before modification, if it sinks, do better next time. Likely more glue was used then necessary, cut back on glue or use 1 less BB.
Photo 6