Surviving the Elements; How to build a wilderness fire and shelter

The Survival Rule Of Threes
You Can Survive
| Without
|
|---|---|
Three Minutes
| Oxygen
|
Three Hours
| Shelter
|
Three Days
| Water
|
Three Weeks
| Food
|
Three Hours Without Shelter
I thought the best way to address basic survival skills was to take the Rule of Threes one at a time and deal with them in order of what is the most immediate need. We've already addressed the first rule: You can survive three minutes without oxygen. Now lets look at rule number two, You can survive three hours without shelter.
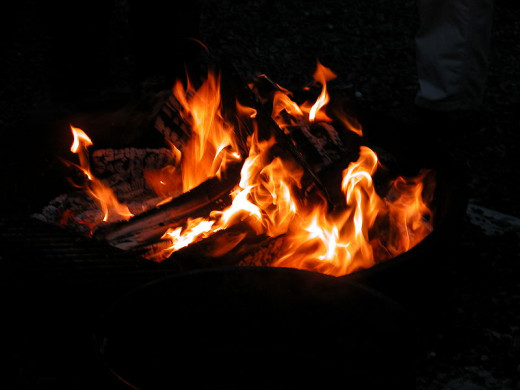
Fire Is Your Friend
In our post on emergency first aid we talked about hypothermia. This dangerous malady can be easily avoided and quickly remedied. One of the best tools in the back country is a nice warm fire. Here is what a fire can do to help you in a survival situation:
1. Heat - A fire can warm you, dry your wet clothing and keep you comfortable.
2. Light - A fire will allow you to continue to work on important tasks after dark.
3. Water purification - Boiling any water for three minutes will make it safe to drink.
4. Signaling - Flames or smoke can be easily seen by rescue teams.
5. Pest repellant - Flame and smoke also provide protection from predators and parasites.
6. Cooking food - Although it may be safe to eat some things raw, cooking it is safer and makes food more appealing.
7. Perhaps most important, a fire provides a morale boost and tending a fire will help you stay in one place.
Your survival kit should contain at least three fire starting tools

How to build a fire
Your survival kit should contain at least three different ways to build a fire. It's nice to know how to start a fire by rubbing two sticks together, but it's smarter to carry a disposable lighter, waterproof matches and a fire striking rod. Even after your lighter runs out of gas it can still be used to strike sparks.
It's important to practice starting fires in all kinds of weather. If you know you can build a fire in a downpour in your back yard, you'll have the confidence you need to start a fire in a survival situation. Always follow local fire restriction rules when practicing your fire building.
In addition to the fire starting equipment listed above, you should have some easy to light tinder in your survival kit. Jute twine, petroleum jelly impregnated cotton balls, char cloth and drier lint are excellent for starting a fire. I particularly like the cotton balls and jute twine since they can also be used for other things such as keeping lips from drying out and building shelter, respectively.
 jute twine, petroleum jelly impregnated cotton balls, char cloth and drier lint.")
Before striking your match or flicking your lighter you should have a fire bed ready. You will need tinder, kindling and fuel. Tinder is a very fine, easily lit material such as juniper bark, bird nest materials, or the shredded inner bark if most deciduous trees.
If you can't find any small kindling material you can make a fuzz stick
Starting a fire with jute twine
To see how to start a fire with jute twine and flint and steel forward this video to the seven minute mark.
Kindling is small twigs or shaved pieces from larger wood. These should be as dry as possible and no bigger than a pencil. Fuel can be as large as you can cut or break.
Place two pieces of wood finger to wrist thickness side by side. Criss-cross some of your kindling across these two pieces, leaving an opening below them for your tinder. Place your tinder on a piece of branch or bark that you can slide into the opening below the kindling. Light your tinder and slide it into the fire bed. Add fuel as needed to keep a small, cosy fire burning.
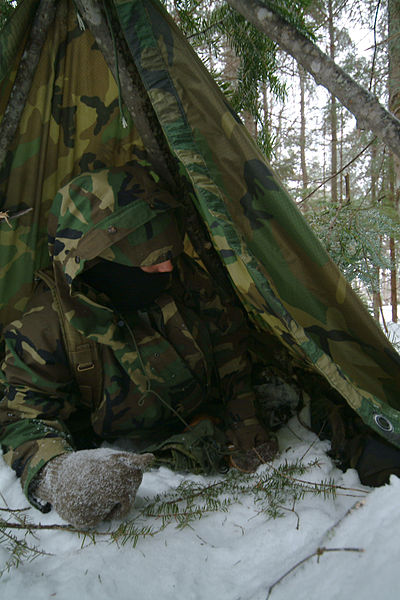
Simple Survival Shelters
Most survival situations can end well if you know how to build a simple shelter. You should carry several shelter related items in your survival kit and know how to use them in shelter building.
Cordage - Used to secure cross braces
Garbage bag - A large garbage bag can be used for the simplest of shelters. just cut a head sized hole in the center of the bottom and pull it over your head for a rain and wind proof poncho.
Survival blanket - These space age wonders reflect your own body heat back to you and can help keep you warm in the coldest of conditions. They are also shiny and can be used for signaling.
Cutting tool - Used to cut small branches and thatching material.
Your shelters don't need to be anything fancy, just something that will keep the weather out and some of the heat in.
Simple tarp shelter
A tarp, plastic sheet or large garbage bag can be used to make a tent style or teepee style shelter. For the tent style simply drape the tarp over a branch or rope and secure the bottom with rocks, dirt or logs. A teepee style tarp shelter can be made by placing a small smooth rock in the center of the tarp. From the opposite side of the tarp tie a cord around the rock. Toss the other end of the cord over a branch and suspend it just high enough that you can still secure the bottom of the tarp to the ground with rocks, dirt or logs.
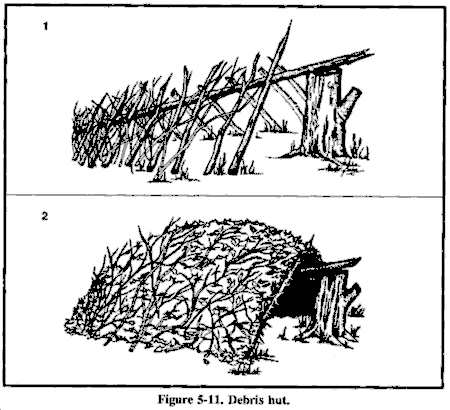
Debris Hut Construction
A debris hut shelter pup tent style or leanto style can be made if you have access to branches and leaves, pine boughs or grass.
The frame is just a pole leaned against a tree or other object about three feet off the ground. Branches or deadwood are leaned against the pole to form a sloped roof. These branches are then thatched with leaves, grass, sod, pine boughs, or anything else you can come up with.
Whatever you are using, remember to pile it on thicker than you think you need to to waterproof it. If you are using either dead branches, leaves you will have to be careful where and how you build your fire.
Debris Hut
A trench shelter can be made by digging a trench in the sand, soil or snow and covering the top with a roof made in the same way as the leanto shelter. Pine boughs can be used for a mattress and for insulation in the snow.
Mint leaves, wind or smoke will help keep insects away.


