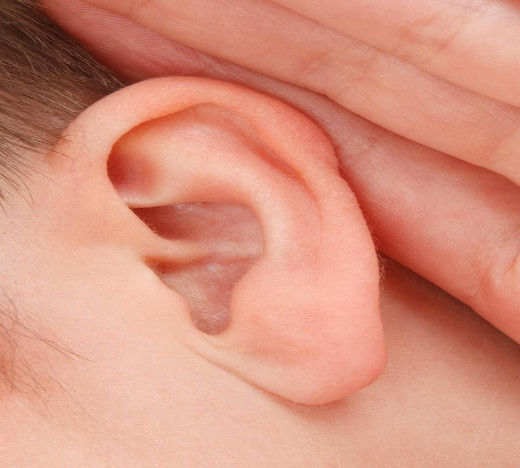
How To Get Rid of Ear Wax

Seeking Out Solutions To Get Rid of Ear Wax?
Are you suffering from earwax blockage and seeking out the right solutions to get rid of it? Or are you just annoyed with ear wax and just need to know the effective ways in removing it? If so, you have found the right place. This page will educate you on why we have ear wax, what causes earwax blockage and the proper ways in removing it.
Why Is There Wax in Your Ear?
This is the common question from people who have been experiencing ear wax-related problems or discomforts at some point. The human ear, being one of the most vital organs, has its own defense mechanism consisting of hair-like parts called 'cilia' and lots of oil glands.
The ear wax, clinically called 'cerumen' and having a color ranging from light brown to dark brown, is a protective oily substance naturally secreted by the glands lining up the ear canal. Aside from providing the needed lubrication that helps water and moisture flow out of the ear canal, the ear wax also traps tiny bits of particles such as dust, pollen, shed skin, dead cells, dirt, and other particles not supposed to be inside. Furthermore, it contains chemicals that inhibit fungus and bacterial growth.
As part of the self-cleaning process of the ear canal, the ear wax, along with the tiny bits of particles it has trapped, are naturally pushed out towards the outer ear until it either falls off or be easily wiped off. In essence, having 'ear wax' may seem to sound unhealthy or unhygienic, but it actually keeps the ear in tip-top shape.
Common Causes of Blockage
Earwax-related problems, though rare, usually occur when there is an excess buildup that leads to blockage. This buildup can be caused by factors ranging from hereditary factors to bad ear-cleaning habits. Here are the most common causes:
- Exposure - Frequent exposure to large amounts of dust or airborne particles that find their way to the ear canal.
- Hereditary - Some people produce large amounts of ear wax more than necessary, have hairy ear canals, have spiral ear canals, or have very narrow ear canals.
- Frequent use of Q-tips (cotton buds) - The use of Q-tips for regular ear cleaning is a common misconception. Actually, it can cause more harm than good. Using Q-tips pushes ear wax further down the ear canal and usually leads to compacting and subsequently, blockage.
Common Signs of Ear Wax Blockage
1. A feeling of mild deafness
2. Feels like your ear is plugged
3. Ear pain
4. A feeling of mild dizziness
How To Get Ear Wax Out Of Your Ear?
The fundamental principle behind removing earwax buildup anchors on these 2 steps:
- Ear Wax Softening - Softening or melting the wax involves putting oil or ear drops into the ear canal such as baby oil, olive oil, mineral oil, over-the-counter wax softening solution.
- Ear Flushing - Otherwise called as 'ear irrigating' or 'ear syringing', flushing involves the use of a syringe to squirt a stream of water inside the ear and flush out those bits of already loosened wax.
Ear Wax Softening
- While lying down on your side with the affected ear facing upwards, use a sterile dropper or applicator to put 5-7 drops of oil or wax softener into the affected ear. The tip of the dropper or applicator should be kept outside the ear canal opening. Keep your head motionless for 10 minutes. This is to give ample time for the oil or wax softener to penetrate and loosen up the wax.
- Tilt your head the other way to drain the affected ear.
- Do this up to 2 times a day and no more than 4 days. In many cases, loosened-up ear wax drains together with the oil and softener before the 4th day. However, it is best to stick with the 4-day routine to make sure that every bit of hardened wax get melted.
Very Important Note:
If you feel a burning sensation inside the ear when using any wax softener or oil, stop what you're doing at once, flush it out with water, and see a specialist the soonest. You may be allergic to these substances or may have ear problems more serious than ear wax buildup.
Ear Wax Flushing - The Easy Steps
- Do this step either in the bathroom or beside the kitchen sink.
- Take a syringe filled with warm water (not hot). Make sure that there are no air bubbles in it.
- Keep your head upright and gently pull your outside ear away and upward. This action straightens up the ear canal and readies it for the syringe.
- Using the syringe, direct a stream of water to the ear canal gently. Tilt your head with the affected ear facing the floor to drain out the water. You may have to do this several times until all traces of ear wax are removed.
Very Important Note:
If you doubt your capability to do ear flushing by yourself, or if you find it embarrassing enough to let someone help you out with it, then you should, by all means, pay your nearest specialist a visit and have him or her take care of the problem. While they may deal with it in a similar manner, they have a range of better tools and have far superior skills.
Other Removal Methods
When all else fails, the methods below are usually the alternatives. However, these methods are clinical in nature and are best left in the able hands of ear specialists. You should never attempt to use these methods yourself.
- Suction Method - The wax is removed using an instrument that suctions out ear wax. This is usually performed with the aid of a microscope.
- Curette Method - The wax is removed using a special surgical curette used by specialists to remove compacted ear wax.
Prevention of Wax Buildup
After you've successfully removed that wax buildup, it would be wise enough for you to get acquainted with the wax-prevention tips below. These tips involve routine yet very simple and quick ear-cleaning procedures. Furthermore, you should also break any old habit of yours that might have caused the buildup in the first place, lest you'll end up with the same problem or worse. Here are the tips:
- Put 2 drops of wax-softener every two weeks. This helps hasten the removal of tiny bits of ear wax before they build up in size. This can be very helpful for individuals who inherently produce lots of earwax.
- The best time to clean the ears is during and right after shower time. During shower time, one can just rinse the ear with water and then tilt the head downwards to remove the water that may have gotten inside the ear canal. To aid in the seamless removal of the water, one can just pull the ear lobe outwards and up to straighten the ear canal. After shower time, one can then use a soft towel to wipe outer portion of the ear canal.
- If you frequently work in areas where there's plenty of dust or other air-suspended particles, cover your ears with plugs to prevent these particles from getting inside the ear canal.
- No matter how tempting it can be, avoid the use of Q-tips. These are designed for cleaning the outer ear canal areas only. However, more often than not, many people cannot resist poking the Q-tip further down the ear canal. This is because of the fact that the ear canal is lined up with lots of nerve endings that get stimulated with the Q-tip, which usually leads to that 'good feeling' when cleaning the ear canal. This is the often-violated rule in ear cleaning. Some may be lucky enough to get away with it for so many years or even a lifetime, but there are certainly some who aren't lucky enough and ended up with compacted wax because of these Q-tips.
- Never ever poke your ear with tiny blunt objects such as hairpins, pencils, paper clips, and other similar items. These are the common items used by some people to get rid of that 'tiny itch' in the ear canal. While poking your itchy ear canal using these items really feels good and relieving, these items usually do more harm than good. Remember, your ear is a vital organ. Don't be bad.

