How To Repair A Split Fingernail

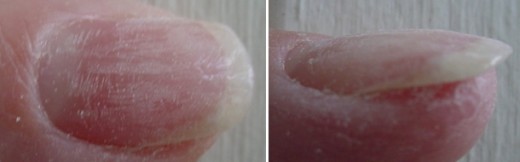
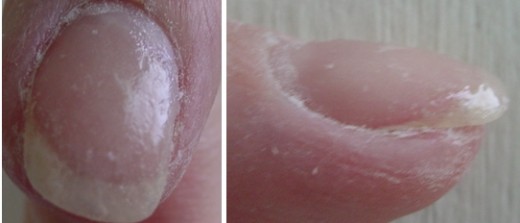
Ever had a fingernail split way down low where it was impossible to cut off, and you just KNEW that if you ripped it off there was going to be blood? Or maybe it split right down the middle and even as short as you could cut it, you knew it was only a matter of time before the end of it caught on something and tore away, exposing the sensitive nail bed underneath? Hurts just thinking about it, doesn’t it?
Well, I’m going to tell you how to fix that split, and get it to last until that little sucker grows out far enough to cut it off. This will work for ANYONE- men, women and children.
Short disclaimer here:
Kids: If you are under the age of 13, PLEASE get an adult or parent to help you with this!
Everyone: Some people may be allergic to cyanoacrylate. Check & make sure you are not before you start this repair!
Cyanoacrylate is ‘tear producing’. Use it only in well ventilated areas. Keep your face back and away from the bottle and from your nail as you are working. Use proper safety precautions and common sense. If you don’t feel comfortable doing something, change position, or have someone help you that does feel comfortable with the procedure. Wipe up all spills immediately, and dispose of soiled materials properly.
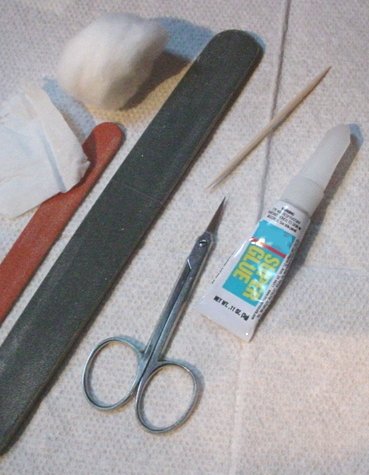
Okay, here we go. You will need:
- A pair of manicuring scissors or scissors with a small, thin, pointed blade
- A piece of plain Kleenex or some other similar tissue (Do NOT use Kleenex/tissue with moisturizers in it)
- A cotton ball
- A tube of cyanoacrylate glue (aka superglue or krazyglue)
- An old towel or rag that is clean and large enough to be doubled or (even better) tripled
- A roll of paper towels
- A couple of toothpicks
- A heavy nail file (one that is used for acrylic nails works best) You can use regular nail files, but you probably will need several as they will wear out fast.
- A sturdy level work surface with room to work such as a desk or table
- A friend to help you if the split nail you are going to be working on is on your dominant hand and you are not comfortable using scissors and/or applying glue with your other hand.
Assemble your supplies. Clear an area on your work surface that is large enough for you to be able to rest both of your elbows AND both hands on it at once. Fold your old towel or rag so it makes a comfortable cushion for your hands and place it on your work surface. Layer paper towels over the old towel and work area to protect it from spills and to make clean-up easy.
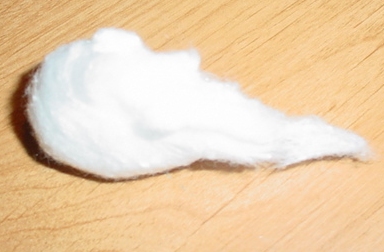
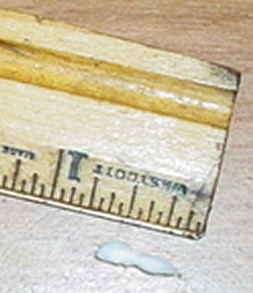
Trim the split nail so it is not any longer than half an inch. Wash your hands with soap and dry them well. Taking the cotton ball, start to pull on the end of it so that you end up with a long narrow strand of cotton about the diameter of a toothpick*. Trim off about ½ an inch of this strand. This little ‘worm’ of cotton is what you will be using to mend the actual split.
*Note: If the split in your nail has a wide gap where it has separated from itself you will need to make this strand thicker.
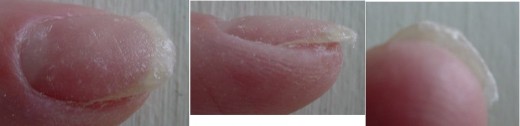
Now comes the ‘tricky’ part. Holding the cotton strand at one end, gently work the middle part of it into the split. This may take a few minutes- be gentle but firm and take your time. When you are finished, a small piece of the strand should be sticking out of the top AND the bottom of the split.
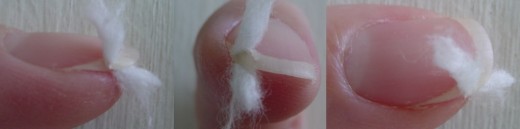
Trim off the excess as close to the nail (top and bottom) as you can. If the split is on your dominant hand, you may have to get someone to help you work the strand into the split and trim it close.
Make sure when you trim the strand that you leave a TEENY bit sticking above & below the nail…this will ensure a strong mend and keep it from pulling out. Spread the cotton strand out so it fills the split from one side to the other.

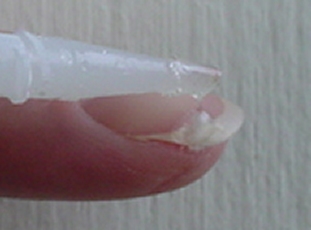
Now the ‘messy’ part. Rest the hand that has the split nail on top of the towels on your work area to keep it stable. Open up the tube of superglue and squeeze a couple of drops onto the cotton that is sticking up out of the split on the top of your nail only. Do NOT overdo the glue. Start with a couple of drops and add more if necessary. You are not gluing your nail to your finger. You are only adding enough glue to “wet” the cotton strand. One to three drops should be more than enough to accomplish this. Recap the glue container after every application to prevent spills.
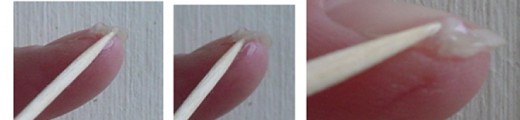
You will need to work quickly now. Before the glue dries, take one of the toothpicks and slide it gently under your nail just behind where the end of the cotton strand is. Slide the toothpick under your nail and gently & quickly slide towards the middle of your nail pressing the cotton strand up against the under part of the nail and away from your skin. Use a motion like you would if there was a piece of dirt under your nail and you were cleaning it out. Wipe any excess glue on the toothpick on a paper towel after each slide under your nail. Be gentle. You do not want to dislodge the cotton strand, you are only trying to remove excess glue underneath your nail and flatten the cotton plug under there so it is more comfortable.
Try to keep your nail flat as you are working so that the glue on top doesn’t run.
If any glue runs into the grooves on the sides of your nail, use the toothpick and swipe as much as you can out of the groove, wiping the toothpick off on a paper towel after each swipe.
Once you have removed any excess glue from the sides (if necessary) and from underneath your nail, and the cotton strand is stuck to the underside of your nail and flattened enough to be comfortable, take the toothpick and gently touch the cotton strand sticking up on the top of your nail. If the glue has not dried and you can flatten the cotton on the top of your nail, do so now. Press the cotton onto the top of your nail with the toothpick and gently spread it out, flattening and spreading it at the same time. Let the glue dry for several minutes. If the glue has already dried, don’t worry, it will just take a little more work to get the cotton plug to flatten out on your nail. Keep in mind that the cooler the air temperature is in the area you are working, the longer it will take for the glue to dry, and the warmer it is, the faster the glue will set up.
After the glue is good and dry take the nail file and swipe it lightly across the cotton on the top of your nail. You will need to do this a couple of times, but the object is to just take the roughness off of the cotton plug and flatten it down a little more, not to file it away. If you notice any sharp or rough areas along the edge of your nail, file these lightly as well. Now is also the time to shape the nail if it needs it.
If you were unable to flatten the top of the cotton plug before the glue dried, you will need to file with more pressure and file down the top of the plug so that it flattens out. The plug should now be just a slight rise in your nail and nearly invisible.


Using the edge of your towel/rag, brush off any dust made by the filing and lightly wipe over the top of your nail with it. Squeeze a drop or two of superglue onto the flattened cotton plug and on to the top of your nail. Make sure to re-cap the glue container. With the toothpick, spread the glue over the top and past the edges of the cotton plug, filling in any depressions or pock marks in and around the plug. Extend a light layer of glue over the entire nail, from side to side and back to tip. Keep the glue away from the cuticle area of the nail. Let the glue dry. This will take several minutes.
Make sure that the glue is dry by tapping it lightly with the end of the toothpick. When you are positive it’s dry, swipe the fine side of the file over the entire top of your nail, roughing the surface up slightly. Stay away from the cuticle area. Lightly dust off the entire nail again with the towel.
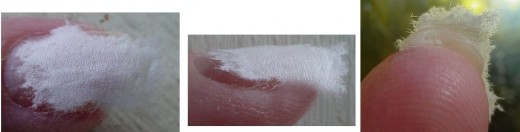
Get your tissue and tear a small piece off the corner. It should be slightly smaller in width and longer in length than the size of the nail you are mending. Do not use scissors. Tearing the tissue will actually make it easier to apply. Lay the tissue over the top of the nail making sure that it covers over the split area with the cotton plug. It should extend slightly beyond the end of your nail. Keep it away from the cuticle area and where the skin comes up around the sides of your nail- leave a space of about 1/16th of an inch on the sides and 1/8th inch from the back (cuticle). The spacing doesn’t have to be exact- just make sure that there is space between the tissue and the sides and back of your nail. If it overlaps anywhere, tear the overlapping piece off.
Get the glue again. Squeeze a couple of drops onto the center of the tissue patch on your nail. Try not to touch the tissue with the tip of the glue container as it will ‘grab hold’ and you will end up having to pry the tissue off the tip of the glue bottle and start over. Use the end of the toothpick to press the center of the tissue down onto your nail if necessary. The tissue will actually start to wick up the glue– use the toothpick and gravity to help you out by tipping your nail side to side to help spread the glue. Add more glue a drop at a time – be careful and don’t overdo it – only use as much glue as you need to saturate the tissue patch and get it firmly stuck to your nail. As the glue wicks into the tissue near the end of your nail, use the toothpick and fold the edge of the tissue that is extending beyond the end of your nail over the edge of your nail. Press this folded end of the tissue firmly underneath the end of your nail and make sure there are no air bubbles in or underneath the folded end. Press any out with the point of the toothpick.
Let the glue dry. When it’s dry, lightly file over the top and file any rough edges on the end of your nail where the tissue may not have tucked under smoothly. Do not file to much on the top of your nail- just enough to take away any roughness. It does not need to be perfectly smooth at this point. You will see shiny and dull spots and it will look somewhat pock marked- this is okay.
Apply another light layer of glue over the top and edge of your nail, making sure the tissue edges and the folded tissue under the end of your nail are covered. Let it dry. Use the fine side of the nail file & lightly sand down the entire nail. File the edges again if they are rough.
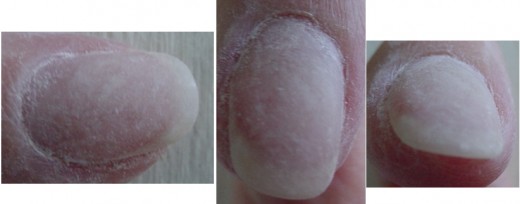
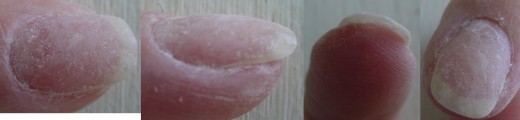
By now the surface of your nail should be nearly smooth and the patches nearly invisible. If there is any place that is rough or lumpy, lightly file it down. Your entire nail surface should be smooth and dull, with no shiny spots anywhere.

Dust off your nail with the towel once again and apply the last coat of glue. Use the toothpick and make sure you get the glue spread out evenly over the surface of your nail. Also, don’t forget to spread some glue on the end of the tissue underneath the edge of your nail if it looks like the glue is thin and it needs it.
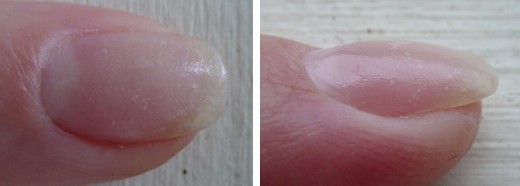
Keep your nail flat and tipped slightly downwards and let the glue dry. If necessary, run the file under the edge of your nail to smooth it. You can now either leave it alone, or use a buffer to further smooth it off and add more of a shine. Your nail will be slightly shiny from the glue. The shine will decrease after a few days. When your nail grows out past the split, simply cut it off and file it.

Tip: If you put on too much glue, and it sticks your skin to your nail and dries, don’t try to pull the skin away. Complete your nail repair, wash your hands, and rub a little oil or hand cream into the skin where it’s stuck. The oil/hand cream will loosen the bond of the glue and your skin will ‘unstick’ in a few hours. The more you wash your hands, and the more often you apply oil/hand cream, the faster it will loosen the bond between your skin & the glue.
Removal: Once the split part has grown out, if you want to remove the rest of the nail patch, it can be soaked off in acetone nail polish remover. Put the remover in a short glass container and soak the finger with the patch in the remover. Soak for 5 minutes or so, then remove & wipe the nail with a paper towel. Continue soaking and wiping until the patch dissolves and you are able to wipe it off your nail with the paper towel.


