How to Install ATI drivers in Ubuntu 11.10 Oneric


You have two ATI driver options: FGLRX and Open Source
Before we start the tutorial, I thought you might like to know the difference between two distinct ATI drivers for ubuntu: open sourced drivers and FGLRX (ATI's Catalyst driver for Linux/Ubuntu).
Open source drivers is where it's at today. One of the more popular drivers for ATI's cards is adequately called xerver-xorg-video-ati. Generous contributors have hacked at code to create a free and open source driver for many ATI users. These drivers have come quite a long way from what they used to be 2 years ago. However, they still lack in performance slightly and aren't officially supported by ATI.
Proprietary drivers, on the other hand, offer better performance at the cost of your bragging rights of saying that you have a completely open-source and free operating system. But how many times will you ever say that? Proprietary rivers like FGLRX are what we call closed-source, meaning that the code is not open to the world to edit, share and improve. This doesn't really affect the end-user and these drivers offer slightly better performance and that is why I and many others prefer FGLRX. Today, I'll show you how to install the proprietary driver.
Option 1: Installing FGLRX the easy way
While writing this article, Ubuntu 11.10 is currently in its alpha stage and is still a bit buggy. In most cases, this method should work. Simply go to System Settings and search for "Additional Drivers."
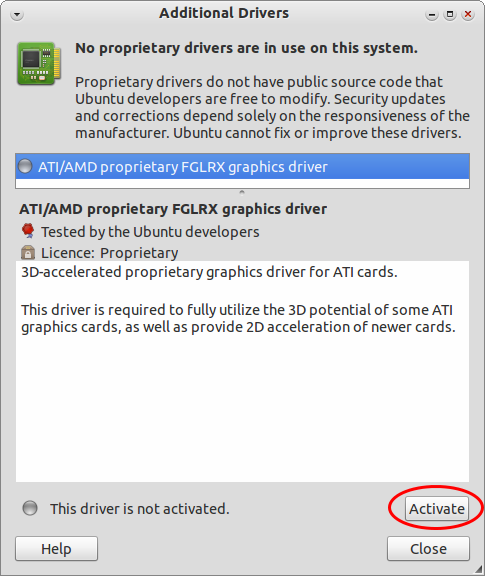
Now you should see a box that shows that the "ATI/AMD proprietary FGLRX graphics driver" is not activated. Now for the tricky part: hit the activate button, enter your password when prompted, let it do it's thing, then restart your computer!
Option 2: Manually Download/install/Configure the ATI Driver
This method is a bit more tricky and, in my opinion, a little less likely to work. So here are the steps:
- Download your driver from AMD's website: http://support.amd.com/us/gpudownload/Pages/index.aspx
- Right click on the downloaded file. Go to Properties and allow it to be executed as a program.
- Now double click the file, let it run in Terminal, and enter you password when and if required.
- Once done, open up another Terminal and enter the following command: sudo aticonfig --initial
- Reboot
This method applies to all Ubuntu-based distros (Kubuntu, Linux Mint, Xubuntu etc.), by the way.
Troubleshooting
I see a black screen upon reboot, what do I do!?!
First, reboot into recovery mode, in low graphics mode. Then enter this again into a Terminal: sudo aticonfig --initial. If you see nothing again on the reboot, go back into low graphics mode to uninstall the driver.
How do I uninstall the ATI driver?
This method only works by removing the drivers and not reimplimenting the old one. Here's the tutorial to uninstall, reinstall and configure the default ATI drivers to the way it was.
Once again, reboot into safe mode in low graphics mode and open up a Terminal. Enter this: cd /usr/share/ati
and this: sudo sh ./fglrx-uninstall.sh


