How To Create A Post In Wordpress

Starting Out With The Right Information
How many times have you gone to a site online that is made using Wordpress only to find a complete mess of information because the site owner really had no idea on how to correctly format the pages or posts.
What you are going to find here is the exact steps you need to take to create not only create looking Wordpress pages and Posts but how to effectively optimize them as well.
Knowing how to do this can mean the difference between a business that is successful or one the is going to fail... Presentation is Everything
Easy Steps To Create A Post
The first thing you will need to fo is log-in to your Wordpress site, once there navigate your way to the dashboard of the site.
You can do this by entering the username and password you created when setting up the WordPress site.
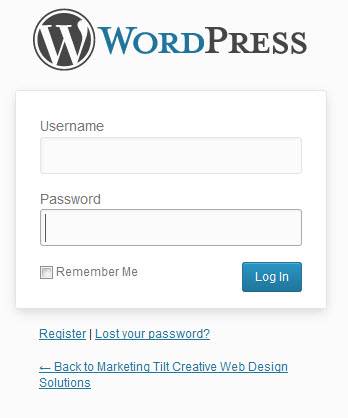
As soon as you click the Log In button you will be redirected straight into the dashboard of the Wordpress site.
So if you have logged in let's get started on creating a Wordpress post.
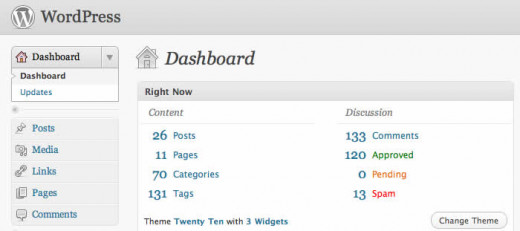
Once you are inside the Wordpress dashboard you simply need to look to the left of your screen where all the menus are and look for the posts section where you will see a "Pin" icon click on that and then add new post.

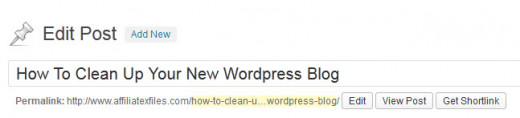
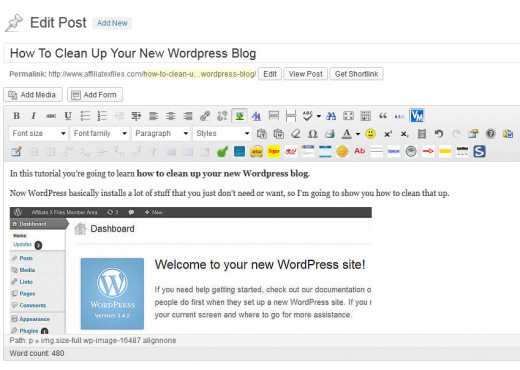
When the Add New Post page appears the first thing you will need to do is add a Title which I have done in the screen shot below. The Title of the post is going to be "How To Clean Up A Wordpress Blog".
Then once that is completed you simply need to start writing the new post.
When you start writing the blog post you are going to notice that the editor is very similar to using Microsoft word in many ways so you should not have to much trouble in creating your first post.
You can do everything that you can in a word document including bold text, underlining and Italics as well as adding headings and images.
Once you get use to using the post editor you wil also be able to add tables but that will be another titorial I will add later on.
If you are like me, then you are also going to need a spell checker which comes standard in the editor.
If you are distracted easily, then you also have the option of increasing the editor screen size when creating a post. What this does is remove any distractions from the editor so you can focus on writing the post.

As soon as you finish writing the post you are probably going to want to publish it straight away. Can I suggest that before you dive into sending the post live you actually save it, saving is not the same as publishing OK.
Once you save you can then preview the post to make sure that it looks and feels the way you want it to.
Once you are happy with your work then you can go ahead and publish the post.
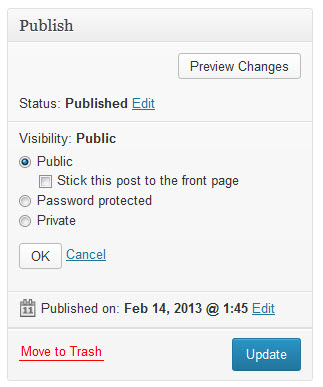
When you are ready to publish the post you are going to see a few options available to you which I will cover individually. If you look at the screen shot above you will see a few options available when posting new content.
You can make the post private, which means only those that have become subscribers can see the content. Then you have the option of password protecting the content, where the viewer will need a password to access the published content.
Then you also have scheduling which I will discuss in more detail below.
For this post however we are going to make it public so we will just hit the publish button.
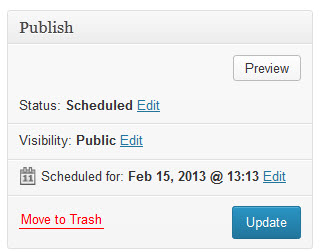
Let's talk a little about scheduling posts, this is a great way to drip feed content out to your readers and also keeps the search engines returning to your Wordpress site as there is new content appearing each day.
All you need to do to schedule a post is change the date and time you want the post to go live.
So for example, I have just published the first post on "How To Clean Up Your Wordpress Blog" and I also have four other posts on the same Topic but I really do not want to publish them all at the same time this will overload my readers and is not a effective way to have traffic constantly coming to my Wordpress site.
So what I am going to do is allocate times to these additional posts where they will be published at a specific time an date. You will see to the right of the screen where the publish button is that is says publish immediately if you click on edit that will allow you to change the date and time of publishing. If you have got this part right then you will see a new message saying Scheduled for with the date and time in bold text.
Before we jump to far ahead I should also introduce you to Categories, each blog post you write needs to be placed into a category you may only a few categories or hundreds this will all depend on the size and niche market of your Wordpress blog.
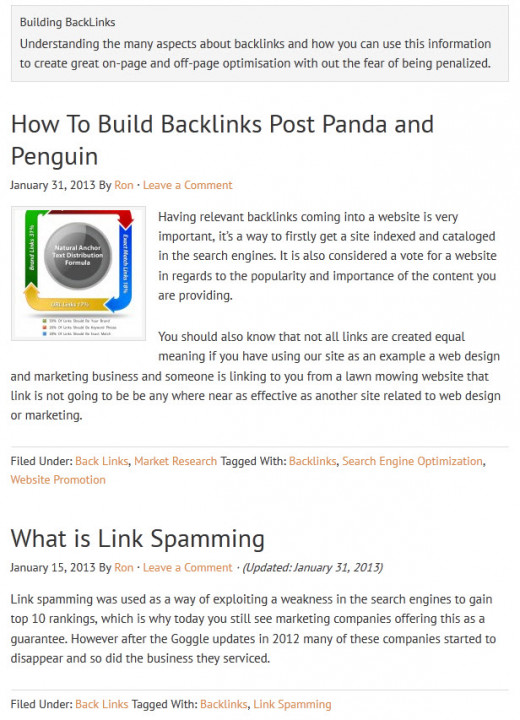
You will see a menu on the right side of the post that is titled categories this is where you can select the category for the post or even create a new category. For the purpose of this tutorial I have selected "Back Links" as the category.
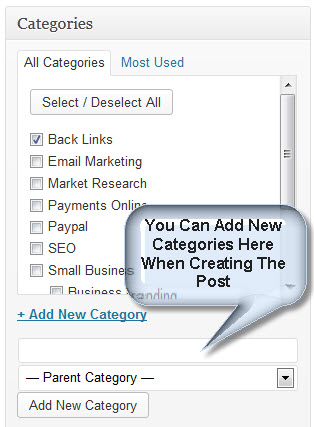
There is also another aspect of Categories you need to be aware of, and that is "Sub Categories" this is where you can create a category that is under another category hence the Sub Category.
This is effective when you have a Category like "Small Business" but have a post that you have written on let's say business branding. You don't want to create another parent category so you just create a sub category and call it business branding.
Then when you are writing about any posts associated with branding you will be able to list that post in both the Small business category as well as the Business Branding category and the post will appear in both categories on your site as they are both related to business but on different aspects of business.
When creating a page on Wordpress you do not need to worry about categories or tags as there is no option to add them. If you want to have this option you will need to find a plugin that allows you to add these functions to the pages.
Another important aspect of creating posts and pages that you need to be aware of is creating permalinks. I think by now you are pretty much done with reading so I have added a video for you to watch on creating permalinks.
Video On Creating Permalinks For Posts
This video is going to show you how to set up the permalinks for your Wordpress site. Many people do not understand the importance of doing this or even how to do it but it is the first step in creating a very solid SEO friendly Wordpress Site.
Sit back relax and hit the play button to get started.
If You Found This Video Helpful Please Give Us A Rating
Adding Tags And Restoring Pages With Revisions
Another aspect of creating a good Wordpress post is using tags, tags are like categories and will add additional pages to a Wordpress site so this is where you need to be aware of what you are adding and where.
So as I write a post I may add tags that are also my three main keywords for that post. A word of advise here and this only from my experience, do not go crazy with the tags on your posts just keep all the tags relative to the post and only use what you need to.
Remember that each new tag you create also creates a new page which can drag you down in the rankings and with PR.
Any site I build with Wordpress always has the tags pages "Nofollow" to help avoid any duplicate content issues.
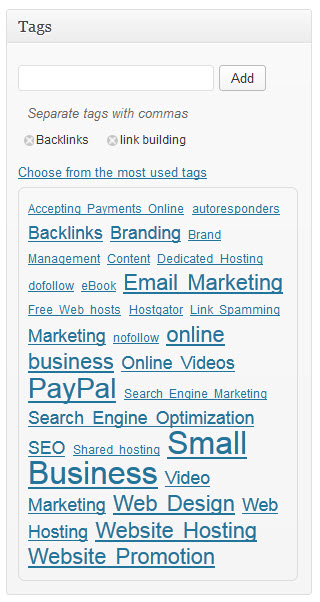
If I had two other posts with the tags "backlinks" then if somebody clicks on the tag "backlinks", they're going to see this post and the other post, which they're going to see three posts that are having tags with "backlinks".
Below is an example of what a Tags page will look like on your Wordpress site.
Quick SEO Tip: you can go into the actual admin area for your tags and categories to add Page Titles and Meta Descriptions which is great for SEO purposes and is not used by many.
This can help to get your categories indexed and ranked in Google.
I do however "nofollow" my tag pages even though I still use the Title and Meta description for the Tags page. I think it just looks more professional.
Revisions are basically, let's say you published it once, and you go ahead and publish it again, you make some changes, you're going to see revisions here.
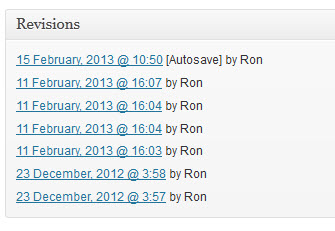
So you can actually revert to a previous revision, and if you revert, you can also revert back or go back to a newer revision.
This can come in very handy if you mess things up and can not reverse what you have done. You simply need to scroll to the bottom of the page and you can restore a previous version of the post.
This can also be done with pages.
This is the first in a series of Wordpress Tutorials I intend to write, if you found this helpful please let me know by adding your comments below.