- HubPages»
- Technology»
- Consumer Electronics & Personal Gadgets»
- Portable Electronics
How To Transfer Your Old Tapes to CD/iPod Without an Expensive Kit


Save the music!
Do you have a lot of old music you love sitting around on cassette tapes? You've seen those kits at the electronics store that allow you to transfer the music onto your computer or a CD, but they're pretty pricey. What if there was a low-cost way to transfer your memories to a CD? There is. With a five-dollar cable, a tape player, and a piece of free software, you can put your favorite music on a CD or MP3 player forever.
$5 at Radio Shack

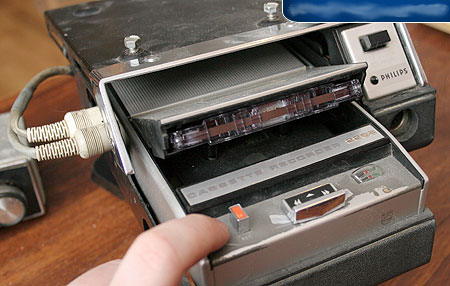
Getting read to record
Purchase a 1/8 inch audio cable. These are available at any electronics store like Best Buy, RadioShack, or even Walmart for about 5 bucks.

Hooking them together
Run the 1/8 inch cable from the headphone OUT of your tape player to the microphone IN on your computer. Turn on the tape player and check your levels. In a Windows computer, adjust your levels by going to Start > Control Panel > Sound > Recording. In a Mac, the settings are in the System References Tab or (depending on your OS) at the bottom right of the screen. Play the music you want to record at its loudest point and watch the levels meter. Adjust the volume from your tape player into your computer till the sound almost, but not quite, peaks in the red. You'll fine tune this later in your recording software, so do not worry about getting it perfect.

Get free software
Download a free recording software. There are several options like Wavepad and CoolMedia, but the overall favorite seems to be Audacity. Install the software and familiarize yourself with how it works. There are good online tutorials that will teach you how to start recording, stop recording, and save files. You will also want to learn to adjust the input and recording levels of the software. Audacity exports, or saves files, to its own "native" format. This means that only Audacity will be able to read these files. To get around that, you will need to play around with the software till you learn how to export files as MP3's. Again, there are lots of free tutorials.
Now, let's roll some tape
Insert the tape you want to transfer into your tape player and hit PLAY. Adjust the input level inside your recording software to be sure that you get the optimal input level. It should peak just slightly before the red level. Anything past red, and you are just putting noise into your recording.

Almost done
Save each song as a separate recording. Output them as MP3s to your iPod or burn them to a CD with each file as a separate track. Below you will find a link to a tutorial that will teach you how to burn a CD directly from Audacity without the need to change the file type.


