- HubPages»
- Technology»
- Consumer Electronics & Personal Gadgets»
- Portable Electronics
How To Use A Flip Camera

Using A Flip Ultra Camera
A flip camera is one of the easiest cameras to use to take videos and as I have been using my Flip camera for a few months now (see the flip camera review), I thought I'd walk you through how you se it, it is quite simple and unlike other video cameras there are very few buttons to get confused with.
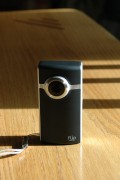
A flip camera is about the size of a mobile phone with a small view screen that displays whatever you point the camera lens at, the cameras screen shows far clearer than some of the cheap mobile phone cameras out there and this is why I like the Flip Camera.
The camera is just a simple point and click camera, that's all you do with it really., the camera needs two AA size batteries, which is just like a digital camera, so once the batteries have been put in, there is the record button which is the red button below the view screen, just press this once to record your video and then press again to stop recording, it's that simple.
The Flip video camera has a delete button on it too, so you don't have to go into a menu and delete it that way, all you do is choose a video and click the bin icon, which is universal for delete.
At the bottom of the video camera you will see a sliding switch with an open padlock symbol and a locked padlock symbol, this is the case cover locking mechanism which will stop your batteries falling out, although I find it hard for them to fall out anyway, because those batteries are tightly fixed in once placed there, at the other side you will see a USB connector arm, which connects easily to your laptop or PC if you have some compatible USB ports and the flip camera comes pre loaded with software that make it easier to save and transfer your videos from your computer to video sharing sites like Yotube and Revver.
With a standard flip camera you get 60 minutes of video time, so try and split your videos up into small bite sized 3 to 4 minute videos and then you'll find you have a good handful of videos to start you off across as many video uploading sites as you want. Although the longer the videos, the more megabytes it will take up on your computer and the longer they will take to upload to Youtube and other sites, so bare that in mind.
Of course a good natural sunlight is essential for your videos to be clear, so always try and film your videos during the day and avoid synthetic lights of any kind as this makes the videos slightly more darker and grainier.
And what I like about the Flip Video Camera is the in built microphone that relays some very clear audio too, because I like to do some drawing tutorials with my camera, I like to talk through them to give an extra dimension and voice to my drawing guides, and this function is perfect for that and even if you are doing something online I suppose you could use it for that, although a screen capture software would be far better.
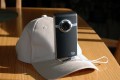
There is a zoom function too, which helps to zoom into a subject, although I've rarely used it, it could prove useful later on, also underneath there is a screw fitting for a tripod, which helps to keep your flip camera still whilst filming is in progress, you can pick them up cheap and it keeps your hands free to gesture with your hands to try and get out what you want to say while you're filming, it certainly helps.
As with any other camera, you need to place your camera at a distance to ensure that the video minutes you are filming look clearer and not blurred, so you can use the video screen view to see whether or not your intended video will look good.
Avoid aiming your camera near the light of the sun, for obvious reasons and the quality of your videos suffer immensely through too much sunlight, you would do far better to just film normally as you would taking pictures with a digital camera.
The key though really is just to experiment with your camera and just explore the different angles you could film with, as that is what I have done with my Flip Camera.
Flip Ultra Series Video Camera Available At Amazon To Buy And Accessories

What Do You Think Of The Flip Cameras?
Flip Ultra Camera