How to Completely Erase Files

Warning: Anything you've deleted on your computer can still be completely recovered, even if it's been deleted from the recycle bin. Does that statement scare you? It probably should. A lot of computer users are shocked to discover that even clicking "delete" on a file doesn't actually remove it. Even when they go into the recycle bin and delete it from there, anyone with access to your computer or hard drive can still recover it in its entirety. This issue raises a whole world of problems when you delete important financial or medical records and later donate your computer. It also raises issues if you have any documents, photos, videos, or music on your computer that you don't want to be seen by anyone except yourself. The good news is it is possible to "truly" delete your files and make it so no one could ever recover them.
Background
Many people think that the delete button simply deletes a file. But that is completely wrong. The way that computers work is by storing a file, then every time you see that file on your computer, the computer is actually displaying a link to that file. When you delete the file the first time, it simply removes that link from your programs, and moves it into the recycle bin. When you go and "permanently" delete the file from the recycle bin, your computer simply erases the link. It then tells the operating system that the place where the file is stored is available to write to. Without a link to the file, the user thinks the file disappeared. But the reality is that it is still there, alive and well. And the larger hard drives get these days, the less chance there is that the computer is ever going to need to overwrite the file. And so it remains, sitting on the hard drive, without a link, but still perfectly accessible if you know where to look.
Warnings
Before you do any permanent deleting, think about what you're doing. If you're deleting a recipe from Word, you probably don't need Department of Defense level deletion powers. But if you're deleting tax records, important medical information, or anything else that is private, you should definitely consider these methods. Secondly, the process I will show you here is completely, 100% irreversible. So if there is any sliver of a chance that you'll need these files again, do not do this.
Securely Deleting Vs. Deleting
I described what happens when you delete a file above. But you're probably wondering how to "securely" delete it, and how that is any different. Like I said, the file is stored on your hard drive and the computer simply removed the link to it. The secure delete utility we will use actually goes to the file as it is stored on the drive and overwrites it. The more times it is overwritten, the less chance there is that it can ever be recovered. Some utilities overwrite it 5 or 6 times, which is plenty according to security experts, but others go and overwrite it 100 times. That's for paranoid people. Keep in mind that the more times you overwrite it, the more time it will take. So if you're deleting your entire collection of ACDC music, it may take a long time.
The Utility
Depending on your needs, there are different applications available. I like free stuff, and this task can be completed just as well using free software as when using paid software, so I will show you how using free software.
If you want to erase your entire hard drive, skip to the section entitled "Erasing Your Whole Drive." If you want to erase a few files, go to the next section below.
Erasing a Few Files
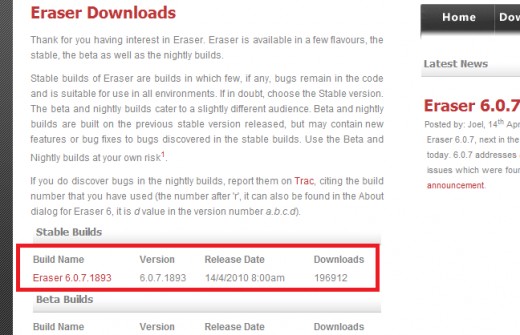
To erase a few files, we're going to use "Eraser," a free and open-source program that meets all the requirements of the DoD. First, go to http://eraser.heidi.ie/index.php and click "download." Choose a stable build and download that.
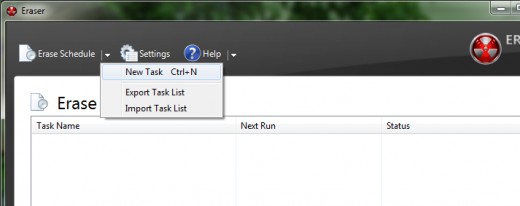
Once it finishes, run the installer and click through the prompts, and let it finish installing. Then, run the program. Click "Erase Schedule" at the top, and choose "New Task."
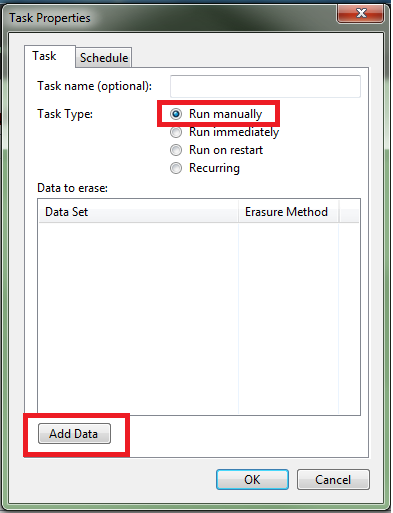
You will want to select "Run Manually," and then click "Add Data" at the bottom.
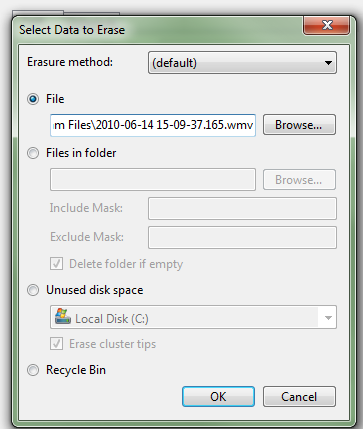
Now, you will need to determine what it is you want to delete. If it is a file, which I will use in this example, browse for and select it. You also have the option of erasing an entire folder, unused space, or the recycle bin. At the top, next to "Erasure Method," choose the one you want. I personally recommend anything more than 5, although you have to decide this for yourself. Then, click OK.
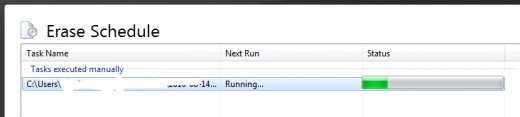
I selected a random file that I made just to delete and then clicked OK. Now, in the "Task Properties" window, click OK. Now, your task will be added to the Erase Schedule. Right click on it and choose "Run Now." It will say "Running" and you will know it's being deleted. Depending on the size of your file and the deletion type you selected, it may take from five minutes to five hours. Let it run.
When it finished, your file will be gone, never to be seen again.
Erasing Your Whole Drive
If you need to delete every single thing on your hard drive, you will need to use a "self-booting" utility. This is because Windows cannot run a program that will delete it as it runs. So you will need a program that you can burn to a CD, boot from, and then delete things from there. Deleting your whole drive will erase Windows along with every single file. So make sure you really want this before continuing. This is a great idea if you are donating your computer. You don't want to hand over a computer that is full of personal details.
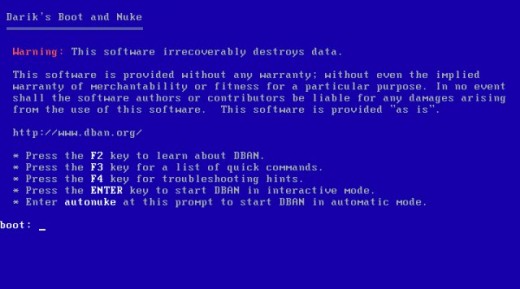
We will use a program called Darik's Boot and Nuke. You can download it from http://www.dban.org/download. You will need an ISO burner to burn it to a CD. The file you download is called an ISO and needs to be burned properly. To learn how to burn an ISO, click here. Once you have your CD ready, put it in the drive and turn off your computer. Then start your computer, and boot to a CD. (Those instructions are here). (I apologize for so many external links, I just can't fit other tutorials in this article and other tutorials are already written for those purposes).
Once Boot and Nuke loads, it will look very "old." This is okay. It's not meant to replace Windows, just delete files and that's it.
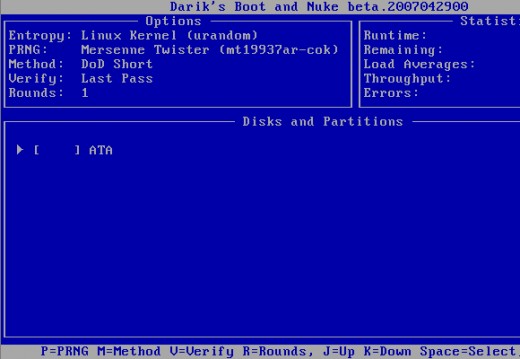
Click "enter" to go to the next screen. Then, select the hard drive you want to erase. Be sure to select the right one! You have to hit the spacebar to select it.
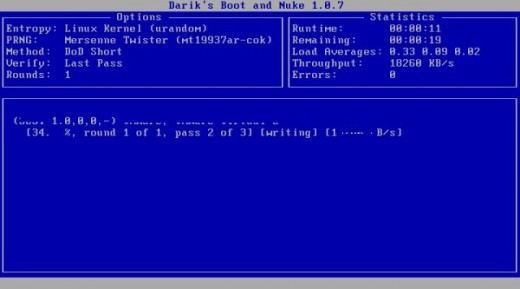
Now, the process will begin. Be prepared to let it sit and go live your life for a few hours, if not days. But rest assured, your data is securely deleted.
A Few Last Things
Erasing your data is typically a quick process. I would not recommend these "secure" methods unless the data really is sensitive. Deleting them by clicking the delete button is fine for most data on the computer. If you have any trouble, leave a comment and I'll do my best to help you.
Tags: securely erase data, how to use boot and nuke, how to delete files, how to delete securely, how to permanently erase data, how to permanently erase file, how to completely erase, how to destroy file, overwriting files, making it so no one can undelete a file, secure erase, secure file wipe, secure file deleting, permanent file delete, complete file delete, deleting a file forever, completely erasing a file
 computer")


, Affects Laptop and Desktop Computers")

