How to Recycle or Upcycle Bottle Caps

Recycle, as it has been widely known, is how we can turn waste materials, often called thrash into something new.
Upcycle means how we can turn waste materials to become something new, useful, and in better quality.
Both recycle and upcycle are expected to bring positive results for environment protections since they can prevent people from dumping their thrash to nature.
When empty bottles need to be recycled the cap must be removed first due to some reasons :
- Small bottle caps cause jams in recycling machine if they are not separated.
- The lids that are still on when being baled will keep air in the bottle and cause explosions and that may risk the worker's safety, let alone more space they take during transportation.
- Bottle caps which are made of metal needs specific treatment in its recycling and totally different from the bottles which are made from glass or plastics.
- Most of recycling sites reject plastic caps because they are made of different type of plastic. Plastic lids are made of material no 5 (PP) while the bottles are made of type no 1 (PET). Mixing them together will contaminate the recycled products and lower their quality.

What can we do to recycle and upcycle bottle caps ?
Here are some ideas how to deal with bottle caps to make them into something useful . They are graded from the simplest to the most complex uses:
Coconut/fruit shredder.
We often need a tool to shred particular fruits like young coconuts, pumpkins, or melons so that we can eat them conveniently. Here in emergency situation you can make the shredder using a bottle lid.
I recommend that this shredder is used temporarily and disposed after being used and not suitable for long term use since it tends to corrode.
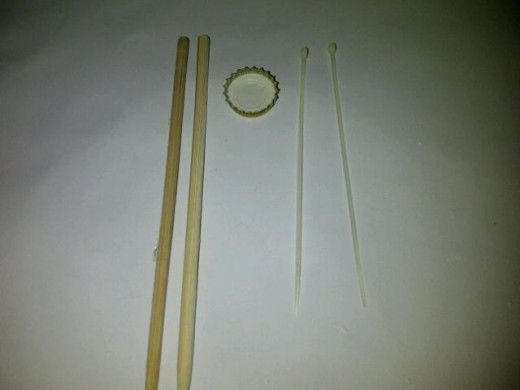
Tools & Materials :
- A metal bottle cap . If the cap is bent.
- A pair of chop sticks.
- Two cable ties.
First wash the bottle cap cleanly.
Bend down the cap side where you'll place the clamping chop sticks later.
Place the cap at upper tips between the two chop sticks at exactly where you bent it so that the sticks clamp the cap.
Unite the sticks by tying them using the cable ties so that the ties strongly secure the shredder at its place. One tie is placed near the cap and the other one on lower part.
Wash it cleanly and now it's ready to be used as a coconut/fruit shredder.
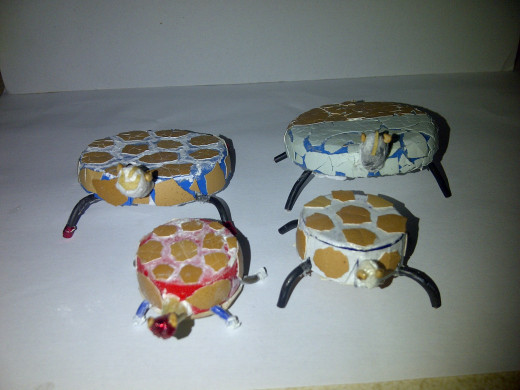
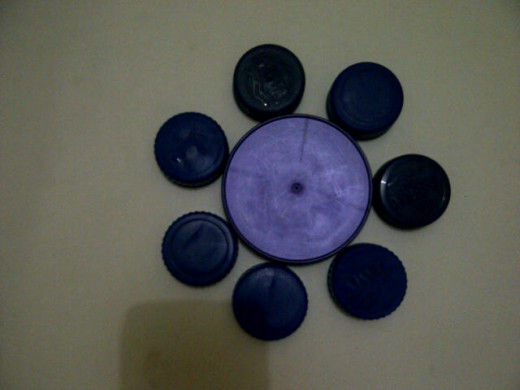
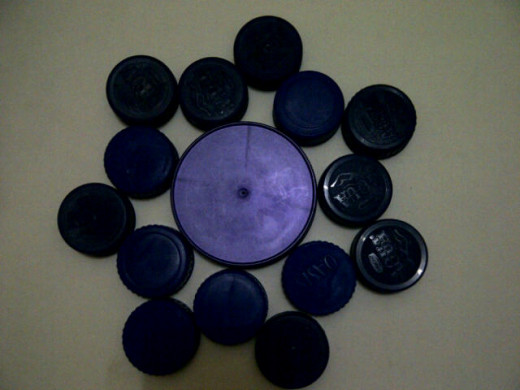
Heat resistant mat.
Putting hot pans on the table without an underlying mat can cause the paint of the table peeled off and damage it. Here is an idea how to make a heat resistant mat for hot pans to make them safe to be put on the wooden table.
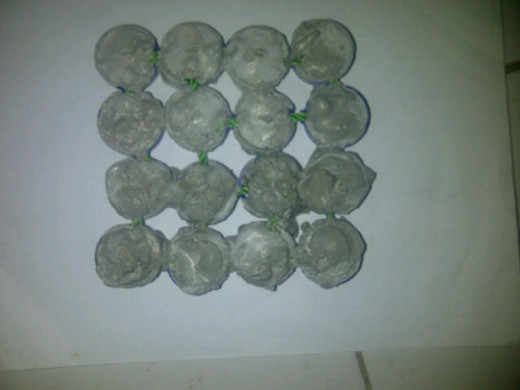
Tools and Materials:
- Scissors
- Small size plastic ropes
- White cement
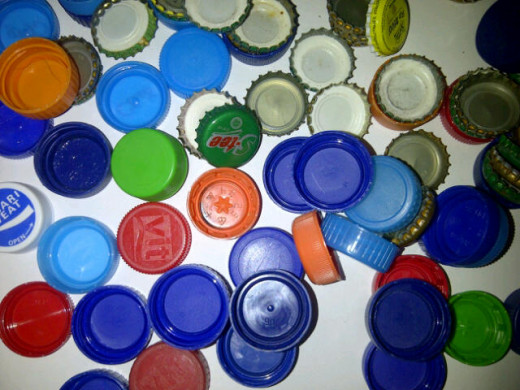
- 16 plastic bottle caps
1. Make two or three holes on opposite sides of every cap then join them using binding plastic ropes that you can buy at hardware stores so that they make the following formation:


Fill the caps with cement dough, the cement will make the mat sturdy when it's dried and can resist heavy pan on top of it. The cement also has function as isolator which absorbs heat coming the hot pant so that it won't burn the table.

Put a metal cap on every cell of the isolator while the cement dough is still wet, the metal caps will make the mat stronger, more resistant to heat and more aesthetics in its appearance.


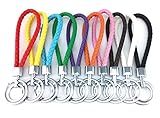
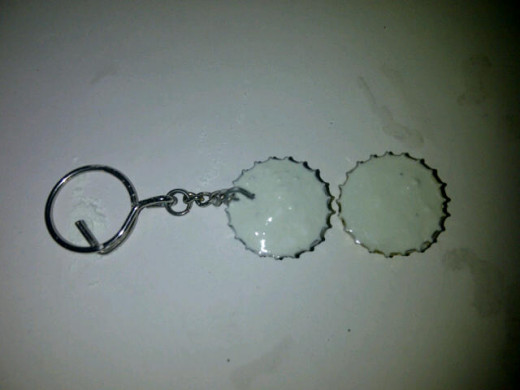
Keychains.
We can make a keychain from two bottle lids. Here is how to make it.
Tools and materials :
Two metal bottle lids.
White cement (gray cement is also acceptable)
Regular/plain keychain .
PVC glue.
Super glue/hot glue/sellotape.
Some wire.
The Procedures:
1. Prapare two metal bottle caps and clean them.
2. Make a small cleft on the side of each cap. Through this side you'll insert the chain.
3. Prepare cement dough which is made from 200 gram of cement plus some water. Mix them thoroughly.
4. Fill each of the caps with cement dough then place the chain exactly at the cleft and let the chain tip immerse in the cement dough. After the dough inside the caps becomes less wet, join the two caps and let the cement inside completely dry.

To strengthen the joint between the two caps we can give some power glue, hot glue, or sellotape. If you use sellotape or if you think you want to make your key chain looks prettier you need to give a cover on both cap surfaces to hide the lines made by the tape or rugged surface due to the glue application.
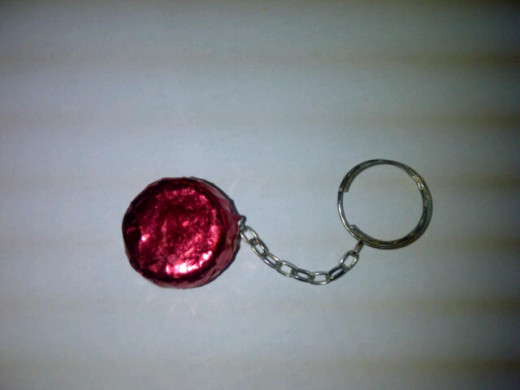
There are many variations in making key chains from bottle caps or lids which all depends on our creativity. Colorful key chains, or the one with embossed initial letter of your name are some other kinds you can produce.

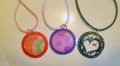
Thematic Pins
You can also make pins from bottle caps. The styles of the pins can be made matching with particular occasions where the pins will be used, like birthday parties, seminars, exhibitions, etc.
Here is one idea how to make a pin which can be used for birthday party or other fun events.
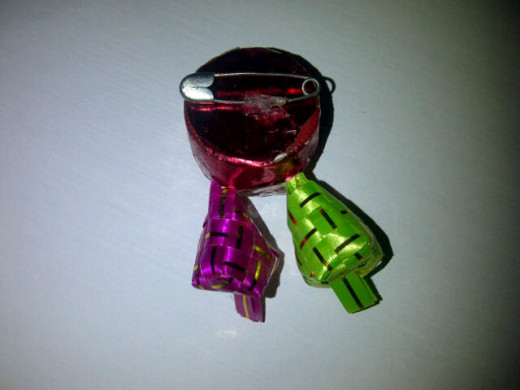
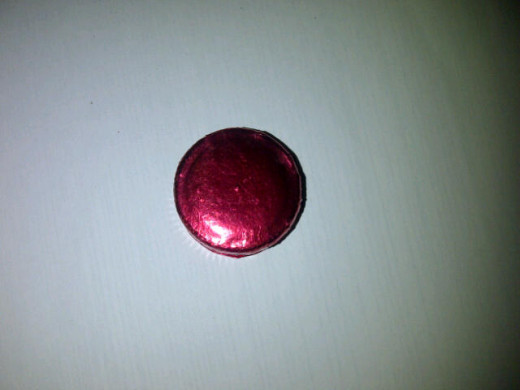
Prepare two clean bottle caps.
Wrap them with color paper.
Put color ribbons or other kinds of embellishments in between the caps and join them using sellotape.
Put a safety pin on the back of it using hot glue or super glue.
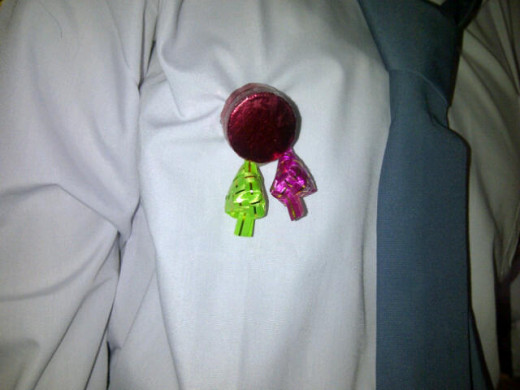
Now you can use the pin for a special occasion.


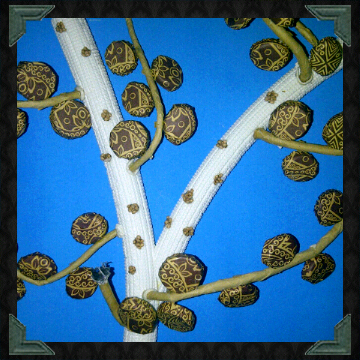
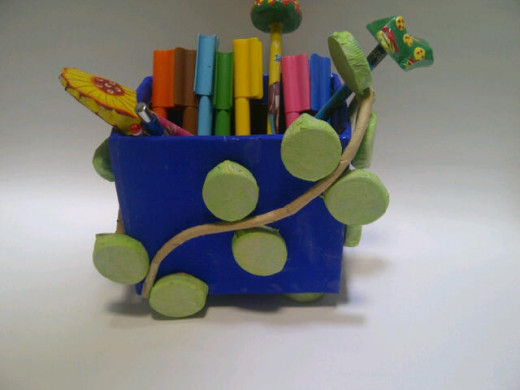
Pencil Holder.
Tools and Materials :
A cutter
A Scissors
20 plastic caps (plastic and metal caps).
A Small used box. (choose one which can be proportionally used as a pencil holder)
White (PVC) glue
Color paper (any colors)
(Paper) ropes.
The basic idea in this project that the box is going to be made a pencil holder with a vine twines around it and the caps will be made as the leaves of the vine.
To give an attractive look, the box should be covered with color paper and if you think the box is not sturdy enough, you can give double layer on every side of it using thick carton which are glued onto each outer wall.
Wrap every single cap with some thin color paper, here I wrap it using green crap paper.
Bend the cap a little bit to give a leaf look after it's completely wrapped.

Wrap every cap.
To hide the cap physical appearance including the brand names on it, we need to wrap every single cap with green paper. To do the wrappings we should use white glue or PVC glue which makes the paper stick to the caps very well. Smear the cap surface with the glue thinly then put the crepe paper on it, make sure there is no wrinkle when you wrap it. Since one layer is not enough because we still can see the brands though it so we need to repeat the layering twice after the first one has dried.
After the cap has been wrapped and dried, bend it a little bit to make it similar with a leaf shape.

Make some paper ropes.
The paper ropes will be used as the vine stem. You can make a paper rope from some thin paper then twist it. Rub with some diluted PVC glue while the paper being twisted which will keep its shape like a rope when it's dried.
Cover every paper string with brown paper to give it a stem look.

Put the stem.
After the glue on the paper ropes is dried, now we can put them on the box. Put some PVC glue on locations where the ropes contact with the box surface. Arrange them in positions that you think are artistic.
Put the leaves on.
After the stems are on their positions, the next step is put the leaves on the holder. Close the cap hole with a piece of thin carton, it will help stick on the pencil holder later. Give some glue on the carton and stick it at the stem that has been put on earlier.
Do the process all the way around the holder.

Check this link out to find other ways in recycling bottle caps.
- How to Use Bottle Caps for Decorations-Another Way in Upcycling Bottle Caps.
Round shape that bottle caps have, make it possible to be changed into some kinds of ornaments. Here are some other ideas how to make bottle caps into home decorations.