- HubPages»
- Technology»
- Computers & Software»
- Computer Software»
- Office Software Suites
Techie Corner- Microsoft Publisher
Extra! Extra! Read All About It!
What is Microsoft Publisher?
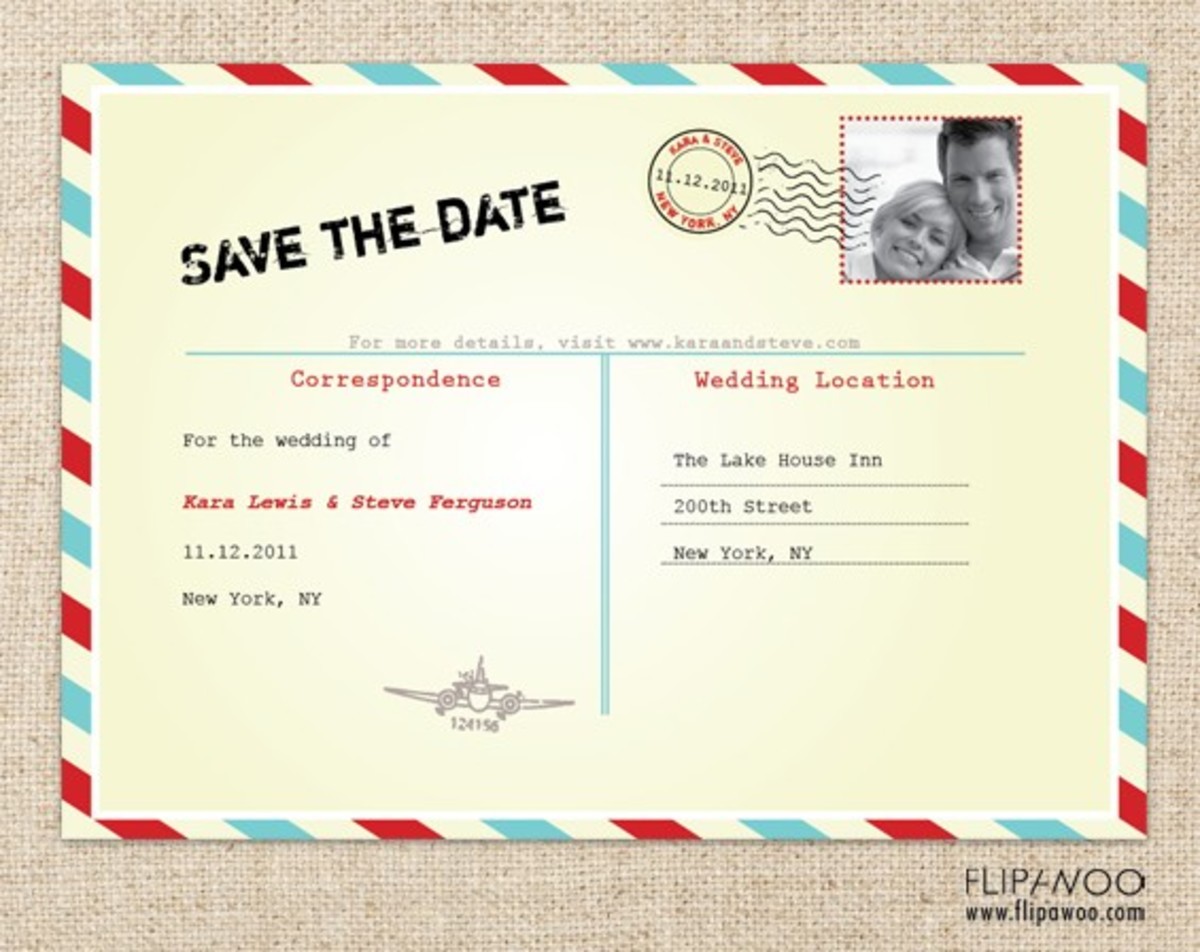
Publisher is Microsoft’s version of a desktop publishing program. While Microsoft Word’s focus is on creating professional letters, the focus for Microsoft Publisher is on creating the necessities for your business, such as fliers, gift certificates, business cards, menus or even websites.
In addition, you can create some fun items, such as bookmarks, calendars birthday cards, birthday banners or Holiday cards. You can take creativity to the next level.
Publisher Options
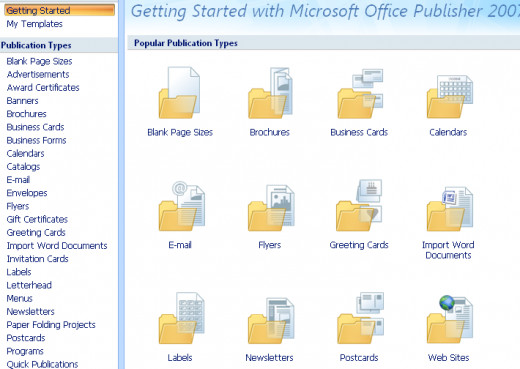
Create Publications for Print
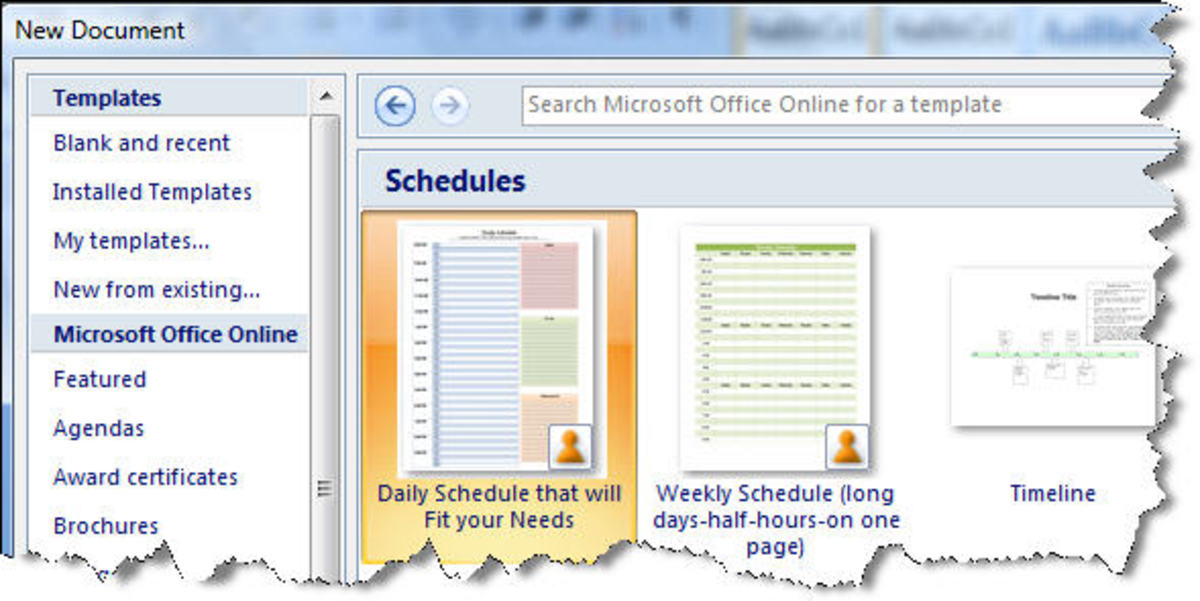
To create any type of publications, click on File>New. From the screen that appears, select from one of the choices. Depending on which version you have, your screen may differ.
You can use any type of greeting card you wish, for example, such as the thank you card.
Once you select the subtitle of ‘Thank you card,’ you’ll notice that you have various templates to choose from. Choose the one that best fits your needs.
Tabs

Change Color and Work With Pictures
For the card you have chosen, you can change the color scheme, simply by clicking on each color under the color tab until you find the one that you like. Then click ‘Apply Scheme.’
At the bottom of the main portion of the page, you will notice four tabs. Each of these tabs represents pages in the card. Page 1 – is the front, Page 2 is the inside of the left, Page 3 is the right inside page and Page 4 is the back of the card. You can modify each one of these pages.
You will notice in the middle of the first tab (or page) is a picture, albeit not a fancy picture, but there is one nonetheless.
If you just position your mouse on the picture you can either choose to resize this picture, move it, delete it altogether or insert your own picture.
If you wish to resize it, just drag the outermost edges.
To insert your own picture, select Insert from the main menu.
Choose ‘Picture.’ Next to the word picture, you will see an arrow that points to the right. Once you click on that arrow, you can choose the location of where your picture resides.
Clip Art is a built in feature of most (if not all) of Microsoft Office’s products. It enables you to choose from hundreds of pictures incorporated into Publisher's program. You can also click on a link to the Internet where you'll find thousands of available pictures in multiple topics. (Just be sure not to publish any document that has Word Art included without permission from Microsoft ™).
To find a specific type picture, type search field and then specify where to search. Then press ‘Go.’ Once you find the picture you are seeking, click ‘insert’ or ‘copy’ and it will be brought into your document.
You can also search for your own saved pictures from a file; from a scanner or a camera (if the scanner or camera is physically attached to the computer and you have the appropriate software installed to download pictures from a device).
If you choose to create a new drawing or autoshapes, you can choose from the toolbar usually located on the bottom of the screen many different options, such as caption balloons, colors, shading, shadows, highlighting, arrows, block arrows, text boxes, line shapes, sizes and much more. Don’t be afraid to experiment with these tools. Have fun with it…the potential for excitement is endless!
To complement your newly designed document, add some flair by utilizing Word Art. This is also accessed by choosing Insert>Picture>Word Art. Experiment with the different styles of Word Art, type in your text, font, font size and color and you’re on your way!
Note that you can insert a picture on anyone of these four pages (and in any one of the available publications)!
To alter the second and third pages, select page 2 from the bottom tab. If you need to enlarge the text so that you can actually see it, hit the function F9 key on your keyboard.
Often, you may want to add a text box and you can do so by clicking Insert>Textbox. Your mouse pointer will turn into a cross hair. Just drag the mouse on your publication until it becomes the correct size text box. Release the mouse. You can then start typing inside of the textbox.
Easy to Change the Font
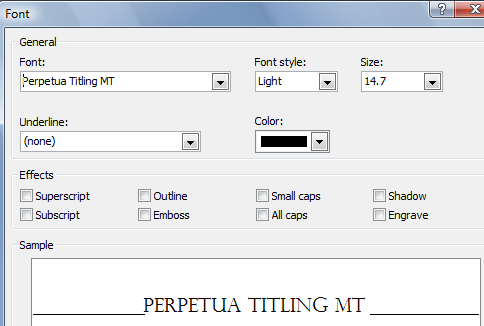
Change Font
With all of the wonderful font styles and sizes, it's no wonder that you'll want to play around and choose a fancy one. To do so, highlight the font you wish to change and then select Format>Font from the main menu. From the dialog box that appears, you can choose all of your options.
When you have your ideal thank you card, select save.
Spell Check
Before you distribute your thank you card (or cards), you should always perform a spell check and make any necessary edits. It'll be quite embarrassing if you went through all of this work, only to send a card that contains errors!
If an error is found, a dialog box will appear showing the word that is incorrectly spelled. If it is an abbreviation or a word that is spelled correctly for your purposes, click ‘Ignore.’ If it appears more than once, you can click ‘Ignore All.’ If you want to change it to one of the available suggestions click ‘Change.’ To apply to all instances of the word, click ‘Change All.’
When spell check is finished, you will see a dialog box informing you that spell check is complete.
If you are ready to print your card, click the print preview icon, which resembles a tiny magnifying glass on top of a piece of paper.
You will notice that under print preview, your card may have some upside down pages, depending on which format you have chosen. If you selected the card to print in fours, this is not an error. When you go to print this out, this card will be folded in fours, first in half one way, then in half the other way so that it opens the way many greeting cards do!
Graphics Manager
You can easily locate all pictures used in this document. If you select Tools>Graphics Manager, the sidebar on the left will display all of your pictures that are already used in this publication. If you want to easily access the picture in its current location, simply double click on the graphic.
Publisher
Have you used Microsoft Publisher before?
Insert Page Numbers
While you may not need to insert page numbers inside of a greeting card (well, not typically anyway), there will be some documents where page numbers will be helpful, such as a newsletter (another Publisher template available).
To actually create a newsletter, you can click File>New>>Newsletter.
You would follow the same conventions on designing your newsletter as we did for greeting cards. The newsletter template already has pre-existing page numbers, however, if you had accidentally deleted the page numbers, you may want to re-enter them.
To insert a page number, click on Insert>Page numbers and choose if you want the page number on the top or bottom of the page and whether it should be on the left, center or right.
Insert Date and Time
If you desire, you can also insert the date and time on your document. Using the newsletter example, select Insert>Date/Time. You will have to position your cursor inside of a text box to successfully insert this.
Choose the date format that you wish. In addition, if you want the date to update automatically each time you open the document, check off ‘Update automatically.’ Use caution, however, when using this checkbox because if you have something that was date sensitive and due in January, you don’t want to open the same document in February and have the incorrect date on it.
You Can Create Custom Templates
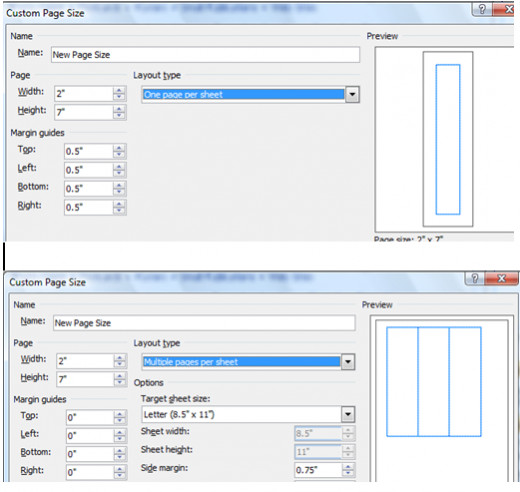
Custom Templates
While Publisher comes with countless types of templates, there are still some that are not included. One example is a bookmark.
If you want to create a bookmark or any other custom creation in Publisher, you can follow these same conventions. You may have to use some guesswork, but if you know the approximate dimensions, it may facilitate your project.
First, select New>Blank Page Sizes. If ‘Custom Size’ 2.5 x 7(or thereabouts) is not available, click on ‘Create Custom Page Size.’ From the box that appears, change the Width to 2” and the Height to 7”. You can opt to have one print per page, under Layout type, or several print per page. Note, if you print multiple pages per sheet, the Width and height may change and you may need to change these back.
Insert your pictures and/or Textboxes. Then click print preview. You will notice how it now shows three on the page. (If you only want two per page, you can change the gaps to be less or more). The lines on top are guidelines as where to cut the bookmark. That’s all there is to it!
Adding a Blank or Duplicate Page
Adding a Page
If you wanted to add a backing to this bookmark, just select Insert>Page from the main menu. The blue line in the middle tells you how much room you have to play with. You can then add text boxes and pictures to the ‘back’ of this bookmark.
***IMPORTANT Note: Anytime there are multiple pages in a document, if you do NOT have a printer that prints duplicate sides, you are going to have to turn the page over manually for it to print on the back. Each printer is different. Experiment first with a fast draft, grayscale and scrap paper if possible, so that you do not waste money on resources. You are going to want each page to face the same way, so make sure you record how the second page should be loaded into the printer for it to print properly.
Insert Duplicate Page
Inserting a duplicate page works the same way as adding a page, except that it will copy everything from the page you are duplicating. If you want the second page to be exactly like the first, select insert>duplicate page from the main menu.
Change Background
If you want to change the way your background appears in any of the Publisher document, click on Format>Background. From the boxes that appear, scroll through and choose the one that best fits the appearance you are seeking. If you click on the down arrow next to the background, you can choose to add only to the current page or to the entire publication.
Microsoft Publisher
Help!
When in doubt...there's always the help menu. If you are unsure how to complete a task and need an answer in a hurry, click on Help from the main menu.
From the following screen, type in a word or phrase that best describes your issue. Then click on the green arrow. From the list that appears, choose the best one that describes your request. If this is not it, click the ‘back’ arrow and try again to choose an option that better suits your requirements.
Easy peasy? Practice makes perfect. Once you play with it a bit, you'll become well-versed and be able to create projects flawlessly!
Thanks for reading!
~Elizabeth Parker
"Bringing awareness about dog adoption and rescue, one dog at a time!"
Author of Finally Home, Final Journey, Paw Prints in the Sand, Paw Prints in the Sand: Mission Accomplished, My Dog Does That!, Bark Out Loud, Unwanted Dreams, Phobia, Evil's Door and Faces of Deception. All books are available in Kindle and paperback format on Amazon.com.
© 2013 Elizabeth Parker

![Microsoft Publisher 2013 (1PC/1User) [Download]](https://m.media-amazon.com/images/I/41f37KWRLML._SL160_.jpg)
