- HubPages»
- Technology»
- Computers & Software»
- Computer Software
How to Install and Configure WAMPServer for WAMP stack

WAMP Stack Lightning Fast Set-up

WAMP Stack Litghning Fast Set-up
I will show you a very quick way of trying out PHP on Windows. You don't have to be an expert to enjoy Apache, PHP and MySQL in one elegantly wrapped package. All you have to do is install one program and you are set! The name of this wonderful program is WAMP Server 2. WAMP Server 2 is very intuitive; that is why you will get up and running in no time.
Compatible Oprating Systems:
- Windows XP/Vista/7
Plan of action:
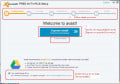
1. Download the WAMP Server 2 installer program from this link: here.
2. Click on the WAMP Server 2 installer file and follow on screen instructions to install.
3. Optional step: restart your computer before launching WAMP Server 2.
4. To test your installation create a file (you maycall it phpinfo.php in your default www directory (i.e. c:/wamp/www) with the following contents:
5. <?php phpinfo(); ?>
6. You should see something very similar to this by pointing your browser to http://localhost/phpinfo.php:
phpinfo()
")
Tips & Warnings
- Skype may cause your WAMP Server to start incorrectly, in that case close Skype and restart WAMP!
- Always start WAMP Server before Skype.
WAMP Server 2 Menus and Brief Descriptions
The menu items are as follows (left mouse click on WAMP Server 2 icon):
- Localhost - opens up your default home page
- phpMyAdmin - opens up the the database administration user interface written in php
- www directory - opens up windows explorer with the path to your default wamp install dir
- Apache > - slides out menu items relevant to your installed Apache module
- PHP > - slides out menu items relevant to your installed PHP module
- MySQL > - slides out menu items relevant to your installed PHP module
- Start All Services - starts wampapache and wampmysql services and loads PHP module
- Stop All Services - stops wampapache and wampmysql services and unloads PHP module
- Restart All Services - stops then starts all services
- Put online - allow everybody to access your domain
- Put offline - allow access only from localhost (wamp icon with have a small T added)
Apache sub menu:
- Version - see and/or select a version of Apache and/or get more Apache versions
- Service - perform different service actions
- Apache modules - select a module from the list to be used with Apache
- Alias directories - create a link to any folder on your hard drive and you can access it from your browser, and even execute php scripts
- httpd.conf - adjust Apache configuration manually
- Apache error log - consult to see errors
- Apache access log - consult to see information about who accessed your server
PHP sub menu:
- Version - see and/or select a version of PHP and/or get more PHP versions
- PHP settings - select settings by clicking on an item from the list
- PHP extensions - select an extension by clicking on an item from the list
- php.ini - adjust your PHP settings by hand
- PHP error log - consult to see PHP errors
MySQL sub menu:
- Version - see and/or select a version of MySQL and/or get more MySQL versions
- Service - perform different service actions
- MySQL console - manual database management
- my.ini - adjust MySQL settings manually
- MySQL log - consult to see information about your database engine
Right mouse click on WAMP Server 2:
- About - click to see about dialog
- Refresh - refresh if some configurations did not take effect
- Help - by default opens wamp server 2 help in french, and here is wamp server 2 help in English.
- Language - select your interface language
- Exit