How to Build a Guitar Effects Pedal Board Cheap


Today I am going to show you how a cheap but effective, effects pedal mounting board. This board will help you eliminate searching for several outlets to plug in your pedals, keep cords from getting tangled and organize them for easy use.
The finished mounting board that you see in the pictures took me about one and half hours to build from design to finish. The material in this project cost me less than twenty dollars, less the cost of the pedals.
draw what you want first

Drawing a rough sketch will help when you get ready to cut your pieces. This way you will be able to cut all the boards before you start assembly.
How big do you want it?
Make a quick sketch of the project. You can make it as big or as small as you like. This picture is for a three pedal board, though I will only mount two right now. This leaves me room to expand to another in the future.
required tools

Tools you will need
These are the basic hand tools you can use to complete the project. If you access to a table saw, miter saw and trim nail gun, it will speed up the process quite a bit.

bevel back piece
getting started
First we need to get our materials together, for the one I am building using the dimensions I used in the drawing, material will be as follows:
The material that I used: total cost $18.65
1. 48” 1x12 pine
2. 24” spruce 5/4” board
3. 2’x2’ piece of imitation leather
4. 1 electric surge protector
After you have your material together it time to begin.
We need to measure the 1x12 and cut it into 2- 20” pieces and lay them aside. I save the remaining piece for the sides angle pieces.
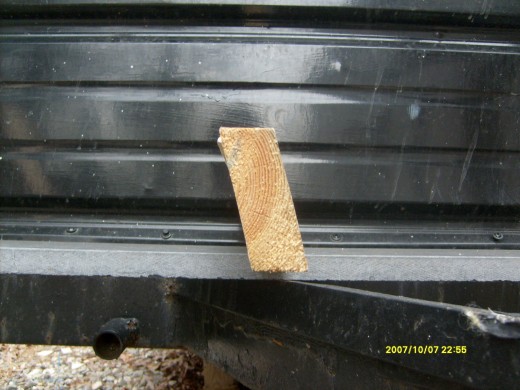
Now, I will bevel the top of the 5/4” board on a 35 degree angle to allow us to make the top board to lie on an angle. You can do this either on a table saw or with a skill saw. Once done with this, cut it to the same length as the 1x12’s, 20” in my example. You may want to angle the 1x12 on the length side on a 45 degree bevel to allow them to lay better. It’s not critical, but it makes for a better look.
Use the piece of scrap left from the 1x12 and cut the side angles. Do this by measuring the height of the riser board (5/4” board cut on a bevel). Measure the length you need, draw a line across the board and cut. In my case the triangle piece was 3” high by 7 ½” long. I was to get both pieces with one cut by dividing the measurement in half on one board.
Once you have all the pieces cut, you are ready to start the assembly.
lay out and get ready to assemble
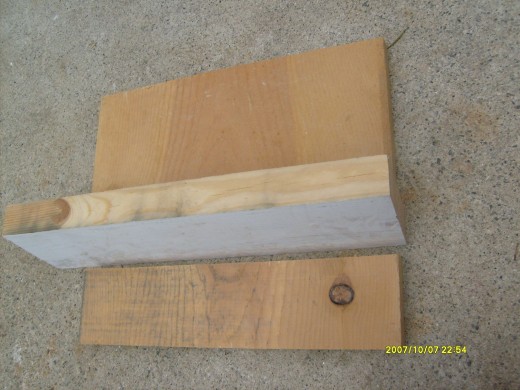
what you need
assembly supplies
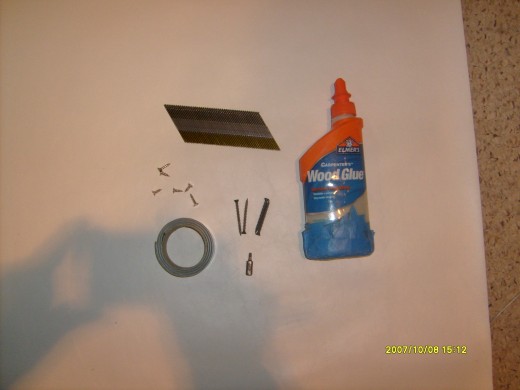
Once you have all the pieces cut, you are ready to start the assembly. The material you will need for assembly:
Wood Glue
Trim Nails
Small screws
paint or cover material (here I am using imitation white leather)
If covering the unit, you will also need contact cement and a staple gun.
assembled and covered base

assemble the pieces
Lay out the pieces in an orderly fashion as they are to be put together. Add a very small amount wood glue to the pieces and nail or screw them in place. Careful not to get to close to the edges if you are screwing it together, the wood will split. Only assemble the bottom portion of the unit, you will add the top mounting board later.
Now, with the bottom assembled, you can either paint it, stain it or my case I upholstered it with imitation leather that I picked up from Wal-Mart for about four dollars.
electrical connections inside board
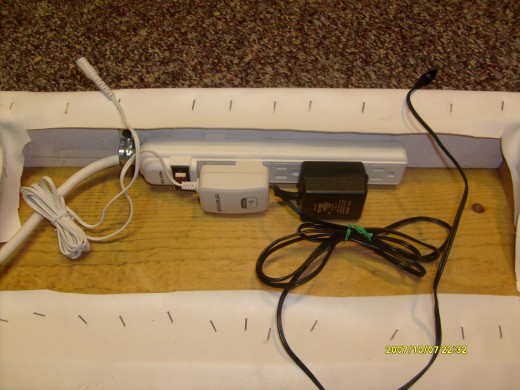
make the electical connections
One you have the bottom assembled then it’s time to install the electrical connections.
First you will mount the power strip, make sure has power surge protection, in this example I mounted to the rear upright board because of clearance issues. Make sure is securely fastened to its location. Once the power strip is in place, plug in the effects pedal power cords to the strip. You will need to drill holes in the top mounting board for the effects pedal cords, I drill two half inch holes in the approximate location that I needed for the cords to connect to the pedals. Pull the cords thru the holes in the mounting board and connect them to the pedals.
make sure you get connector thru the top
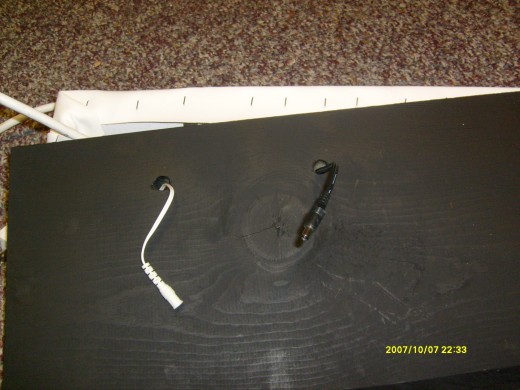
drill holes and feed wires thru top
Most 9v 300ma connectors will require an half inch hole to feed them thru the top.
Effects peal test
test connections
Next, test your electrical connections. Plug in the effects pedals and connect the power strip to a power source. Turn on the pedals, one at a time first, then both to ensure there is no power issues before you close the unit.
mounting tape applied to back of pedals
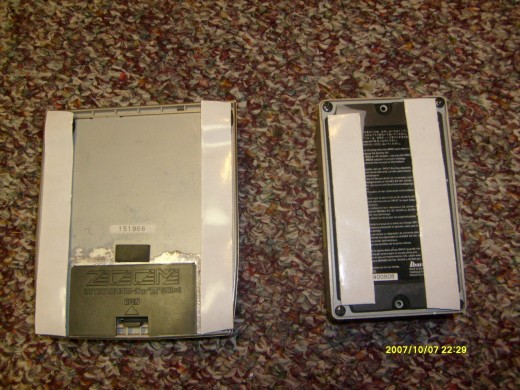
make sure to put mounting strips on both sides
Apply mounting strips (Velcro or double sided tape) to back of pedals, this will hold them securely in place. Depending on the type of pedal you may need to put strips on both sides to prevent them from rocking. Also, if you are using a pedal that requires batteries, use Velcro so that you can remove the pedal to change the batteries.
mount the pedals and connectors
mount the top and and pedals
Now remove the pedals and unplug the power. Using small trim screws attach the mounting board to the base. Make sure you leave the effects pedal connectors cords pulled thru the holes with enough slack to make the connections once top is installed.
Mounting the effects pedals to the board, you can do this a couple of ways. You can use either Velcro or double sided rubber glue strips. I used the double sided glue strips; it gives the pedals a little cushion
pigtail cord between effects pedals
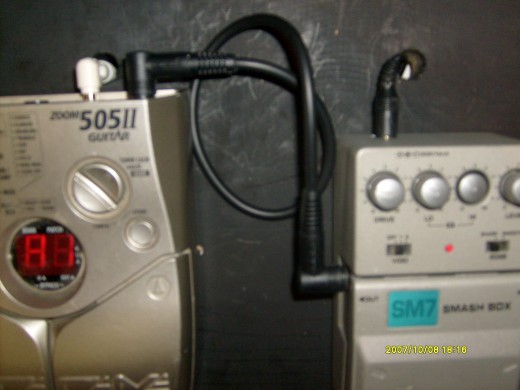
connecting the pedals to each other
When connecting the pedals in series it will be necessary to purchase short 4inch or 6inch pig tail cords. You can pick up one like the one I used at Radio Shack for about three dollars. There are a lot more expensive ones out there, but its up to you. I tried to stay under twenty dollars for the whole project.
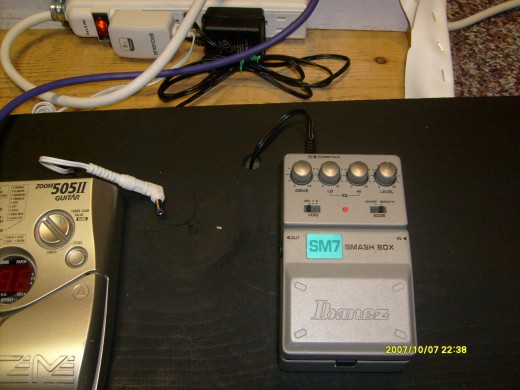
connecting the pedals to instrument and Amp
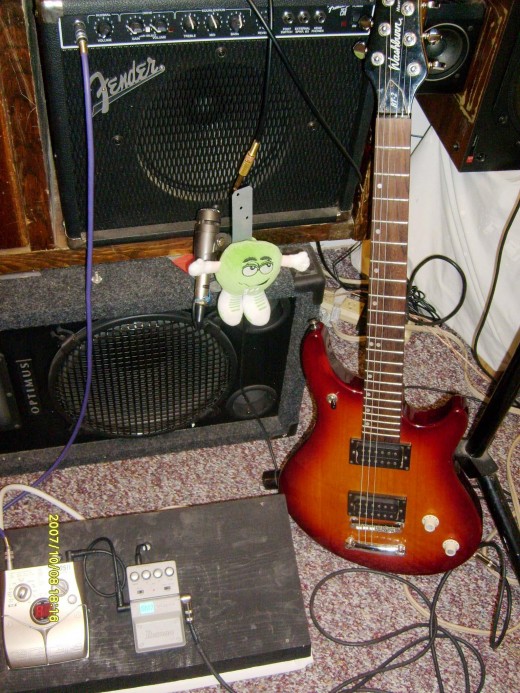
connections for multiple pedals
Be sure when you are connecting multiple pedals that you hook them up in series. In other words, you will use the output of the first pedal in the series, (the one that will go to the instrument), and connect it to the input of the next pedal. Repeat this for the remaining pedals. The last pedal will output to the Amplifier or mixing board. The picture shows two pedal in series with the connections to the guitar and the amplifier .
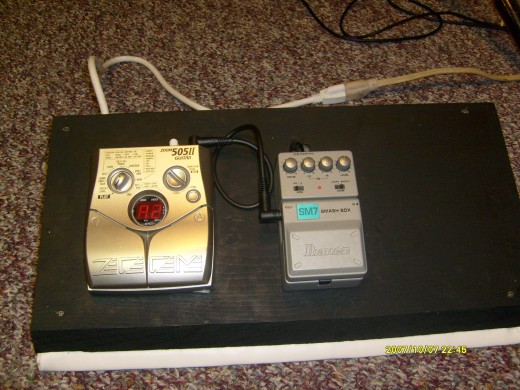
finished mounting board

pedals and tuner mounted and ready to go
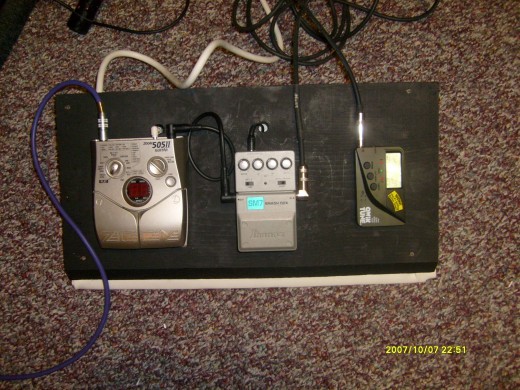
finished
That’s it. Now you have a cheap guitar or bass effects mounting board. As with anything, the more time you take with it the better the end product. For less than twenty dollars I think that it’s a great project for anyone wanting to have an effects pedal board without the high cost of buying one at music store.
How to tune a guitar half step down with tuner
- How to Tune an electric Guitar half step down with a Tuner
Are you a beginner or novice guitar or bass player looking for advice on tuning a guitar or bass in different Pitch variations? If you are trying to play along with artist on CDs this is a must to insure...
If you are looking for great beginer guitars
- Cheap Electric Guitars for Beginner
If you are a beginner or intermediate guitar player looking for an economical first electric guitar, you can find some great deals out there. There are all sorts of guitars that actually play pretty well and...


