How To Make A Q-Tip Snowflake

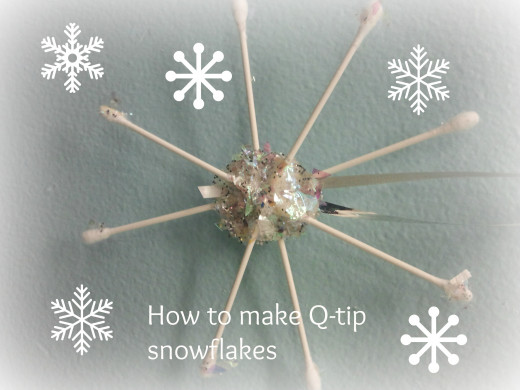
The winter season is upon us and with it brings colder temperatures and the beauty of newly fallen snow. When the air is too chilly and the kids are stuck inside then there are fun things to do inside while they wait out the weather. Crafts are a fun way to keep the kids busy and provide homemade decrations for your house and/or office. Here is an easy way to make snowflakes using an item most families already have in their homes. So gather the kids and break out your q-tips to make these cute and simple snowflakes.

Supplies Needed
You will only need a few supplies to make the snowflakes. You need:
1. Q-tips
2. Elmer's Glue
3. Glitter. I like to use silver or a pearly white color but feel free to be creative!
4. Wax or parchment paper
5. Ribbon

Directions
1. First you will nedd to lay down the wax or parchment paper so the glue doesn't stick to any other surfaces.
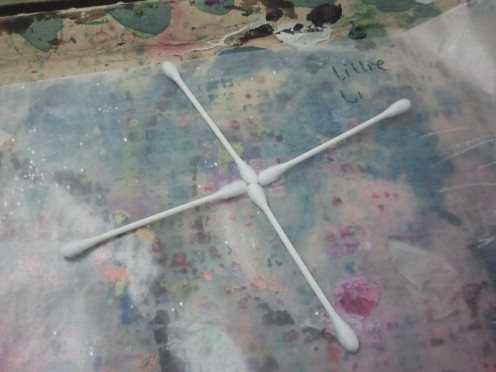
2. Next place 2 sets of 4 q-tips with the ends touching. It will resemble a cross shape.
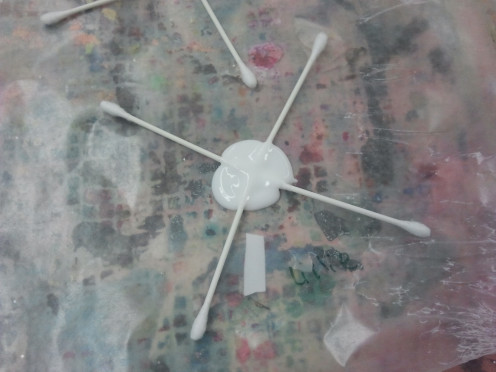
3. Squeeze glue in a circular motion where the q-tips come together. I usually make a circle of glue until it covers all the cotton. Don't be afraid to put a lot becuase if you use too little glue then it won't hold together when it dries. You can also apply a little glue to the ends of the q-tips also.
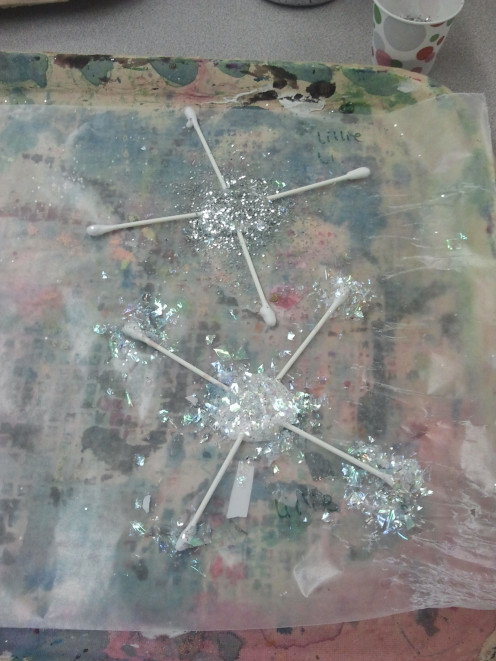
4. Once you are done gluing, cover all areas of glue with glitter. Don't forget the tips too!
5. Now you will have to wait until the glue is completely dry. If you try to lift it too soon the q-tips won't stay together. You can put the craft in the refridgerator to speed up the drying process. If not, I wait 24 hours for it too fully dry.
6. Once the glue is no longer wet, very gently peel the center off the parchment paper. You can hold the q-tips where they meet in the middle to help keep them together. Flip both sets over so the bottom is now facing up.
7. Apply glue to the centers of both sets and but your ribbon in the middle if you want to be able to hang them up.
8. Put the q-tips back to back so they are alternating spaces and are not lined up. Please refer to pictures for a visual.
9. Lastly, let the glue dry and decorate with your beautiful snowflakes!


