- HubPages»
- Arts and Design»
- Crafts & Handiwork»
- Jewelry Making
How to Make Earrings With Memory Wire

Create Your Own Designs On A Budget
For many women, jewellery is the perfect way to glam up a boring look. A new pair of earrings can not only build up a person's confidence, but it can also turn into a fun, profitable hobby. Whether you decide to purchase wholesale materials to build and sell your own earring creations, or if you just want to make your own earrings with minimal investment and with your own unique stamp on it - there is no better way to do so than by using memory wire.
Materials
To start designing and making your own earrings with memory wire, you will need to purchase some items. These can normally be bought online for a minimal amount of money. (My whole lot cost less than £10.00 and I have managed to create more than 10 pairs of earrings with an abundance of supplies left over!)
Things You Will Need:
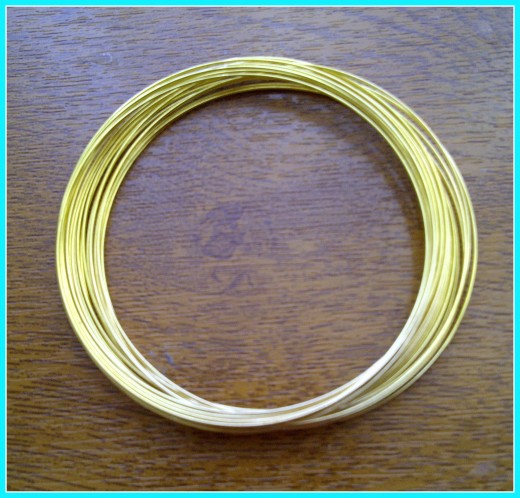
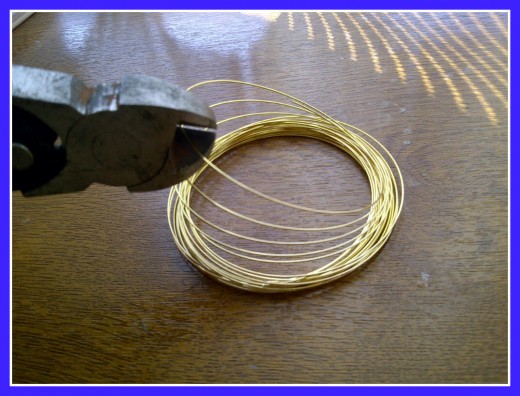
- Gold Memory Wire (60mm for the size we are making)
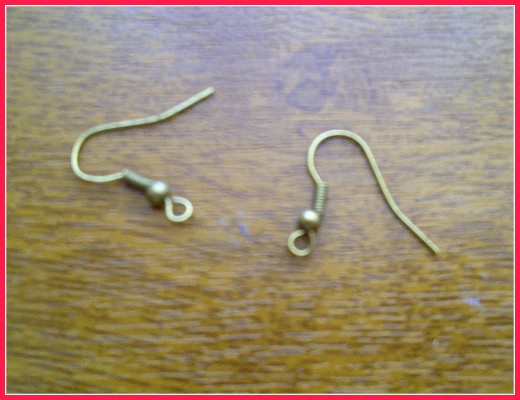
- Earring Hooks
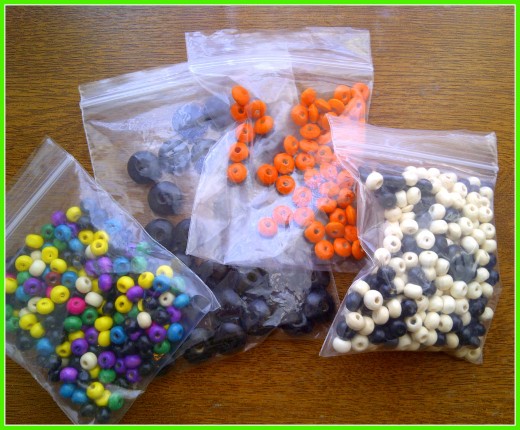
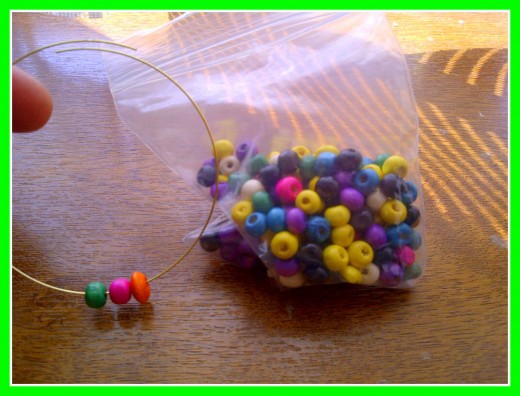
- Various Coloured Beads
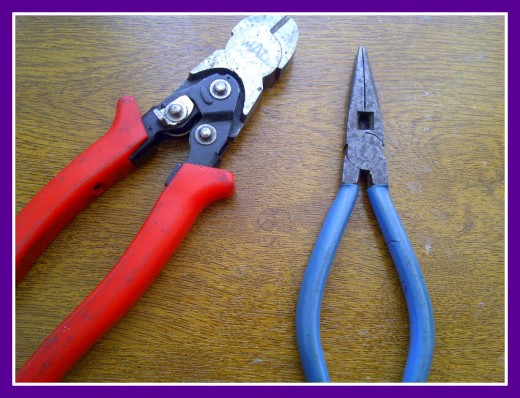
- Wire Cutters
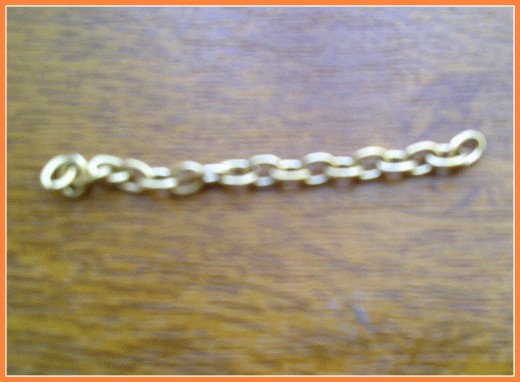
- Some Gold Links
- Your Imagination!
Step 1
Begin by getting your memory wire. Depending on how large you want your hoops to be, cut the memory wire with the wire cutters.
Try to measure accurately, so that both hoops are the same size. Bear in mind that you will need to leave at least 2cm extra space for the looping of each end of memory wire.
Step 2
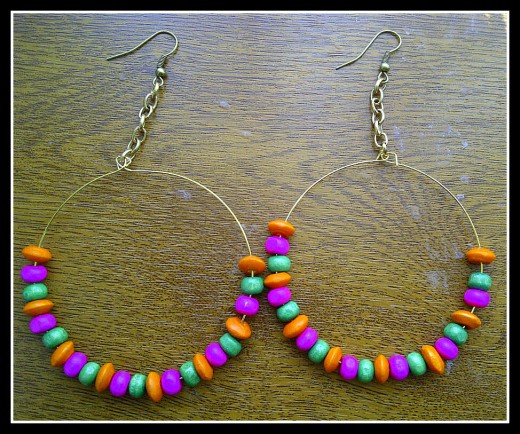
Once the memory wire is cut to the desired size, start choosing your colour theme. The theme I am going for is a bright summery mixture, with pink, orange and green. Opt for colours that suit your skin tone and that can be combined with a number of different outfits. Make sure that you keep the same amount of beads on each hoop, while keeping the pattern consistent. For example, it one side of the hoop ends on an orange bead, finish the opposite side with an orange bead also.
Step 3
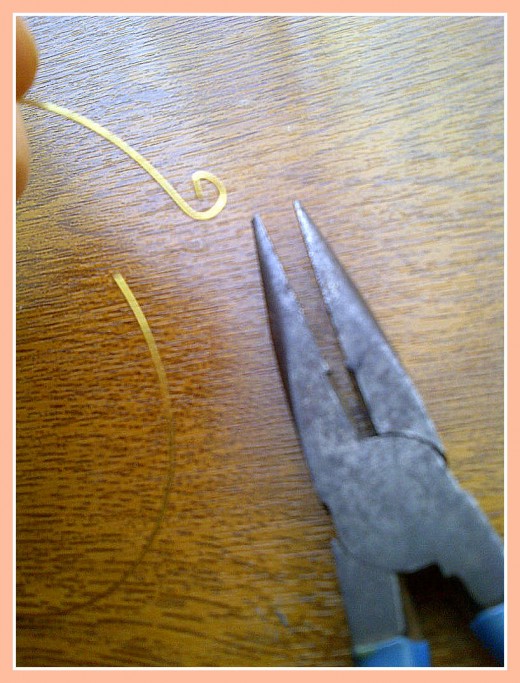
With the beads put into place, take the blunt wire cutters with a thin, pointy tip.
With this clasped on one side of the memory wire, curl it over the top of the wire, until a loop is made.
Do this on the other end. If you cannot do this first time do not worry, because it takes practice.
Be patient and as careful as you can in making each loop symmetrical.
TIP: Try to clasp the memory wire with the end of the wire cutters, because this area is narrower, providing a much tighter loop.
Step 4
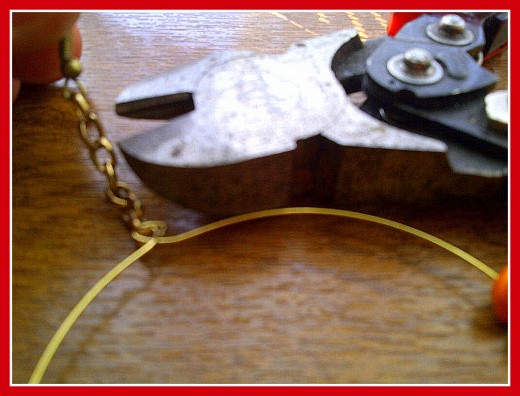
With the beads in place and the ends of the memory wire looped, you are ready to attach your gold chain links. Prior to doing this, hook one loop through the other and tighten with the wire cutters to prevent the memory wire from de-taching.
Next, take at least 7 small gold links and use the wire cutters to snip a small gap in one of the links. Use this gap to manipulate the link onto the memory wire loops. (This is intricate work, so take your time.)
Once the link is in place, tighten the gap you made with the wire cutters. The top link should now be facing sideways, so that the earring hook can be attached to it in the correct position.
Step 5
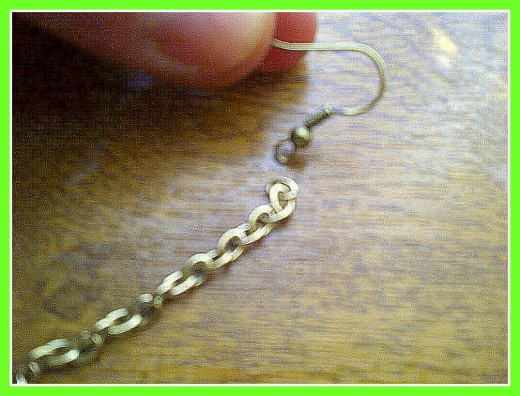
The final part of the process is to fit the earring hook onto the top chain link. Once again, snip a gap into the link so that the earring hook can fit snugly in between. Tighten neatly with the wire cutters and examine the earring for any haps that may cause it to fall apart. So long as everything is tightly constructed, you are ready to wear your new, custom-made earrings!
Things To Do With Your Homemade Earrings
Making your own earrings with memory wire can be fun in many ways. The following are some tips on ways you can profit, both monetarily and personally.
- Make an eBay shop and sell your creations online!
- Send your earrings to a friend or family member as a cost-effective, original gift.
- Buy wholesale materials to create many pairs of earrings, each unique to your own taste and style.
- Start a jewellery making class.